
So this is the real view across the West Dart valley at Hexworthy. I remembered to take a tripod, set the image size to maximum, use a little optical zoom, and take lots of overlapping photos. Actually this was my second attempt - I'd done the same thing the previous year, but the 5 photos didn't make a wide enough picture to a high enough resolution. This time I took 12 pictures with more zoom to make a wider, less tall combined image.

I found a program called Hugin which did a great job of combining the 12 photos into a complete panorama image. The result looked good and should work well, but at this point I got a bit stuck, as I didn't have suitable software or knowledge to do further editing or the means to print out such a large image, even on multiple sheets. So I will pick up that story later...
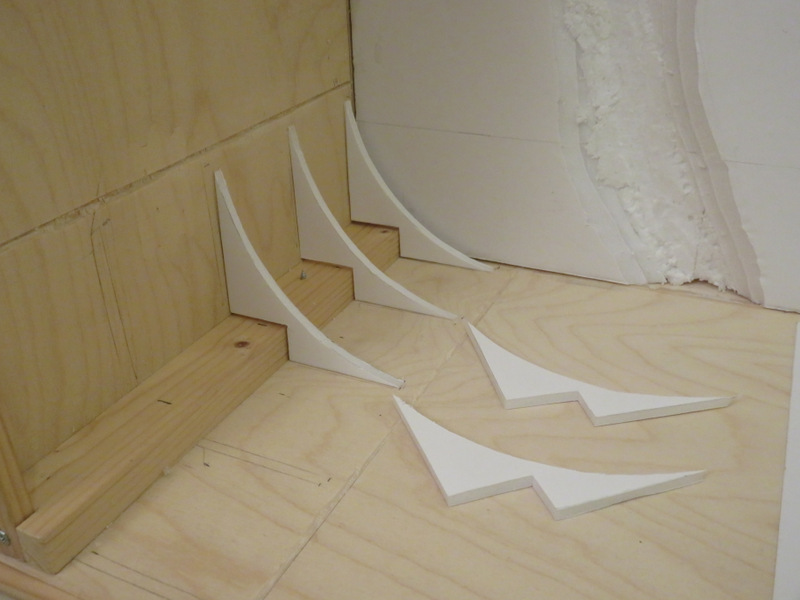
Now I wanted the backscene to wrap-around the internal corners of the layout in a curve to avoid corners and shadows. I know you can get bendy MDF and thin ply, but adding more wood to the layout means adding much more weight, and seemed overkill. So I cut some formers from foam-core board, cutting round a metal cake-tin lid to get the curvature (the picture shows the layout lying on it's back). I then cut a shallow slot into the ply just beyond the end of the formers, with a shallow chamfer back towards the formers.

The backscene support was then simply made from a piece of 20-thou plasticard cut to fit into the slots - which both force the plastic into the curved corner, and recess the edge to hopefully give a smooth transition from flat to curve without a step. I glued it to the formers with contact adhesive, although my formers were not entirely consistent, so maybe something with more gap-filling properties (no more nails, silicone caulk) would have been better. Anyway it seems to hold fine.

The last preparation step was to make the layout presentable. Although the ply outer skin could have been varnished, after a discussion with the wife (the layout will sit in the dining room) we decided on the grey paint used for Slugworth & Co. This is actually Wilkinson's primer, so goes straight onto the wood, although visible areas got a rub-down with fine emery then a second coat, which gives a nice smooth satin finish. I also painted the rear of the layout, the lighting bar, the domestic fiddle yard, and even the backscene boards as it should give a better surface to stick the backscene to when sealed.
To be continued...
1 comment:
Company I worked for in Yorkshire could print this out on canvas for you. https://theframedpicturecompany.co.uk/contact/ other printing companies are available.
Post a Comment