Showing posts with label trees. Show all posts

Monday, 22 September 2025

Rail200 - trees and people

A day off on Friday and some time free over the weekend has enabled me to catch up where I'd wanted to be with the Rail200 project. The first job was to finish the trees. I'd got most of a pack of Woodland Scenic armatures left over from Loctern Quay, but the larger sizes were too tall for the height limit of the challenge and only the shorter trees could be used. My friend Tim mentioned he had a pack of smaller Woodland Scenics trees but had found them a little short. We did a swap so he got some of the taller trees and I got some of the smaller ones.


As usual, I cleaned up any moulding lines and marks, and drilled the bottom of the truck to superglue in a length of paperclip wire. They were then dunked in hot water and twisted to spread the branches, and tweaked into a 3-dimensional shape.

The trunks look a bit plasticky. In the past I've brush painted them, but this time I thought I'd airbrush them while the airbrush was out to weather the buildings. This seemed to work well.

And so, this week was foliage time. I'd picked up some Busch foliage at a show, but first impressions was it didn't tease out and fell apart if stretched too much, so the trees looked a bit lumpy. I couldn't find any left over foliage from previous trees (there must be some somewhere), so ordered some Woodland Scenics foliage which I know works well, and some WS polyfibre too. The foliage can be teased out until it is light and fluffy, then glued onto the branches (I use Matt Modge Podge). The polyfibre can be teased out even more, but needs foliage adding in the form of finely ground foam scatter stuck on a liberal coat of hairspray. 

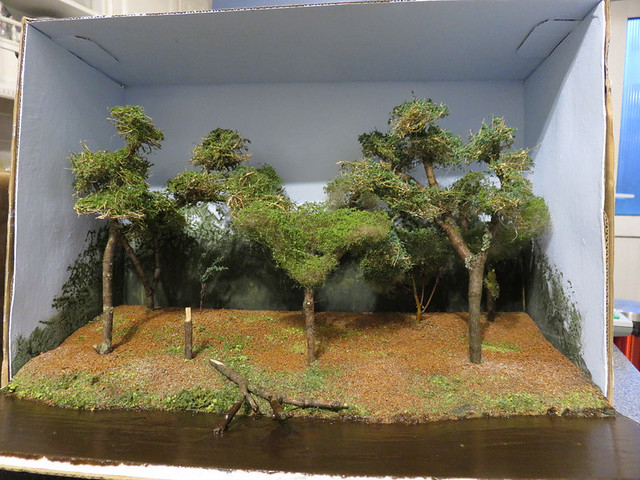
The polyfibre tree (left) is fuller and more dense, but still lets light through. This will be a view-blocker for the front of the layout. The WS foliage (third, fifth, sixth trees) looks better than the Busch stuff, but together there is a variety of shades and density of foliage. 

The trees are planted in place on the layout by punching a hole through the (kitchen towel) surface, and poking the wire in covered in matt modge podge. The trees on lower ground needed a hole drilling in the ply surface below. The two tallest trees (second left and far right) are 135mm tall, so needed the trunks recessing into the polystyrene below the surface so they fit within the 140mm height limit!

The other job this weekend was to paint the details that had already been prepared and primed, and a few figures too. There are a couple of Monty's Models figures, the rest are Dapol/Airfix/Kitmaster - they still look good! Painting is using acrylics. The plastic figures were drilled up their legs for a 0.5mm wire to help locate them securely, the whitemetal figures already have a rod below a foot.

I've started gluing the details and people in place, and a few last jobs are in progress, so the finish line is in sight!

Sunday, 23 April 2023

Growing trees - Part 3

I'd meant to post pictures of the completed trees planted on the layout once they were done, but shortly afterwards I went down with Covid, and I have only now got around to this update!

Since the baseboard is foam-core board and landscape is expanded polystyrene covered in a PVA-soaked tissue and tile grout skin, planting the trees is easy. A dental probe is used to punch a hole through the hard skin of the scenery after which the tree can be "planted", it's wire "root" pushing easily through polystyrene and foam-core. The wire and base of the trunk are coated with matt modge-podge to hold it and if needed gound cover is pushed out the way to allow the trunk to sit on the landscape, any gaps being disguised with a little extra ground foam scatter. 


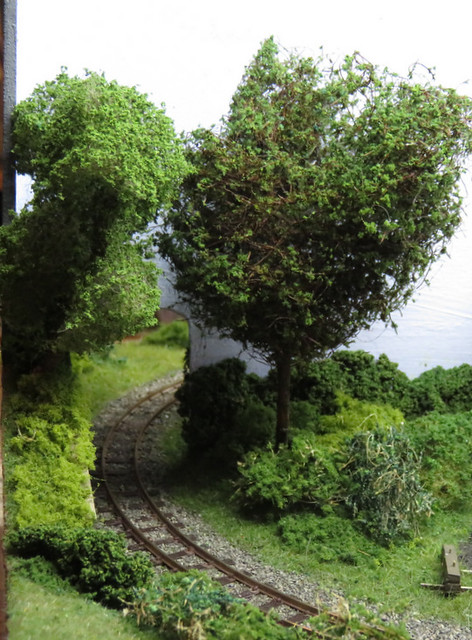
The right-hand end of the layout now looks quite wooded, as is the intention since the river valleys are filled with trees. Although the trees form a row only one tree deep the use of denser foliage on trees in the centre suggest the woodland is more dense than it actually is. One tree sits at the front adding depth to the scene and acting as a view-blocker, while the trees at the right-hand end very effectively screen the track exit. With the tree at the front too, the exit is not easily visible even looking along the layout. 


You may notice some flowers and grass tufts have been added, the flowers adding a welcome splash of coulour but hopefully in a subtle way while the tufts add more variety to the grassy areas. 


At the left hand end a couple of large trees break up the scene and help disguise the compressed road, the tree at the rear having more dense foliage. I added some commercial poplar trees behind the station where there is a narrow embankment, hopefully adding some visual interest. 


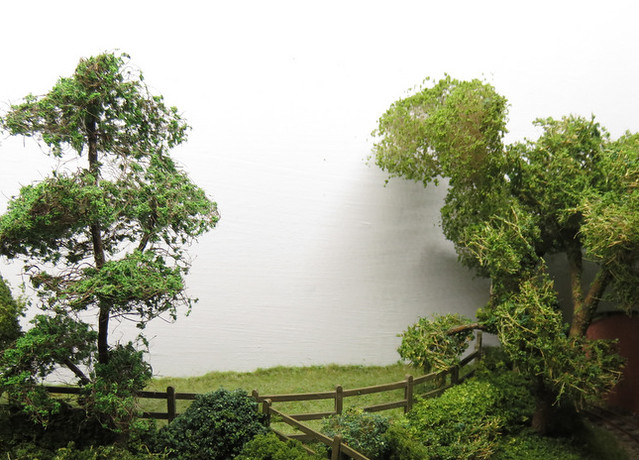
The playground is now fully assembled and set into the scene, and backed by trees to give a woodland effect. It has gained a fence (Ratio) and some gates. The rear fence is attached to the playground sub-base while at the front it is fixed to the embankment, which along with the low undergrowth completely disguises the edge of the sub-base. The playground surface has a brown scatter representing the bark chippings that once seemed popular for such playgrounds. Some flowers (pansies?) line the embankment and there appear to be some bluebells in the woods. 

At the right-hand end the trees can be seen to hide the exit track, while the tree at the front frames a scene around the bridge. My wife observed that the tree at the front has become a regular feature of my layouts, including Loctern Quay and Awngate! At the rear a tree by the stream both disguises the join in the backscene and casts a shadow where the stream meets the backscene. Grass tufts can be seen in the fields too. 

Tuesday, 4 April 2023

Growing trees - Part 2

 Another method of adding foliage to the trees is to use a fibrous material and a separate scatter material.

I think my fibrous material came from Green Scene although I don't see it listed now, the Woodland Scenics polyfibre looks similar. The leaves can use any scatter material, I use a fine ground foam from various sources. 


The fibre is applied in a similar way to the foliage matting, but there are differences. I tended to cut off a chunk and tease out to a large "cloud", then cut smaller pieces from it to attach to the tree, using matt modge podge. This material is teased out to a much greater extent than foliage matting, taking up many times its initial volume.


The fibres fill out the tree shape, effectively providing the twigs without leaves. I suppose it looks like a winter tree, although the transition between the plastic branches and the fine fibres looks rather abrupt. At this stage the tree is sprayed liberally with hairspray and the chosen scatter applied, sprinkled from all sides - including from below, but mainly from above and the sides. A repeat hairspray application and scatter make sure the covering is secure and even.


The result is a more bulbous tree with a relatively dense covering of leaves, although the leaves are around the outside of the tree shape and not through it - as often seen on real trees. I guess the foliage could be less dense if the fibres are teased out even more, although if that leaves the fibres visible I find the result less convincing. 

In this tree line-up tree one (on the left) uses Woodland Scenics dark green foliage, two uses Heiki-flor foliage in light green, tree four (far right) uses Woodland Scenics mid green foliage, but tree three (third from left) uses the fibres and foam scatter as shown above. The resulting different shape of the foliage adds variety, and the denser foliage can be useful when using the tree to block out a background or give the appearance of more dense woodland. It is also useful to be able to use a wider range of scatter material colours and textures. 

Monday, 3 April 2023

Growing trees - Part 1

Hexworthy sits in a valley which hosts many trees, in fact some parts by the river are densely wooded. That means I'd need trees, and quite a lot of them. While I have made trees using the traditional (and effective) twisted wire method, it takes a long time - and my results weren't always that good. However, I have discovered Woodland Scenics "tree armatures", plastic mouldings for trees 5 to 7 inches tall, a pack contains 12 in 4 designs. 


The procedure I use is as follows:
  • Cut off the base, any moulding lines and release marks
  • Drill the base "peg" to accept a piece of straightened paper-clip wire, superglued in place. Drilling has to be done slowly and in brief bursts as the plastic melts easily, binding the drill
  • Now the armatures are dunked in boiling water for a few minutes, this warms the plastic making it more malleable. 
  • Remove and shake/dab off excess water, taking care not to get scalded - but the tree itself won't be too hot to touch
  • Now twist the trunk. I grip at the lowest set of branches (sometimes pliers helps) and at the next set of branches up and firmly twist through about 60 degrees. Repeat at the next set of branches up, and the next... it gets easier as the trunk tapers. Each 60 degree (ish) twist means branches now fan out all around the tree
  • Each branch then is then shaped and has its own branches twisted to hopefully natural shapes that fill the space
This is actually quite easy, although the pointy branches are not kind to the thumbs. 


The next step was to paint the trunks, mainly to try and get rid of the plasticky look. I mixed a colour close to that of the plastic so any bits not covered wouldn't stand out, with a little matt modge podge in with the acrylic paint to help it stick and stay matt. A thinner darker wash was run into the texture of the trunks although to be honest it made little difference. Maybe spraying would have been quicker, probably dry-brushing with different colours would have given a better effect but taken much longer...


Placing on the layout helps to figure out what trees will fit where, and is an encouragement. A hole is punched through the top layer of scenery and the wire "root" pushed into the foam below. 


Foliage can come from different sources, but the Woodland Scenics foliage works well, as does the similar Heiki-Flor foliage. Small pieces are cut then teased out in all 3 dimensions - tweezers help - to get a delicate spread. This is then threaded onto a branch covered with a little matt modge podge. In the process a lot of the foam "leaves" fall off, so when the tree is complete it is sprayed liberally with hairspray and the fallen leaves sprinkled back on. 


The effect works well, surprisingly well given it's ease, and can result in pleasingly light and delicate foliage - although the density of the tree depends how much foliage is applied and how far it is teased out. While not exactly quick - I guess the whole process takes about 2.5-3 hours per tree in total - these trees are much quicker to make than completely hand-made trees and look far better than most shop-bought trees. 

Wednesday, 12 February 2020

Growing trees

Moving up (literally) from the grass and undergrowth comes the trees. I had in stock a pack of Woodland Scenics tree "armatures", which could be considered as flat-pack trees as the plastic moulding is completely flat.


The idea is they are twisted and bent into a three-dimensional tree. I found dunking them in hot water for a minute or so made that a little easier, and it was helpful to hold the trunk below where I was bending with a pair of pliers, but the concept works well.


The result is surprisingly effective. The best technique is twisting the trunk working up the tree, which spreads the branches in all directions, but as some trees were to be against the backscene they needed the branches bending towards the front or sides, away from the back. With a little thought the branches can fill the 3-D shape in a balanced way.

I then painted the plastic as it looked a bit, shiny plastic. I used a dark brown enamel wash dry-brushed with a mid-grey, and although at a distance it doesn't look that different it does take away that plastic look.


I used commercial foliage products - Woodland Scenics on two of the trees, and Heiki on the other. This is cut into small irregular chunks and teased out - particularly pulling the top and bottom of the flat material out to form more 3-dimensional shapes. I stuck the now fluffy foliage to the branches using matt medium ("Modge Podge" matt) rather than PVA, which dries invisible.


The trunks have a small peg protruding from the base, the idea being they can plug into a moulded "root" base to stick on a flat board. Of course I want to plant them into the ground, but the short peg wasn't enough to secure them, so I drilled a 1mm hole into the end of the peg and super-glued in a length of wire (straightened paperclip).


Here's the two at the back of the layout, with a nice open feel to them, and a good shape and size. On the left I've used a couple of the trees my son made for a school project using twigs and rubberised horsehair stuck on with hot glue. The best ones were used for Slugworth & Co., but these were revitalised with extra flock and planted in the corner, which they fill quite nicely. Just visible on the far right is a commercial tree I found in stock - it's a bit of a "lollipop" but fills a gap and isn't very visible!


The other tree sits front and centre, creating a view block - not least to hide the fiddle yard exit, as seen here - and to make the middle of the layout feel less empty. However, whether it is too much in the way remains to be seen! It could make operating tricky by blocking the view of the uncoupling magnets, so for now it is pushed into the hole but not glued.

Monday, 8 October 2018

Green Fingers

Continuing the scenic work on Slugworth we moved onto bushes and trees. Bushes and undergrowth is represented with a variety of scenic materials, including rubberised horsehair, various teased-out fibrous materials, and even some lichen. These were covered in scatter and ground foam in various shades of green, the idea being to give an impression of different types of plant rather than any attempt to model specific types. It's a messy and surprisingly time-consuming task, but adds a lot of texture to the landscape.

IMG_5726

The trees are all Joshua's work. I've mentioned the scenic demo exhibition stand by Roy Hickman before, who gets kids involved making scenic items. Joshua has made a couple of trees under his instruction, which use real twigs, rubberised horsehair or teased-out fibres stuck on with hot glue, and scatter material fixed with cheap hairspray. Then he had a homework project to model the rain forest (no, I've no idea why) - so he used the same technique to make a number of trees.

IMG_2171

We'd kept the model thinking the trees would come in useful, so now we have uprooted them and replanted those that fitted best onto Slugworth, along with those he'd made on Roy's demo stand. Some got a refresh of scatter along the way. Such a simple method, however I think they are really impressive, and better than any trees I've ever made from twisted wire...

IMG_5733

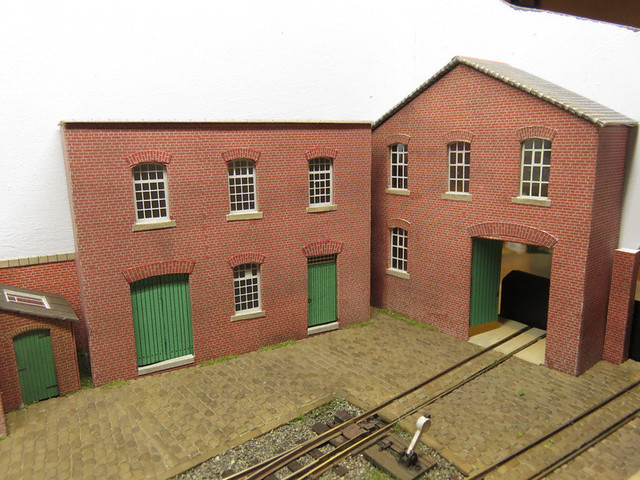
Meanwhile, the buildings are getting bedded in to the factory yard. Although they fit into the cobbled yard which minimises any visible gap, we did find the long thin "tufts" of static grass we made on the foil worked well along the edges of the buildings.

IMG_5737

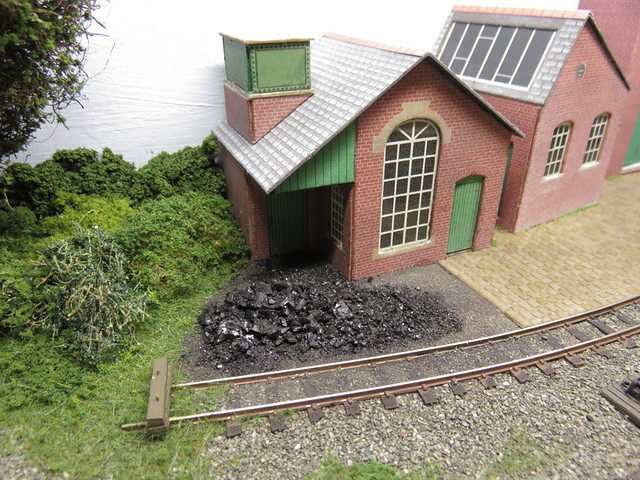
At the end of the yard we wanted a gravel/cinder ground finish, which we simply achieved sprinkling sand onto PVA glue. This was then painted dark grey with acrylics. Joshua then crushed a lump of real coal with a hammer, which was used to make a pile of coal outside the boiler house.

IMG_5740

Things are really coming together now. Just some final details to add, although they can take a lot of time...