Monday 20 November 2017

Progress with the NS2

I've been making irregular but steady progress with the Narrow Planet NS2 kit I got last Christmas. It's not a difficult kit at all, but I've been tackling it alongside (i.e. in gaps in) other projects. My first step was to blacken the etches, which helps paint to adhere later. I'm using some gun blue applied with a cotton bud.
IMG_2112

The etches were sprayed with an etch primer, while the 3D print was given a normal primer (both Halfords). The print was given a little attention with emery paper and home-made sanding sticks (emery paper glued around a coffee stirrer) between each of two or three coats of primer to ensure a good quality finish on the areas that would be visible (bonnet top and sides, and under-frame). Even though it's a top quality print a few minutes work between coats of paint is a worthwhile investment.

IMG_3318

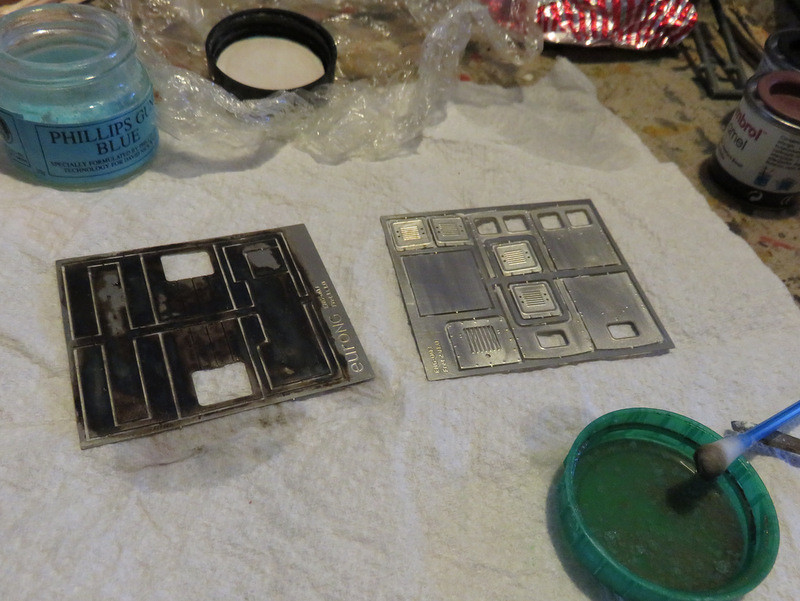
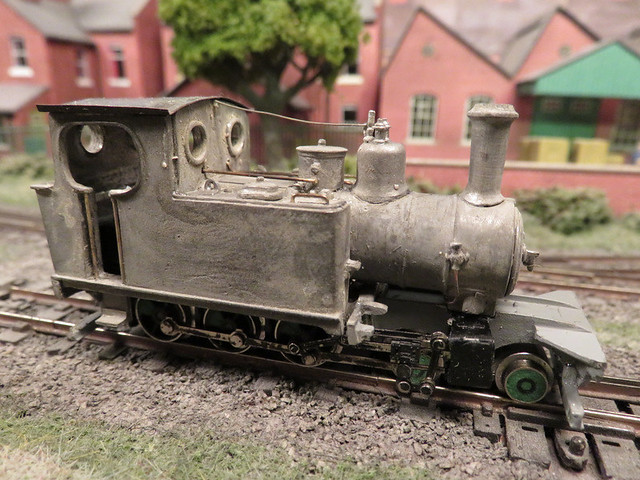
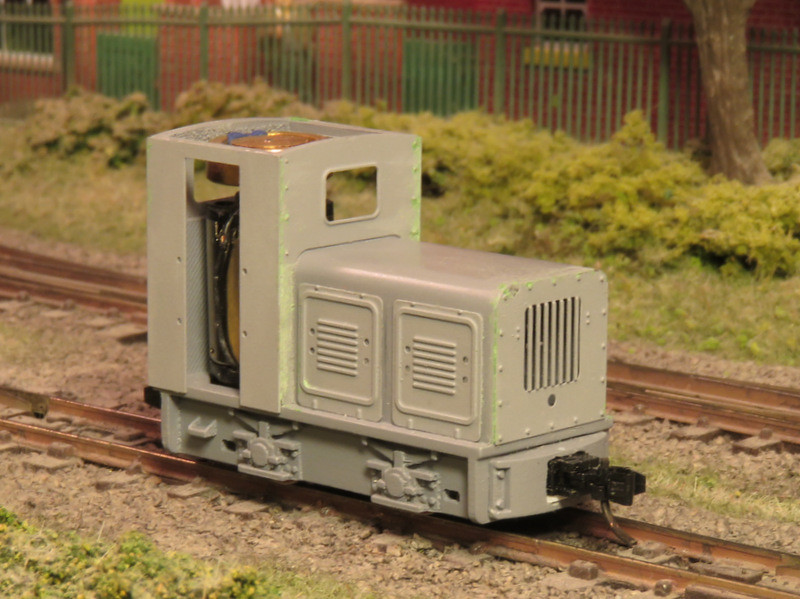
The etches were then assembled - here you can see their lighter shade shows the etch primer, compared to the slightly darker shade of the standard primer. They fit well but once again, to get a good finish I filled any gaps (you can see the green filler) and spent a little more time with the emery paper.

IMG_4206

As usual the Microtrains couplers took some thought to mount, though the solution proved relatively easy. I drilled four holes in the coupler block at the corners of the slots, put a fine coping saw blade through a hole and cut out the square opening. A similar square opening was needed in the buffer beam behind, making space for the coupling draft box. After painting a wire pin will be passed through the buffer block and coupling to secure it in place.

IMG_4205

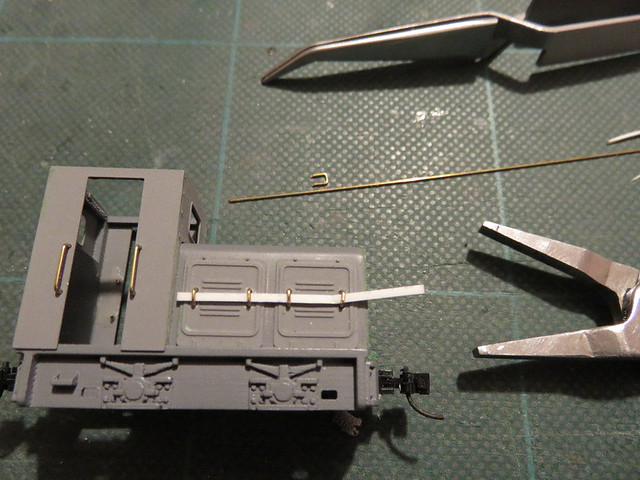
Handrails came next, and those bonnet panels needed a lot of handles! As the etches are laid over the print they needed drilling out too, with a fine bit in a pin vice. The 0.5mm wire was bent around the flat nose pliers, you may be able to see the mark I made where the width was correct to form the handle to a "U" shape. The strip of 20 thou plastic was used to space them equally from the sides while superglue was applied from inside.

IMG_4217

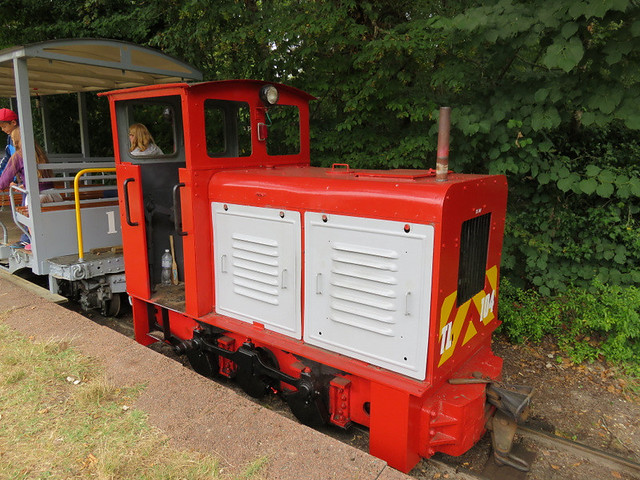
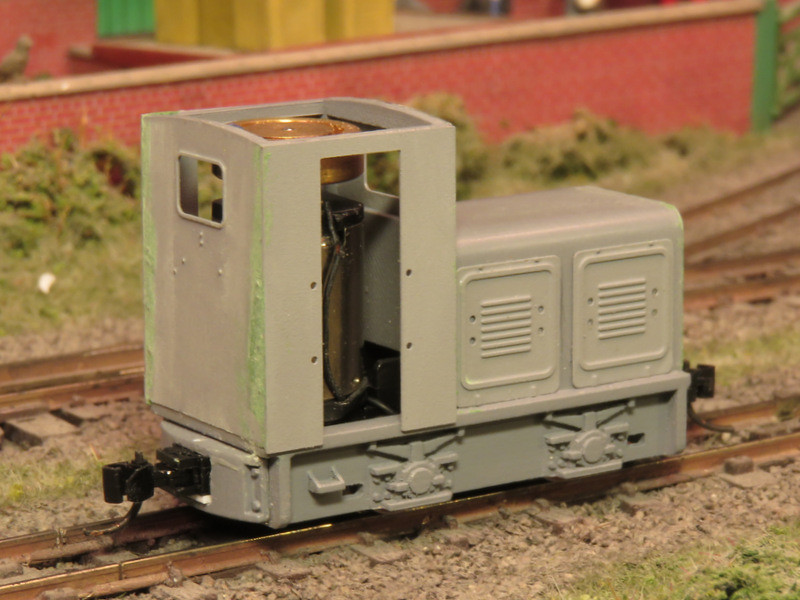
So it just needs the cab roof adding, then I expect another coat of primer before the top coat. I've not yet decided on a colour, though I'm quite tempted by red for a change, as on this NS2f, though the wasp-stripes may be a challenge!

IMG_1341

Monday 13 November 2017

WD Hunslet finally complete

This has been a long project, started over a year ago, using the Langley kit for a War Dept Hunslet 4-6-0. However it proved a tricky kit to build because of the extensive modifications needed to the chassis, and in particular the valve gear. Thanks to the help of a friend with spare parts and much advice on the NGRM forum I've made it through, but not without long periods where the project got put aside through frustration. This is how it looked in February:

IMG_2489

The body went together with little problem, and proved to be well detailed. I replaced the cab roof with one bent up from thin brass, and added handrails, pipes, and actuating rods from wire. At this stage the body had been blackened in preparation for an etch primer - the blackening doesn't do much to the white-metal, but I think it helps the paint stick. The problem was at this stage it still didn't run smoothly.

Apart from the broken part, the challenges with the chassis were:
- The motor on my chassis lay horizontal, the body needed it to be vertical. It wasn't difficult to change but clearly not all Minitrix chassis are the same
- Once apart, the wheels and gears are a devil to get back together, with the pick-ups too
- The driving wheels are not all the same size!
- Then the crank pins will be out of sync, so the rods will bind. I think I took 4 or 5 attempts to get the chassis back together and the rods to go round
- Much adjustment and fettling was needed to make sure the bits of valve gear don't foul
- The cylinders are a long way forward, probably a mm or so too far, so the valve linkage binds from being over-stretched. Again much fine adjustment, and bending the piston supports back ever so slightly

Finally I've got it complete, and running smoothly without jolts and binds. OK, the Minitrix mechanism is very noisy, but that is normal! But I cannot recommend the kit to the inexperienced.

IMG_4209

This view shows the wheels nicely, the trick of carving back alternate spokes and using filler for the balance weights is really convincing - removing one of the big problems with N-gauge chassis of too many too fine spokes. The pony "disk" wheels should probably have more of a profile but it's better than spokes.

IMG_4211

After priming, filling, rubbing down, and more priming, a can of Halfords black enamel did the body, with the smoke-box and roof brushed with a slightly more matt black with a hint of grey. Buffer-beams are two coats of red over a coat of white to make them bright, plus brass on the brass bits and gunmetal on the grab handles. A dirty wash was applied to the chassis, footplate, bottom of the boiler, tank tops, with some dry-brushed soot on top and rust in a few discreet places. After a spray of Testor's Dullcote a dusting with weathering powders for soot, ash, and track dirt in the appropriate places finished the job, just leaving glazing (Micro Krystal-Klear), plates and coal to be fixed

IMG_4214

The result is a fine looking, hard worked but reasonably well kept loco, and should look at home shunting goods at Awngate or hauling passengers to Hexworthy. It's been a challenge but I'm glad I persevered, and thanks to all those who helped along the way.

Thursday 2 November 2017

Expo Narrow Gauge 2017

Last Saturday was the annual Expo-NG show at Swanley in Kent. This is the biggest annual show in the UK narrow gauge modelling scene, and as well as a selection of layouts in different scales from around the UK and beyond, there is excellent trade support from the specialist suppliers - many of whom are rarely seen at shows. This year the show seemed a little smaller than usual (by a couple of squash courts), but this was down to the layouts present being smaller on average (but no drop in quality or, I understand, number), and fewer entries to the Dave Brewer Challenge - at least compared to last year.

IMG_4100

Unusually for me, one of my favourite layouts was large scale, and of an overseas prototype. Mer les Bains (1:32, 32mm gauge) by Peter Smith was full of French atmosphere, with a high level of detail and finish.

IMG_4186

Another favourite was Lambton & Verdane Regis Tramway (O16.5) by Stuart Marshall, a freelance street tramway that had a cohesive and convincing feel. I heard this won the Reinier Hendriksen trophy, which I think was well deserved.

IMG_4053

Creech Grange (006.5) by James Hilton is a superb if tiny piece of modelling. James has used Busch HOf (6.5mm gauge) mechanisms to model a 15" gauge estate railway, scratch-building loco bodies and rolling stock from a variety of methods including some 3D printed. As an illustration of how small this is, the standard gauge siding is EM (or possibly P4).

IMG_4047

Another tiny but detailed layout is Castle Quay (009) by Chris O'Donoghue, which shows how much can be packed into a small space (a wine box in this case) in 009. The tall net sheds set the Sussex coast setting, while the boats started off as souvenirs from seaside shops.

IMG_4065

Underhill Town (009) is a larger layout by John Wooden, showing several stations along his imaginary line. The towns were delightfully detailed, but my favourite scene was this beach halt, where the view was downhill towards the sea - an unusual arrangement that worked really well.

IMG_4125

Holbeach Estates Railway (009) by Stephen Sullivan captured the wide open spaces of the fens, with the workings of a potato estate railway. The collection of small i/c locos was fascinating, these are tiny in 009.

Now on to the Dave Brewer Challenge, which this year was for a diorama featuring a halt. 5 entries made it, and all were well modelled, so the judging must have been tricky.

IMG_4073

Promontorio (006.5) - Danny Figg. Feel the heat!

IMG_4087

L'Arret - Coleville-sur-Orme, 1944 (1:35, 17mm gauge) - David Hughes. Very fine modelling, though arguably more military than railway.

IMG_4084

Kin Tore Halt (O16.5) - Edward C M Florey. A modern preservation scene, and at least the lack of trains can be explained...

IMG_4076

Gibbet Hill Halt (Nn3) - Simon Hargraves. A rural idyll. The realism in this scene is amazing considering how tiny this model is!

IMG_4082

Halt at major road ahead (006.5) - Steve Pearce. This was the winning entry. I wonder if it is because it was the only one to feature a complete train, or because of the humour? The scene is just after a farmer's truck collided with the brickworks train, and while the drivers argue, others are trying to catch the geese that have escaped from their broken crates.

So another cracking show, and I could go on with more photos, but this post is big enough as it is. If you've time to browse some more I've posted an extensive collection of pictures to Flikr.