Monday 28 October 2013

Thakeham on show!

EXPO-NG proved to be an excellent show, as usual. I'll post some pictures of the layouts in due course, but first an update on how Thakeham performed!

Set-up didn't take too long, the simple stand and light made a big difference, finished with a name-board and simple information display. Operation was from the right-side so I grabbed the end of the table of challenge entries, and pulled up a chair! That left time for a quick look round and a visit to the 009 Society sales stand before the show opened...


My 6-year-old boy was insistent that he wanted to come and help! I wasn't sure how helpful he'd be, but in fact he proved quite competent at operating - when he wasn't too excited! Here he is loading the wagons, a somewhat fiddly job.


I was helped by the Sussex Downs group; Simon Wilson, Phil Savage, and Mark Holland all did turns at operating that gave me comfort (and sanity-restoring) breaks and so I managed to see a lot of the show in short stints, so thanks to all. Mind you they were only to quick to give the controller back when I returned! Here's Phil at the controls while viewers wonder where the sand loads went.


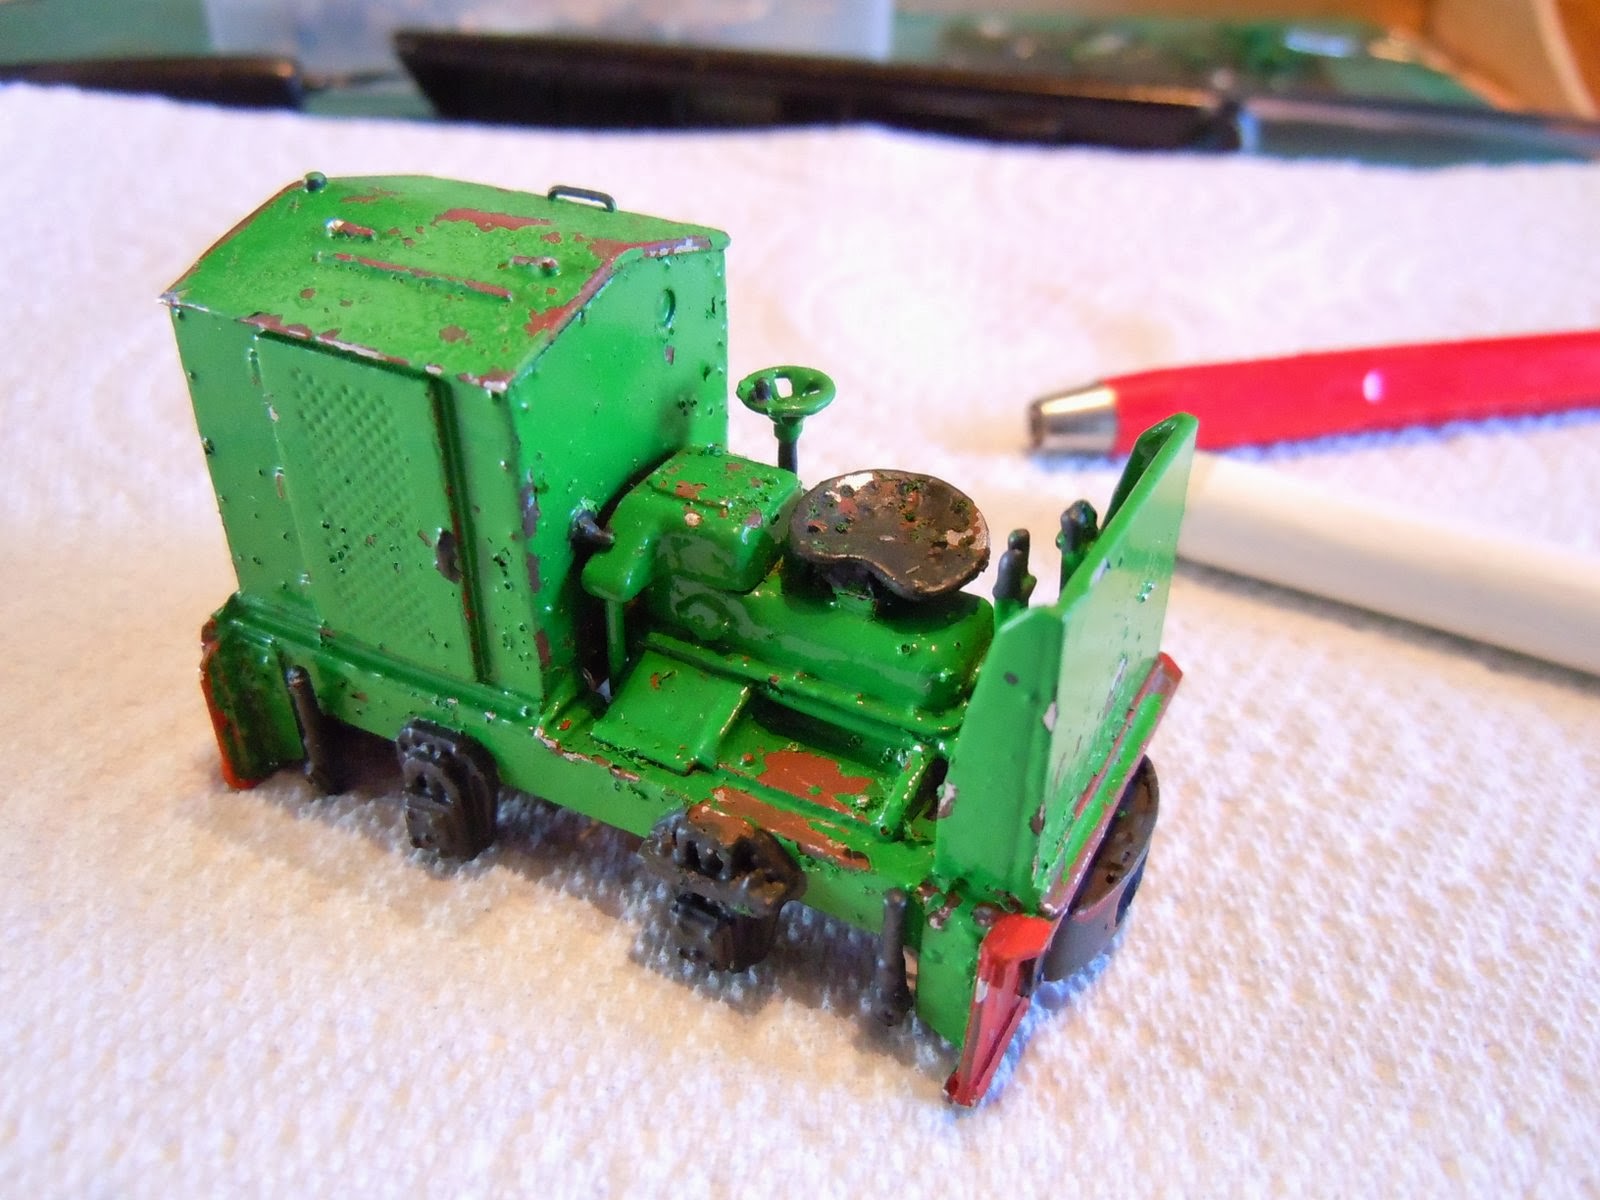
To my relief and surprise the layout performed very well. There were a few incidents of loads sticking in the wagons resulting in derailments when unloaded, traced to an oversize load, plus one occasion of the loads jamming in the chute (gravity failure). We learned that if the rod was not pulled right back hard the loads may not be pushed off the magnet. And the act of loading up quickly took practice! However the unloading generally worked smoothly and attracted interest. The Hudson performed smoothly all day, as did the Lister when given a run in the afternoon, but the O&K had an occasional sticky moment in one direction which I shall have to investigate.


I may not have won the challenge this year but I am still very pleased with the layout: it's my first ever (almost) prototype model, it looks good and works well. It attracted lots of nice comments which is very encouraging, so thanks if you were one of those that made them! There were even some potential show invites so there may yet be more to come from this little triangle.

Thursday 24 October 2013

Making an Exhibition of Thakeham

What's this hinged piece of wood with dowels sticking out? An agricultural tool? Implement of Torture? No, just a support for the layout.

 
Three blocks of wood are glued under the layout with 12mm holes drilled to take the dowels, the support is opened out and slotted in place. This raises the layout about 6" above the table, to something like kitchen worktop height, a much more comfortable viewing height while still being operational from a chair.

 
I printed out a name-board and stuck it to a piece of foam-core board, which is attached to the top of the layout back-scene with some Velcro. If permanently attached it would get damaged, and the layout wouldn't fit in the car boot!

 
I've also made up a brief information panel with some photos using the foam-core display board I'd made for Landswood Park. With these simple refinements, and the angle-poise type florescent light attached as previously described, the layout is ready to be shown. I have even spent a couple of evenings test-running it to make sure it works as well as it should - well, at least it does before it leaves the house...

 
There is plenty more I could have done but a challenge like this is time-bound. In fact I completed the layout a couple of weeks ago, as we will shortly be moving house and, amongst other jobs, I have had to pack away my modelling kit. It would have been nice to add a few more details, make more concrete products, do better trees, paint or varnish the fascia ... but I have achieved what I set out to and I am happy with the result.

If you can get along to EXPO Narrow Gauge on Saturday do say hello, I believe the challenge layouts will be on Stand 5 in the main hall. If you can't, I'll post more pictures soon.
Posted by Picasa

Monday 21 October 2013

Remote Unloading

With loads that can be popped into the wagons while hidden under the hopper, I need a way to unload them at the other end of the line - inside the tipping shed. Of course the other end of the line is the far corner of the board - OK, it's only about 3 feet away, but out of reach from the operating position, so how can I do it remotely? You might be expecting something clever, mechanised, automated, finely engineered ... you may be disappointed!

I made up a lever with a cross-bar from offcuts of plastic sprue and plasticard, with a neodymium magnet at each end of the cross-bar. This was meant as a mock-up ahead of making something stronger from bits of rail and copperclad board, but it worked fine as it was! The lever is mounted into the centre of a couple of chutes made of plastic, pivoted on a paper-clip wire, and has a length of steel wire fixed to the bottom end, a coating of graphite lubricant for Kadee couplings keeps it all moving smoothly.

 
This chute contraption is mounted into the board next to the track inside the tipping shed. From below you can see the steel wire-in-tube curving round to meet a wooden dowel, to which it is attached using an electrical choc-block connector, the screw is an end stop to limit movement. The dowel runs across the board to poke through the fascia next to the switch panel, the off-cut of MDF seen here is a more solid mounting than the foamboard.

 
Having considered gears and levers and even motors, I settled on this as the easiest method, and amazingly it works! About an inch of travel of the operating rod moves the lever through a little over 90 degrees.

 
So this is the view from behind the back-scene as a train enters the tipping shed, note the essential "buffer stop" (every millimetre of this layout counts so the loco is run against the stop). On the left is the chute and the lever is about half-way down through its arc towards the wagons.

 
Looking from above (shed roof removed), once the lever has touched the tops of the wagon loads when pulled up brings them with it - remember the small magnets set in their top? When the lever reaches the top of its travel the cross-bar recesses into the "hoods", which push the loads off the magnets, whereupon they drop down the chutes.

 
All that is then required is to collect them in a tub, and repeat... I made up 5 pairs of wagon loads, so the process can run for a good, er, 5 minutes. Fortunately I can reach the tub to retrieve them from the operating position!

 
Posted by Picasa

Saturday 19 October 2013

Uckfield Show 2013

I escaped from packing the house up this afternoon with my son to take a trip to the Uckfield show. The Uckfield MRC always seem to put on a good show and feature narrow gauge layouts, and this year did not disappoint. Admittedly I had seen several of the layouts before, which is no surprise as I visit as many NG shows in this corner of the UK as I can, but they are all top layouts and there was plenty I hadn't seen.


I've heard and read about Christopher Payne's Pynton Tramway Co. on O9, featured in Railway Modeller a few months back, but this was the first time I'd seen it. As with all his layouts he has made a good job of presenting it, as well as superb scenery and fascinating trains - it runs well too. I had an interesting chat with Christopher about lighting, as he'd just installed some strips of LED's across the layout to supplement low-voltage halogen bulbs at the front. I think the result works really well with the LED's giving a good even light with the halogens providing the warmth of a sunny day.


Also present was Des Trollip with Zebediela Citrus and his "Pizza", Southern Cross Sand & Cement, both in 009. 

Tricky to see due to the crowd was Giles Favell's The End of the Line in O / O14, another one I have seen before but fascinating to watch two trains of different gauges and a road lorry all moving at once!


There were a couple of other NG layouts too, there were some SG layouts as well (once again the P4 layout could be spotted as the trains derailed!) and some very good trade support, but it was great to see a "mainstream" exhibition showing that narrow-gauge layouts can steal the show!

For more photos follow this link.

Wednesday 16 October 2013

Wagon loads of sand

The Thakeham Tiles railway only ever needed a couple of skip wagons, though there seemed to be one or two "spares" in the siding by the engine shed. Now I have plenty of O14 wagons from Landswood Park, I even have skips, but they are "weathered" with coal or manure, and that didn't seem appropriate for Thakeham! So another triplet of the lovely KB Scale Hudson Skip plastic kits were made up, with small strips of lead on the underside and in the bottom of the skips to add weight.

Time is running short now so I needed a way to paint and weather them quickly. First they were given a coat of red oxide primer (blu-tak in the bearings protects them), then a thinned wash of rusty brown. While that was still tacky weathering powder was stippled into the paint to give a varying texture and colour. The photo below shows the result of this, and a wagon still in primer. As I'd forgotten to add the lead before the primer this is clearly visible too.

 
After that well thinned dirty black was applied around the axle-boxes, coupling pockets, and the skip "rocker" to suggest grease seeping through the rust. For a relatively quick method the results were very pleasing, and prototypical as the skips used at Thakeham seemed to have no sign of paint left on them!

Finally a little dilute PVA was applied followed by the sand where it would collect on the frames and stick in the bottom of the skip (and hide the lead weight!). The two wagons the line used were for different colours of sand, which I have represented. These two are coupled together semi-permanently with the link and pin supplied in the kit, and Microtrains couplers on the end, the third skip will mostly languish in the siding.

 
The Thakeham line existed for one purpose only, to move sand about, so the wagons need loads to carry! Rather than loose loading them (I don't want sand in my locos mechanisms!) I made up these simple false loads from offcuts of foam-core board shaped to fit in the skip, and a carved hump of expanded polystyrene. The black dot in the top is a small neodymium magnet, of which more next time...

 
These were finished with a coat of brown paint and a couple of layers of the coloured sand again over PVA. Here they are seen loaded into the skips via the access hole inside the sand hoppers, next to the control panel.


Posted by Picasa

Sunday 13 October 2013

Hudson Complete

The Hudson has also been making slow but steady progress between work on the layout, but has gone fast enough to catch up the O&K while in the paint-shop, such that the final weathering and varnish was carried out on both at the same time.

My deviation from the instructions left me with the body and footplate/frame as separate assemblies, which made spray-painting easier! The green is Halfords spray enamel as I used on the Lister a couple of years back and is rather shiny, the can of black I had in also turned out to be gloss. Ho hum.

 
I wanted this loco to appear much newer and less worn than the O&K, to reflect the fact it would be about 20 years younger. Still, it can't be shiny on an industrial layout, so the paint was given a good burnish with a fibreglass pencil, then a coat or too of well thinned dirty paint. A dusting of weathering powders and a coat of Testors Dullcote matt varnish finished things off in the usual way.

 
The figure is from S&D and meant as a tractor driver, with legs wide apart. His left arm and head were supplied separate allowing their position to be chosen, but he's still had some serious surgery to bend his right leg in, while his left was amputated at the thigh to twist it to the position seen here.

 
Picking out the control knobs in red helps them be seen - black is more likely though! The epoxy glue knobs have come out very well. I did swap the handbrake (right) and reversing lever (far left) as I thin the instructions have these the wrong way round.

 
Both locos took a little fettling of pickups and body retaining screw tightness (not sure why) to get them running, but now both seem to run well. The O&K has a slight gait and is rather noisy running one way, but seemed to improve with running - I wish I had a continuous run to run them in!

 
Posted by Picasa

Sunday 6 October 2013

Finishing the O&K RLc1

We last saw the O&K complete but in bare whitemetal. Painting started with a coat of red oxide primer, followed by a patchy wash of rusty brown, the buffer-beams were given a coat of red then masked off. I wanted a well-worn look for this loco so tried the salt over water again, plus a few blobs of PVA in places I wanted more rust.

 
The top coat was a light green enamel from Halfords. It took a while to get the salty bits to break away despite soaking the model in water, perhaps this technique works better with acrylics? The PVA was stubborn to remove too (maskol would have been better if I had any!), and so in a few places bare metal now showed through. Maybe an etch primer would have been a good idea too..

The green was also really very shiny, and rather lurid, in fact at this point I wondered if it were a good choice! So the panels were burnished back with a fibreglass pencil. Always do this over a tissue, afterwards fold and bin the tissue so you don't get bits of fibreglass everywhere, they are irritating if the get in your skin!

 
There then followed touching in the red bufferbeams, black details, and rusty red/brown over the rusty patches and any shiny bits. A wash of well thinned dirty brown dulled the paint further and collected dirt into the nooks and crannies, a darker wash filled the grilles. Finally a dusting of weathering powders and a coat of Testors Dullcote matt varnish completed the painting process.

 
The result is as hoped, a dirty and slightly rusty machine that has had a hard life, but still in use. The effect over the grilles didn't work as well as I'd hoped, but the final shade of green is rather nice. The driver is of an unknown source (from a friend) and isn't the most detailed, but is much better than the driver that came with the kit!

 
It's funny how you only notice things like the silvery hair and that small white particle on the footplate in the photos afterwards isn't it?

 
All looks good, though I admit I haven't actually had time to test it works since reassembly yet!
Posted by Picasa

Tuesday 1 October 2013

The 009 Society 40th Anniversary Convention

I spent the weekend at the first ever 009 Society Convention, held in honour of the 40th Anniversary of the Society. Conventions have been going for years in the US and Australia but I'm not aware of such a thing in the UK, so this was a bit of an unknown for the Society. In the event the hotel was fully booked and the conference facilities filled, some members having travelled from as far as the US and Australia...!

There was a theme of historic models in keeping with such an anniversary, and a highlight for me was the display of a section of P. D. Hancock's Craig & Mertonford layout as re-assembled and preserved by the model railway club he once attended, along with much of the original stock now in the hands of others. P. D. Hancock was possibly the first to build a 009 layout starting in the late 1940's, and through regular articles and eventually a book he inspired many others to follow in his footsteps, laying the foundations for 009 as a popular modelling scale.


There were many other layouts too, some well-known, others not seen at exhibitions for years, and several I had never seen before. From the trade perspective 009 has never been so healthy, with Minitrains now having an extensive range and showcasing new products at the convention (as well as sponsoring a competition), news of the ready-to-run L&B loco development by Heljan, and PECO having launched a range of RTR wagons and coaches, seen here on display. The composite coach has just been launched and (unsurprisingly) stocks at the convention sold out quick, the brake coach will follow. I have to say these look amazingly detailed, though a little large for Awngate, though when unlettered versions are released I could be seriously tempted!


The society second-hand sales stand was popular as always, and there was a good range of clinics or seminars on a variety of subjects, which were well attended. On the Sunday there was a great range of members own projects on display through the conference rooms, lounge, and bar! I set up my shoe-box layout Southon Yard, it was nice to get it out after several years in the loft, it's fun to play with (for a while!) and attracted a lot of positive comment.


The centre-point of the event was the Dinner on the Saturday night, though there was always conversation to be had over a layout, at breakfast, in the bar, along the corridor, with old and new faces to see. Indeed it was the people and atmosphere that made the event a success, the feeling was more like a big family party than a model railway show. A truly memorable event, can't wait for the next one!

Rather than overload this post with pictures I've uploaded a selection here - sorry no captions yet!