Showing posts with label rolling stock. Show all posts

Monday, 13 April 2026

Coach upgrades

I've been doing a spot of work on some coaches. Firstly, a couple of older models. The Five79 Dundas Tramway coach was built in 2015 for Awngate, while the Dundas kit for a Vale of Rheidol brake van is even older and also saw service on Awngate. However, having adopted a darker shade of green for the Ashover coaches more recently, I thought these would look better in a matching shade rather than the lighter green used on Awngate. 


I removed the roofs, glazing, and vacuum pipes, and some of the seating from the coach came out too, but didn't strip the existing paint. The Tamyia deep green acrylic paint was brush painted, thinned with a little water to flow well and not dry too quickly, and allowing 3 coats for full opacity without obscuring the detail. The frames were painted off-black, and the window frames picked out in pale brown (a fiddley job but worthwhile). The roofs were sprayed with grey primer, the coach roof was given a covering of masking tape first though I didn't bother on the van since the lamp top was well fixed. 


The pair were then weathered in my usual way: a dirty brown wash over the underframes, a track brown airbrushed over the underframes and just onto the lower edges of the body, and an off-black airbrushed over the roofs and ends. These vehicles retain their Microtrains couplings, and can accompany a pair of the Ashover coaches with which they fit well, to form a longer train of mixed but matching vehicles for Hexworthy. 


This pair of Peco Glyn Valley Tramway coaches are much newer, having been acquired ready-to-run in the last year. I expect they will add to the stock suitable for use with smaller locos, such as quarry Hunslets, on Hexworthy. However, like most RTR stock, they look too clean and plasticky, even for a preserved railway. 


End details of steps, handrails, and brake levers were touched in with off-black, as were the underframes and lamp tops to take away their shiny finish. Foot steps were painted weathered brown, and inside, the seats painted green although this is barely visible through the windows. I had some seated figures left over from previous coaches, so both got a scattering of passengers. 


Weathering follows the same process as the other vehicles, the "soot" being even more effective on the white roofs. Not really visible here, but I've added wire droppers to the couplings to allow magnetic uncoupling. 

Monday, 6 November 2023

Ashover coaches part 3: Details and roofs

The instructions don't mention handrails but pictures of the coaches show them prominently, and with the steps for low platforms they are an obvious requirement. I realised that staples were slightly too long but would fit if I was happy to accept them running to the bottom of the door, lower than the prototype, and being a flat section. I'm not making an exact model so figured the precise length and bends would save a lot of time, and look better than I can manage bending wire.

I drilled all the holes (80!) with the dremel in the stand, using a slightly undersize bit as it tended to melt the hole bigger than the drill, even in short bursts (I wish it could go slower!) - but much quicker and easier than using the pin vice by hand. The staple legs were cut shorter (especially to avoid the window openings), and supergled in using a 20-thou strip of plastic for even spacing from the body. 

The brake coach had steps made up from plasticard. Those at the left (saloon) end were made to match those of the other coaches, those under the guard's compartment doors made to a similar style but longer to match the double doors, and passing in front of the frame bracing. The steps are 20-thou plastic but the upright supports are 40-thou, and with a second thickness of 40-thou between the steps to support them. 

I also added door handles. They are not very prominent on the photos and are quite slender on the frames of the sliding doors, so I just used short lengths of microstrip vertially on the outer edges of the doors, but horizontally on the brake compartment doors which are assumed to hinge inwards in the usual way.

Experimenting with roofs led me to realise that they didn't fit well to the ends of the coaches, and it seemed that the ends were too low, and the top edge sloped down to the outer edge. To avoid an unsightly gap I added a strip of 20 thou plastic to the top of the end, and filed it smooth to the front and level across the top. I also added a little microstrip to the top of the door frame. You can just see the door handle behind the left handrail here.

I decided on the drinks-can roof. The moulded plastic roof was slightly too curved and wasn't smooth underneath, making shortening and fitting complex, while fabricating a plastic roof to be a neat fit and not warp is challenging, especially as the partitions leave little room for bracing underneath. 

The metal was cut to size with a scalpel using lots of light cuts. I decided to cover the metal with masking tape to give a tarred cloth finish, it also serves to stiffen the metal slightly. I took care to roll the roof onto the tape rather than flatten it, so the curvature is maintained. The sides and ends are then folded underneath. 

To further strengthen the roof and prevent it distorting I added a couple of lengths of 40-thou plastic longitudanally underneath, the strips spaced apart with slices of plasticard then superglued to the roof. 


Some of the kits came with lamp ventilators but they didn't match, and some kits didn't. I found a load of matching whitemetal ventilators in my bits box, not sure of the original source. I think the prototypes had torpedo type ventilators rather than these "sea-shell" type, but at least all 5 coaches will have the same type. Holes are drilled with the dremel again and they are superglued from underneath. 

I'm also fitting rainstrips which, perhaps surprisingly given the doors being at the ends, curves over the whole length of the sides. The strips are tacked in place with plasticweld solvent, which doesn't really stick to the masking tape/metal roof, but holds it long enough to dribble some superglue along it. A fiddly job, 2 roofs are now done so just 3 more to complete!

Saturday, 28 October 2023

Ashover coaches part 2: adding a brake

 Work has continued on the build of the Ashover coach kits. There are now five...

A couple of the kits came from a friend at the Sussex Downs group who was having a clear out, but with them was a partially assembled kit. After a little partial disassembly to resolve the issue I'd found with the floor width and to "open" some doors and windows, it was completed (front left in the photo below), except that the footsteps and the bogie brake gear are missing. The bogies can probably run without brake gear (only the lack of brake handles is noticeable) but as the wheels look a bit coarse I may pick up a new pair of bogies at some point. 


The final kit was built as a brake. After posting some options in the last update, my friend Tim Sanderson pointed out that he had built some variants of these coaches including a brake to the same design as my "option C". This involved an extra pair of doors (which I had left over from those I had "opened"), but the cuts were minimal and all joins were at doors or door frames. Tim had explained these conversions in the August 2002 Railway Modeller.


So armed with Tim's article I set about cutting as shown - the end door, panel, and first window were cut from each sides (opposite ends so they are the same end of the coach, if you see what I mean). The windows were then cut away, and the door/panel swapped to the other side of the coach to put the panel outer, and the door plus the additional door set into the side. I made the cuts with a scalpel (new blade), light cuts from the front then deeper cuts lined up from the rear, leaving a surprisingly clean cut.


As with Tim's conversion on reassembly new framing was needed over the double doors (in one piece) and between them and the rest of the coach (to match the other side of the doors). These were made using 40 thou (1mm) plasticard cut to strips the same depth as the coach side, the frame being the thickness of the plastic. There's no significance in the use of black or white plastic, just the scraps that happened to be on the bench!

One other change I made was to the door windows. The end doors on these coaches slide behind the blank panel, and the broad cross-member is probably related to the sliding mechanism. However, the luggage compartment doors would probably hinge outward as per a normal carriage door, there being nowhere the inner door could slide anyway. So I cut away the cross-member and made their windows into normal drop-frame carriage windows, with a couple of them partially open. Also as seen below, small pieces of plastic microstrip were added to the frames to represent the outward-opening hinges. 


Given the preservation era of Hexworthy I see this vehicle being mainly for the carriage of push chairs and prams, and to give access for wheelchairs, let's assume a big ramp is carried inside. So the saloon has the usual bench along 4 windows, ending in half-height partitions, then a space by the 5th window which could be for wheelchairs or prams. There's a partition separating the saloon from the luggage compartment but the double-doors would be convenient for disabled access. I do need to sort out steps for this carriage too, bearing in mind the double doors away from the end. 


Next I need to decide how to tackle the roof. It is tricky as the roof will be fitted last (after painting, glazing, etc) and needs to fit neatly, but with little support needs to be rigid enough without appearing too thick. It doesn't help that the doors and end seem very slightly lower than the top of the sides. 
  • Some kits came with a thin sheet of plastic, which I have curved by taping to a can then dunking in boiling water (left). It will need trimming to fit, but experience says this will need significant bracing if it is not to sag, and could still be at risk of warping. 
  • Alternatively, the tall drinks can cuts easily to form a pre-curved thin metal roof (middle). This won't warp, but would need some strength to prevent it bending or getting squashed in the middle, and would need sticking down very firmly. It also may be more tricky to add rainstrips to. 
  • Another option is the Dundas moulded plastic roof for the Vale of Rheidol coaches (right). This is about the right width and too long, so would need cutting down. It's a little thick but not excessively so, and rigid enough without bracing. However, the moulding has recesses just inside the end (presumably for the ends of the coaches they are designed for) and so cutting to length could leave a gap over the end. I only have a pair of these so would need to order more.


Saturday, 7 October 2023

Ashover carriages

Hexworthy will need some passenger stock, so I have collected a few of the Meridian kits for the Ashover Light Railway carriages. Bachmann are soon to release a ready-to-run model so I need to get on and finish my kits first! The kit is reasonably straightforward although I guess it is getting old as there is some flash to clean up, nothing too dramatic though. 


The first was built while demonstrating at Alexandra Palace earlier in the year, and the second at Amberly in the summer. It wasn't until I got to the third until I wondered whether I should open a window. I don't have a book on the Ashover but found a couple of photos in my library showed that yes, the side windows opened in the usual way, so a few windows were modified cutting out part of the frame with a strip of microstrip across (3rd window from right on the rear coach). 


The pictures also showed the doors open, they slid behind the adjacent panel. I don't know they they were left open when the train was in motion (I expect so), and I guess that would be frowned upon on a preserved railway, but nonetheless I thought it would be interesting to model the doors open on one end. Cutting them out wasn't as difficult as I feared, some planks were scribed in the floor and I added a strip of 40-thou plastic along the inner frame to represent the edge of the door recessed into the panel. 


I have picked up a few tips for assembling these kits well. First, the floor half mouldings are slightly too short and too narrow. The length isn't a real problem as when assembled with one side and one end then joined, there's a gap of about 30 thou in the centre, but that doesn't cause any issues. The width though means that if the sides are joined to the floor they will bow in, a strip of thin plasticard along one side of each floor piece solves that, checking that the side and end come together. Also, the tops of the body sides are prone to warping inwards. I've taken to cutting pieces of sprue to form cross-bacing as seen here, and also for later builds adding a strip of 40-thou plastic along the top edge. 

Opening the doors of one coach left me with a spare pair of doors, with one unbuilt kit left. While the Ashover didn't have a brake coach (they were vacuum braked so perhaps not necessary), I thought a preserved railway might have a coach adapted for wheelchair users, children's buggies, etc. So here's some photo-edits to consider how the final coach could be adapted.


Option A: A pair of doors at the end, these would have to be hinged rather than sliding of course. I could omit the vestibule partition to make an open saloon, with the right two windows and to the right-hand end, which would make sense for wheelchairs although it isn't really a brake/guards coach. The steps would need extending. 


Option B: I noticed the door is exactly the width of the window, so by cutting out a window the two doors can be added with an adjacent panel, looking more like a guard's compartment. The inner partition splits the coach 1/3:2/3 so would fit between the fouth and fifth windows, or the second and third, neither of which makes much sense. Blanking, frosting, or replacing the right-hand window with a ducket would make more of a traditional brake coach, but wouldn't help with wheelchair access.

Option C: As above but with the cut-out door and panel swapped sides to put the panel towards the end. Actually, I don't think this makes any more sense than B, and the steps might get more complex.

Option D: Including a window in the cut-out and swapped section would provide an observation end compartment (taking advantage of the end windows), albeit rather small, and there's still little space for a guard's compartment. Maybe the same with two windows to the right, with just three to the left and the double-doors just right of centre might make more sense. 

Thoughts welcome!

Tuesday, 17 May 2022

Preparing for SWING

Both Loctern Quay, and my son's Slugworth & Co., will be at the "SWING" narrow gauge show in Worthing this Saturday.


Since both layouts were out last month at Narrow Gauge South, and generally performed well, there is little preparation to worry about. However, one of the new trucks I'd made insisted on derailing through facing points. Strangely, it hadn't done this in testing, but after derailing repeatably at the show it was quickly banished back to the stock box. 

This kit uses the new type of wheels which have much finer flanges than older wheels, and a wider back-to-back measurement. For some reason the flange was hitting the vee of the point and riding up - clearly not checked by the check-rail. That reason was most likely to be skew axles. 


Can you see them? It is barely perceptible until looked at closely, and took a couple of attempts to get a photo that shows the skew. Of course correcting this means moving one of the sole-bars lengthways to align the axle boxes. I scored along the join between the sole-bar and floor and cut down the ends of the sole-bar, then flooded the joins with solvent. Some firm but gentle persuasion with smooth-jaw pliers got the sole-bar free in one piece, and with a reasonably clean break apart from some material left in the corners. 


The sole-bar and floor were cleaned up, then with one end trimmed slightly the sole-bar was reaffixed, taking care to ensure the axles are completely perpendicular to them this time! Surprisingly the botched fix is not visible, except perhaps right in the corners of buffer beam, sole-bar and floor - which you can't see in practice. I didn't even need to touch up the paint.

So the fix was easier than feared, and just shows how important it is to check the axles are square to the chassis. Testing on the layout seems to confirm the tendency to derail is fixed, though of course the only real test is to run it at an exhibition. 

Do say hello if you are at SWING. 

Tuesday, 29 September 2015

A Coach and some wagons

The upcoming exhibition at Croydon this weekend, to which I am taking Awngate, has pushed me to finish some projects that have lingered on the workbench.

A little while back I briefly featured a coach I'd started building. It's a Five79 kit RC810 for a Dundas Tramway coach, nicely moulded and went together very easily - until I got stuck with the couplings. A bar is provided to attach Bemo type couplings to the bogies, but that wouldn't work with the Microtrains couplings I use. I didn't need them attached to the bogies as the couplings pivot, but the wheels are so close to the end of the body mounting the couplings behind the buffer beam would foul them. So the kit sat half-built while I pondered what to do.


As is often the way with these things the solution was simple. I added a "coupling block" to the buffer beam from plasticard, which provided something to mount the coupling on so it didn't foul the bogies. Such "outboard" coupling blocks were not unusual on narrow gauge stock, even the screw protruding slightly gives the impression of a coupling pin.


The coupling mounting arrangement is clear seen from the underside. In front is one of the four bench seats for the interior - a nice moulding that if available separately, could be put to many uses!


After the couplings were sorted it was a simple job to complete the build and paint it, weathered to a slightly grubby state. It could do with lamp tops, and passengers of course - but for now it is serviceable. It's a moderately tall vehicle but not long, and fits well with on the layout - ideal for mixed trains I think, with a few wagons and a goods brake van.


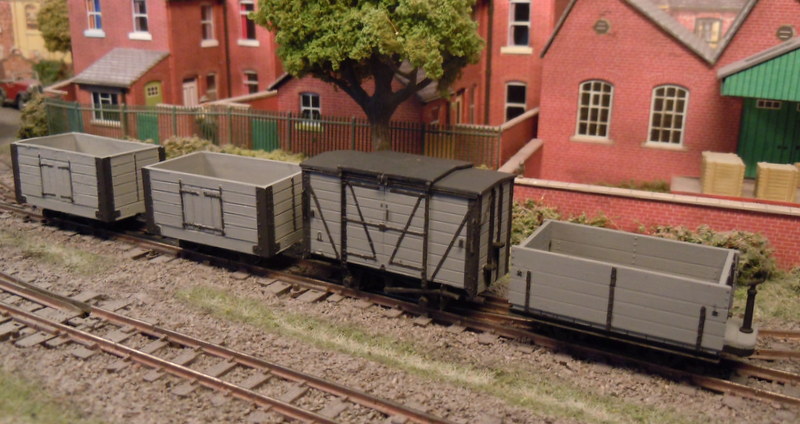
Talking of wagons a few have been knocking around the workbench - another RNAD van and Bagnal open, plus a couple of opens from the second-hand sales stand, they're less detailed but provide variety. I like NG goods trains to have a mix of wagons.


But I don't like wagons to be too clean! A few minutes work with a wash of acrylic "dirt" and a dusting of weathering powders really tones them down, the opens could now do with some loads. I'm working through fitting couplings, and checking/adjusting them on much of the stock ready for the weekend.

Friday, 18 July 2014

RNAD Vans

I picked up some of the new 009 Society kits for Royal Naval Armament Depot (RNAD) wagons a while back, and last Friday I was putting one together, trying to figure out how the brake gear went together.

Saturday Morning I arrived at Amberley to set up Thakeham Tiles, and what is right opposite? A handy prototype!


I'm glad to say I got the brake levers correct; the instructions are a bit ambiguous in this area but a picture speaks a thousand words they say...


The complication is that there are levers on both sides, which both go to the right when facing the van, and both operate the brakes on both sides. This means that the linkages to the brake blocks are the opposite way round on either side, linked via a shaft across the wagon, and one of the levers needs it's rotation reversing. As you can see in the picture below the lever this side operates the shaft with a cam arrangement, and the left-hand brake linkage is at the top of the shaft.


Not so easy to view because of an adjacent wagon, but on the other side the lever acts directly on the shaft, and the right-hand brake linkage is at the top of the shaft.


While I was at it I got a shot of the end detail, with steps and handrails.


Meanwhile outside, a demonstration train was running with more ex-RNAD stock, including open wagons with ends, and a brake/passenger vehicle.


More on the actual model when I get time to progress it!

Tuesday, 5 November 2013

A collection of projects

Since we are expecting to move house soon I had cleared away all my modelling materials and most of my tools into boxes, I even finished Thakeham 3 weeks before EXPO to allow time for this. But as is the way with house moves it seems we are still some way from the big day, so a box was reopened and some projects dug out.

 
Bottom left is another Egger coach grabbed at EXPO so I can increase my rake to three, or run a second mixed train (Awngate only fits two bogie coaches).

Above that is a Wantage Tram etch, along with a Halling chassis (top left) I got to go in it. However the Halling doesn't fit as it is too long, a shame as they are superb runners, so I have other thoughts developing to use that. Meanwhile I picked up a Meridian MPD18 chassis kit at the Convention.

Bottom right is an impulse buy from EXPO-NG, a WW1 Simplex should fit Awngate nicely. My son wants me to build the full armoured version but I'm leaning towards protected. This was bought with the MPD18 chassis to fit - but this time a Mk2 version despite being bought just a month later than the first I bought, hence the different packaging!

So there is plenty to get on with. The coach is probably the easiest having done two already, and the Simplex if a "proper" kit so should be reasonably straightforward, but I'm keen to start the tram loco to have something a bit different for Awngate, even though it may be the most complex project here.

So here is the MPD18 Mk1 chassis! It proved fairly quick to put together, though being tiny it is rather fiddly. The etch fits together very cleanly, I'm not convinced by the motor mount but it seems to work. I'd rather have larger wheels, these are just wagon or pony-truck wheels and I think they'll struggle to pick up power well. The axle is small too,

 
A couple of tips to anyone building one:
- Two brass tube sleeves are supplied to allow the worm gears to fit the smaller diameter axles. The instructions suggest drilling holes through the sleeve tubes to allow the superglue in to attach them to the axle, this sounded fiddly so I simply cut across the tube with a razor saw until a hole appeared.
- The pick-up on the insulated side is supposed to be fitted under the chassis by gapping the tiny PCB and soldering the upper half behind the lower part of the chassis side. I found this impossible, it would have been easier before assembling the running gear into the chassis. But then I realised I didn't need to bother as it could be superglued to the outside of the chassis and work just as well!

 
Considering it's tiny size and it is the first 009 chassis I have ever built (other than a Salford Models Hudson diesel which I failed to get working as a teenager) I'm rather pleased. It seems to work - but only with a finger on it, as it is too light to pick-up power! I need to add more weight to properly test it.
Posted by Picasa

Monday, 11 March 2013

Painting, Windows and Finishing

I'm not great at the painting, but being a mug I decided a two-tone livery would look best on the coaches, and brush-painting that took me a while! That was followed by a little weathering with dirty washes and weathering powders. The windows are the original Eggerbahn mouldings which have a ridge round each window, the only way that was going to look right was to paint it to look life a frame. More fiddly work with a brush, especially with the bars on the end door windows!

 
At Brighton I had picked up a bottle of "Micro Kristal Klear", which is a PVA-like glue that dries clear and does not mist plastic glazing. This was ideal for sticking the windows in, once in place the seat backs were stuck in place that hides the bottom of the glazing. The other feature of the glue is that it can be drawn across small openings to form the glazing, which I have tried with the Skylark spectacle plates, it can be seen drying in the picture above. If it works well I've got quite a few locos with unglazed spectacles...

 
Despite my best efforts keeping all the bits together I found I'd lost the glazing for the guard's compartment doors. I cut new glazing from clear plastic - set in an part open position, as all the other opening windows are open, so it would look odd if they were closed. A piece of microstrip finishes the frame.

 
Having added coal to the bunker and a driver figure inside it was time to stick the roof on the Skylark. The curvature of the plastic roof is slightly too much, so here it is being held in place while the epoxy dries!
Posted by Picasa

Wednesday, 12 December 2012

Putting the brakes on

Some of you may know Mike Beard, who has been describing on the NGRM-Online forum the re-build of his own Egger coaches, a more extensive rebuild than I have tackled. He mentioned to me a while back that he was looking at 3mm Scale Model Railways products for detailing the coaches. But it was a pleasant surprise to find a pair of brake handles in a Christmas card - thanks Mike!

 
Of course coaches like this usually did have brake standards on their balconies. They didn't take much fitting, and as you can see from the rather poor photo below, they do add more interest to the end of the coach.

 
The size is spot-on too, so Mike was onto something looking at 3mm scale, but surely the poor 3mm scale people would need a stepladder to put the brakes on?
Posted by Picasa

Sunday, 7 October 2012

Coaches - Final Detailing

The last few evenings have entailed the fiddly detail work that complete the coach, it takes time but it is enjoyable and well worth the effort. As "freelance" coaches there is no prototype to copy, which means looking at photos of similar coaches to figure out what the details should be - in some ways this is more of a challenge than copying a prototype!

So the balcony railings have lost the spikes and gained a plasticard "wooden" rail instead, I've copied the prototype step from the last post to the other 7 corners, and made a stab at the under-frame truss rods. The vertical supports are in fact solid across the coach - cheat I have seen others do and is virtually invisible from normal viewing angles, while making them strong enough. The truss rods are brass rod with a short piece of wire insulation representing the tensioner.

 
Moving on to the roofs, I decided that oil lighting was the most likely and fortunately I had some spare Parkside Dundas sprues with some on. The take a little cleaning up but look OK, and save some fiddly work! Two per compartment looked far too generous so I stuck to one, and I quite like the unequal spacing on the brake coach.

 
A cruel close-up of the brake coach shows how the under-frame and steps look - not too bad I think. I'm particularly pleased with the detailing around the guards compartment door, hopefully it now doesn't just look like it was scored into the side of the body.

 
Another close-up showing the ends of the coaches, the steps, and buffer-beam overlay. I'm rather pleased with the way the balconies have come out. I've yet to fit the couplings - in fact I haven't cut the Bemo style couplings off one set of bogies yet.

 
Talking of bogies, they are too modern really but since they are barely visible I can't see the point of changing them. I've also omitted brake gear - I'm not sure what it should look like and most of it won't be visible either. I did think about fitting vacuum hoses but the castings I have domintated the balcony ends, I'll look out for something smaller. So for now I think they are about ready for primer, which will show up any imperfections.
Posted by Picasa