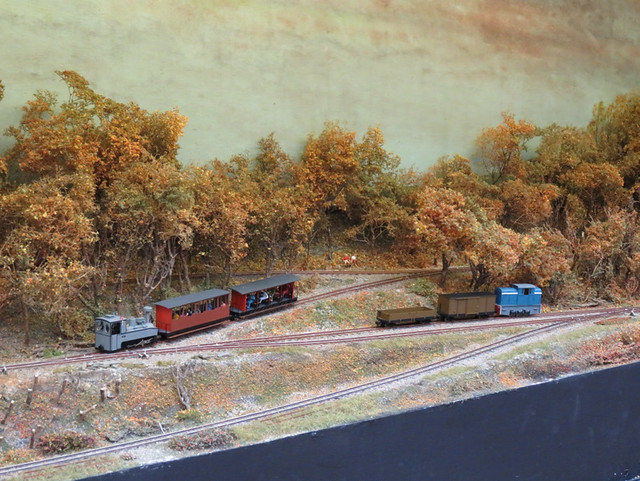
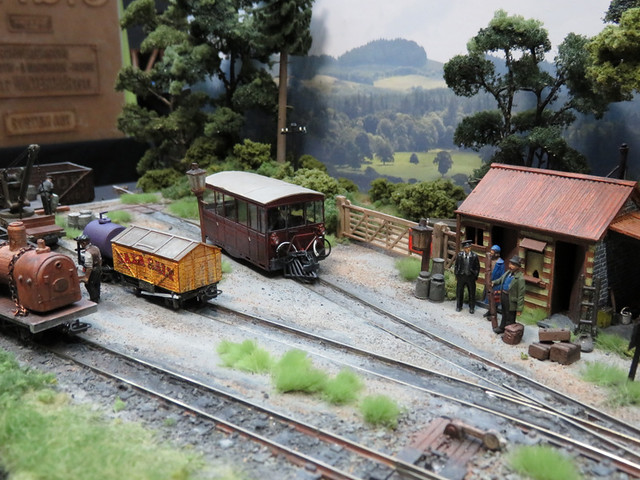
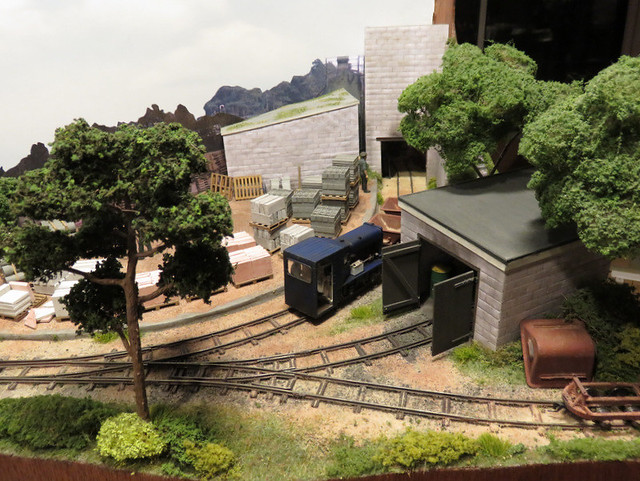
Showing posts with label Thakeham Tiles. Show all posts

Thursday, 24 October 2019

Uckfield Show 2019

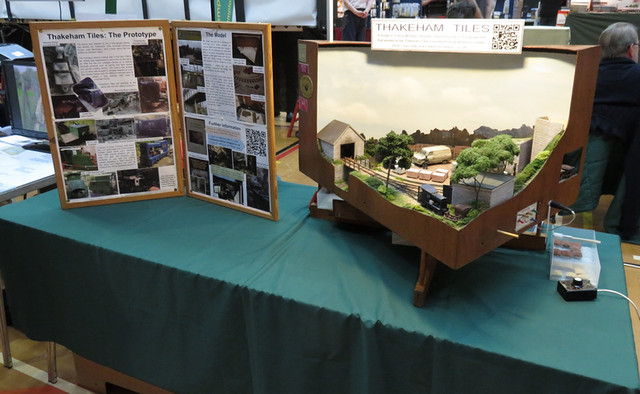
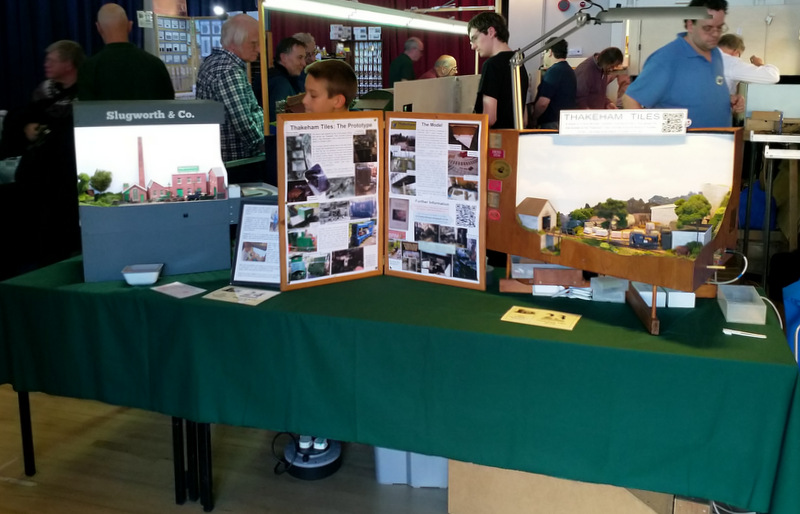
Last weekend was the excellent Uckfield show, and this year we had two layouts there - my son's Slugworth & Co and my own Thakeham Tiles. Neither is very interesting to operate so the idea was that switching between layouts would alleviate the boredom! Here we are set up at opposite ends of an 8' table.


It was good to see a number of teenagers from the local high school model railway club taking part - last year they showed their layout, this year they were helping with operating layouts and stewarding. Great to see younger people getting involved and showing such enthusiasm.

As usual there was a range of top quality layouts on a range of themes and scales, but with a particularly good Narrow Gauge influence, a total of 5 of the layouts being NG. A long-standing favourite is David Taylor's Charmouth in O16.5.


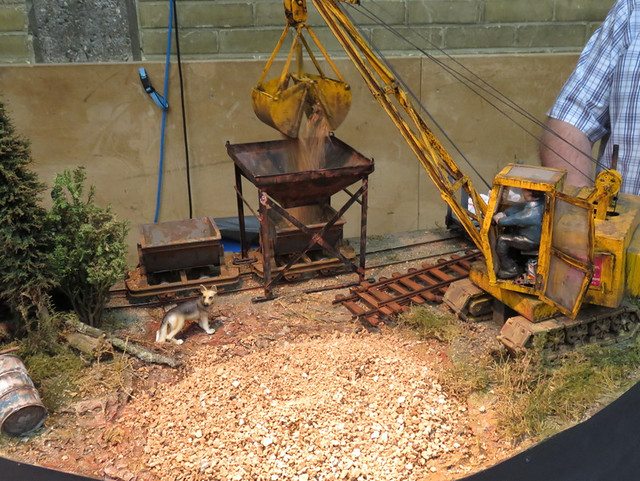
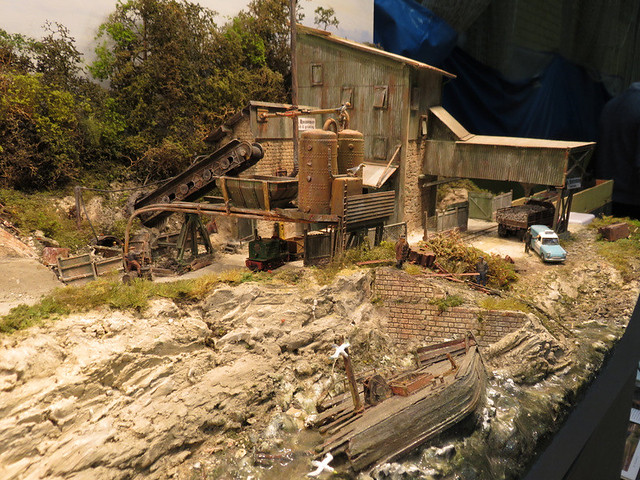
Fen End Pit, in SM32 by David Barham, goes one better than Thakeham by using real sand. This is loaded using a working drag-line excavator (Joshua had a go - and it wasn't easy to control!), and tipped into a working conveyor and screen. Oh and the modelling is brilliant too.


Midland in Bristol (O gauge, Richard Ellis) came second in the MRJ/Wild Swan/Ian Rice "Cameo" competition. The detail is superb, and the unified slightly weathered appearance adds atmosphere and realism. That said it is little more than a diorama, operation is very limited and the trains almost incidental, perhaps inevitable in this scale given the limited size, but the modelling is the highest standard.


Another Cameo competition entry is Bottom Works Sidings by Chris Matthews in OO, featuring a steelworks branch and exchange sidings. It's an excuse for grimy industrial locos and freight shunting, plus DC electrics (why not?), but the bleak wintry setting really gives it atmosphere.


Blueball Summit by Andrew Bartlett is a superb example of finescale modelling and scenic work. The viaduct and village below is an impressive centrepiece, but the whole layout is to a high standard. Oh by the way, it's N gauge - but you really can't tell can you? That says it all.


So that's just a few of the good layouts, but there was one more that I'll share in another post...

Wednesday, 9 October 2019

Reviving Thakeham

Thakeham will be at the Uckfield show on the 19th and 20th of this month, so with a couple of weekends to go I thought I'd better dig it out of the loft - where I think it has been for about 2 1/2 years - and check it over.


Despite being stored with silica gel sachets in the storage cover, the temperature and humidity variations in the loft have not been kind to the paper covered walls of this building. I think I used Pritt-Stick to fix the paper and it hasn't proved durable. The roof is also badly warped - this started soon after I made it as the corrugations were stuck on with contact adhesive, which seems to have reacted with the plastic - but even the added "moss" can't really disguise it now.


I figured the only answer was a replacement. Fortunately it's a very simple structure, being little more than a plain end wall and corner of a roof. A new foam-core structure was knocked up to the same external dimensions, though I increased the height of the right-hand wall slightly to increase the roof pitch a little. I printed out a new blockwork sheet from the Scalescenes file (the advantage of Scalescenes), this time fixing it on with a thin layer of PVA. I've found that doesn't cause wrinkles if thin enough, and I hope it will prove more durable.


A new roof was also made, fortunately I had enough of the corrugated sheet left. This time I used double-sided sticky tape to fix it to the plasticard roof structure as seen here, I don't know if that will prove durable either but it shouldn't warp. The strips on the right were stuck underneath at 90 degrees to the roof surface to make a bend-resistant frame.


In place on the layout it fits the recess in the ground perfectly. The blockwork has printed a slightly different colour (the work printers have been changed!) but it looks OK. I'm pleased with the roof finish, which this time actually looks like asbestos. I sprayed it with grey car primer, and liberally sprinkled on some talcum powder, after it was dry (1/2 hour) this was rubbed with a toothbrush, then the process was repeated a couple more times to build up texture and colour variations. Finally a little pale grey-brown weathering powder was applied in a random way.


On the engine shed roof, part of the masking tape felt had lifted showing the white plastic underneath. This was simple to fix with another coat of dark grey paint, working into the crack, then while tacky pressing the masking tape back down.


Then I noticed one of the points was not going all the way over, this was traced to the wire-in-tube under the baseboard flexing too much, and taking up the motion. Sticking a piece of foam-core board alongside the tube to hold it fixed that, with a small adjustment to the wire to ensure the point blades moved fully from side to side.

With that fixed I turned on the power - to find a dead short. So I spent over an hour trying to trace the cause, which is surprising for such a small layout. Eventually after much disconnecting of wires from terminal blocks under the board, and poking with a test meter, I traced the short to this point - the moving blade had shuffled along far enough to touch the fixed rail where circled below. As the blade is the same polarity as the adjacent stock rail, but the fixed rails around the frog are switched with the point movement, a short occurred when the point is set as shown. The fix for now was to push a Stanley knife blade into the gap forcing the blade away from the fixed rail - but I really should think of a way to stop it happening again.


After all that a wire came loose from a switch - possibly due to the test-meter poking - but a dab from the soldering iron fixed that.

So finally I got to test the layout, and of course the stock. The photo below shows my entire O14 collection, although the Lister and O&K on the centre track tend to be kept in reserve. They are very low geared so slow and noisy, but in any case the two Hunslets are prototypical. The blue Hunslet needed a few droplets of oil on the worm gears to get it running smoothly, although it is never the smoothest of mechanisms and has a jerky start/stop. However once the rails had been given a new rub of graphite all the locos were found to be running fine.


So after somewhat more effort than I had envisaged, Thakeham is now ready for exhibition.
Wednesday, 14 November 2018

Thakeham in BRM

Thakeham features in December's British Railway Modelling magazine


They've done a good job of presenting the layout feature, with some large photos. I'm rather pleased that my photography was up to full-page prints!


It's an excellent issue for Narrow Gauge and Industrial enthusiasts, with a feature on Chris Donoghue's Compass Point in 009, an Emmet-style GN15 layout, and Six Quarters - a cracking little industrial layout in OO by Oly Turner.

Monday, 22 January 2018

Thakeham Hudson Hunslet article

In print again!

Thakenham

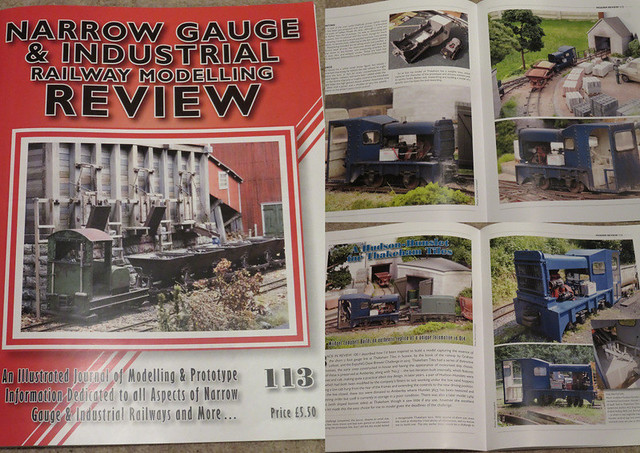
The latest issue of Narrow Gauge & Industrial Railway Modelling Review has my article on building the Hudson Hunslet Diesel - a model of the prototype used at Thakeham. It's always an honour when my work is worthy of making it into print, and especially a magazine featuring such high quality modelling as this one. The editor, Roy C Link, has done a great job of presenting the article, and the rest of the magazine has some top class articles too.

IMG_1713

Tuesday, 14 March 2017

Preparing Thakeham for Lancing

Just a few days to go until the Sussex Downs 009 group show at Lancing. Since most layouts there are 009, HOe or similar, though there is an O-16.5 layout, we thought we'd increase the range of NG scale/gauge combinations if I brought Thakeham. Plus, it has local interest. So this week it has been retrieved from the loft and checked over, just a little loco servicing to get attention and it will be packed up ready for Saturday.

IMG_2491

IMG_2492

IMG_2493

There will be lots of excellent layouts as well!  Full details of the exhibition are in the last post, so hope to see you there.

Sunday, 30 October 2016

EXPO NG 2016 - The Layouts

29_IMG_1858

Another EXPO NG, and as usual, a great day. Thakeham ran without problems, which is always a relief, and received many nice comments. I'd been concerned my son wouldn't be up to helping out, as he'd been suffering a rotten cold, but fortunately he was sufficiently recovered to come, and again was a great help with operating the layout - which meant I got time to look around in breaks between operating. At least at EXPO operating never got too monotonous as there was often someone to talk to, so thanks to those readers who introduced themselves (which just proves there are readers too!).

The show had many great layouts - of which a few are shown below - but also some of the best trade support of any show, for narrow gauge interests. I did find time to pick up a few bits and bobs that will make their way into future posts I'm sure!

23_IMG_1761

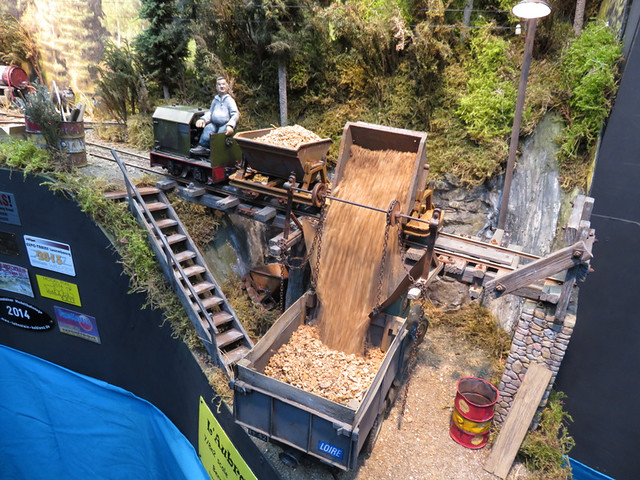
My son's favourite layout - and probably mine too - was L'Aubraie (7/8" scale, 45mm gauge) by Bernard Junk. It featured a working excavator to fill wagons, which were then tipped into a waiting lorry...

23_IMG_1762

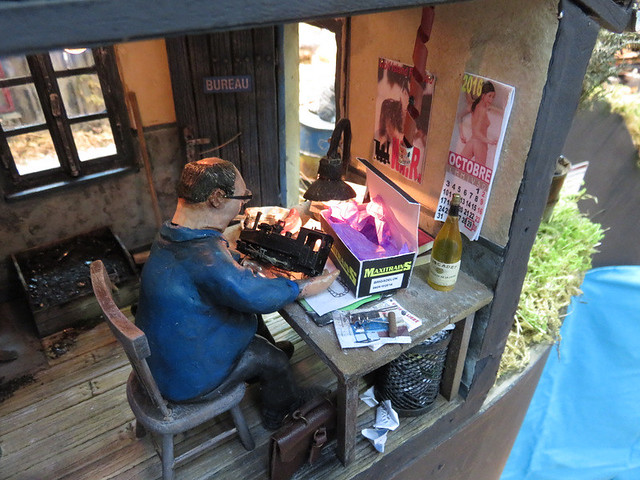
However it was the incredible detail that made the layout stand out, and that was done with a level of humour...

23_IMG_1724

09_IMG_1721

The Corn Mill (009) by Henk Wust, Derk Huisman, and John & Jane Jacobs, had impressive scenery.

35_IMG_1753

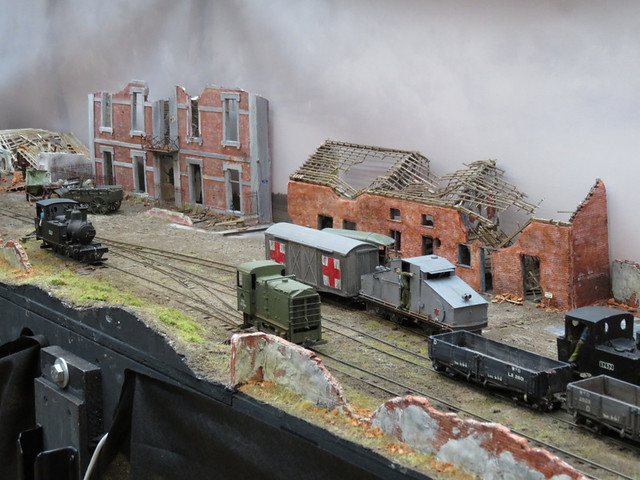
Up The Line (O-16.5) by Kevin Hughes was a detailed and atmospheric depiction of the War Dept Light Railways of the Western Front in WW1.

48_IMG_1781

P'tit Train se la Haute Somme (009) by the Association des Modelistes d'Amiens Longueau is a model of the line of that name in North-East France. Impressively presented, it was like a series of paintings, but the trains moved.

50a_IMG_1823

Grindley Brook Wharf (009) by Tim Ellis is already a favourite of mine, and deserving winner of the Reinier Hendriksen trophy for best freelance layout.

I could go on, but I'll overload this post. So do browse the 70 photos I've put in an album for more quality narrow-gauge inspiration! As for the Dave Brewer Challenge, well that was almost an exhibition in itself, so I'll come back to the entries in another post!

Friday, 28 October 2016

Thakeham Hunslet and preparing Thakeham for the return to EXPO

So last night, after some burning of midnight oil over the last 3 weeks, I completed the Hudson Hunslet.

IMG_1717

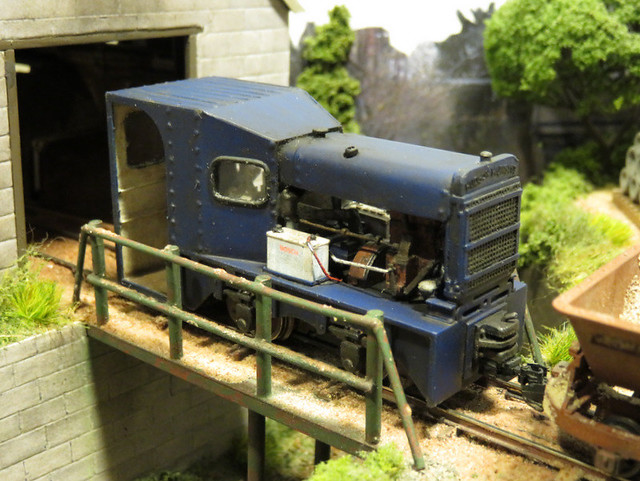
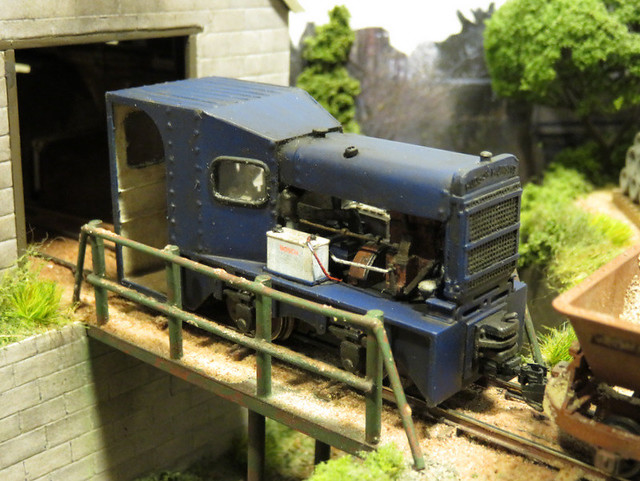
The last week has been painting and weathering - which I'll come back to in another post. The blue came out a little darker than I expected, but looks good, and I'm happy the loco is recognisable as the unique Thakeham example!

IMG_1713

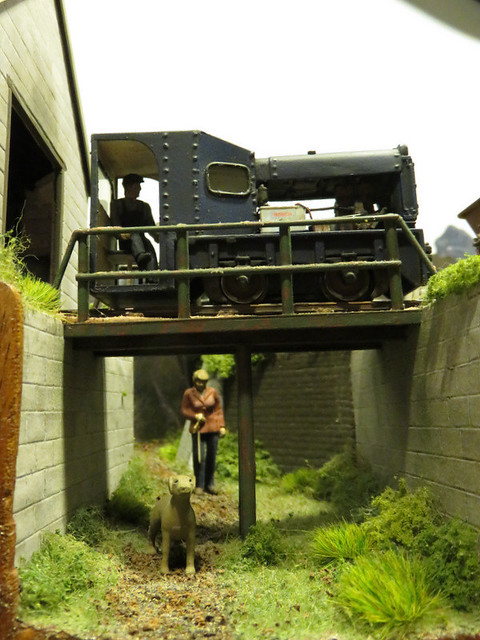
The layout was of course completed years ago, but I have still made some minor changes. For example the old man walking his dog didn't really seem to look at home, and in dark clothes was easy to miss. I've since found this plastic figure, which I've painted up in brighter colours and equipped with a dog lead (brown paper!), I think she looks much more natural.

IMG_1711

I also wasn't really happy with the the tree at the front of the layout - a home-made effort, the shape of the trunk wasn't right. For speed, and frankly because it looked better than any I've made, I bought one at the Uckfield show to take centre-stage. My tree was moved in front of the engine shed, where it seemed more at home, and the weedy trunk and branches less obvious. While at it I've improved a few bushes and added some grass tufts.

IMG_1715

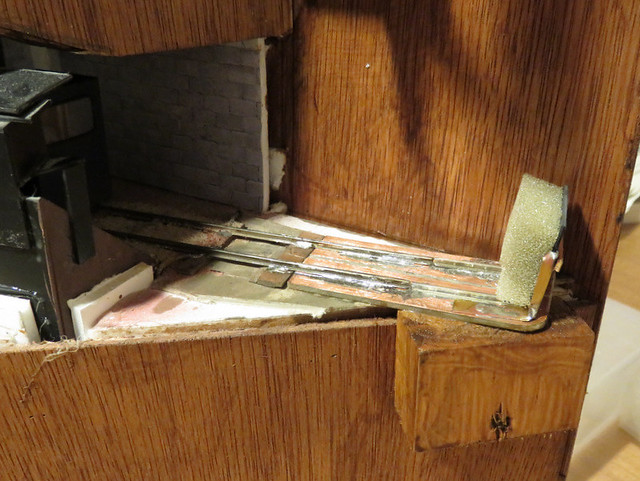
While building the loco I carried out some clearance tests - fortunately the cab missed the bridge handrails (not by much), and fitted the buildings. Some plastic was removed from the tipping mechanism, but the main issue was the long overhang of the cab meant the wagons stopped short of the tipping dock. So the track needed extending about an inch. The rails were unsoldered to slew them parallel to the "wing" of the layout, the last sleeper removed, and a piece of copper-clad inserted extending all the way to the end of the new additional length. I've soldered rails on too, though I'm not sure they are needed - it's the overhang that's the issue. A new and more substantial buffer stop was soldered up and a foam block protects the loco. The copper-clad track is self-supporting but I added a block of wood to protect it.

IMG_1714

I've even made a few extra sand "loads" for the wagons, and adjusted the collecting bin for them. So other than a few last-minute checks and packing up, I'm ready for EXPO-NG tomorrow. If you're there do say hello, you'll find me opposite Narrow Planet, just round to the left as you enter the hall.

Friday, 21 October 2016

Thakeham Hunslet - Adding The Details

After a few long evenings I've finished the Thakeham Hunslet ready for painting.

IMG_1708

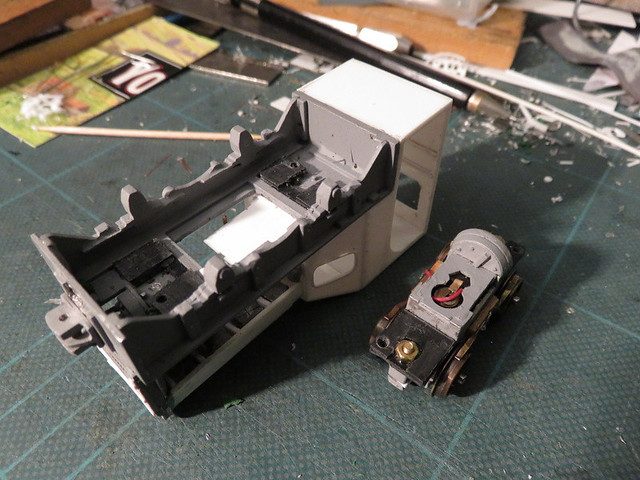
One problem I had was fixing the chassis. At first it was a tight fit where the motor fits through the footplate, but that was working loose and the bolts that held the chassis together were holding the footplate up, so it wasn't really held securely. I made up plastic ends to the chassis that are held on by the bolts as well as epoxy, these not only provide a platform for the body but have "wings" that allow holes for securing screws. Under the footplate more plastic was added to rest on them, and allowed a couple of self-tapping screws to take hold. Result, it may be crude but the chassis is secure!

IMG_1703

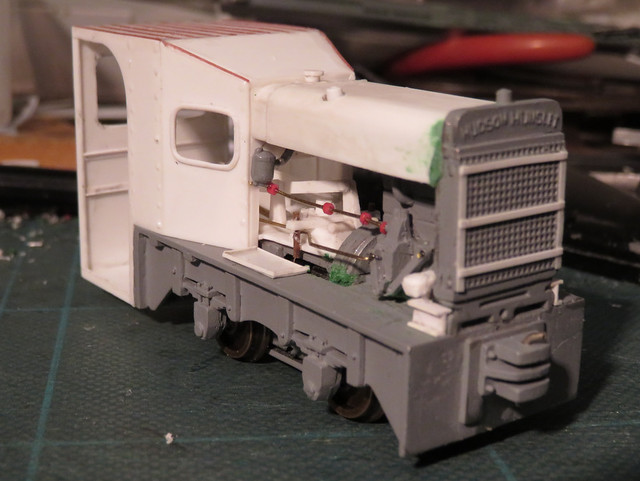
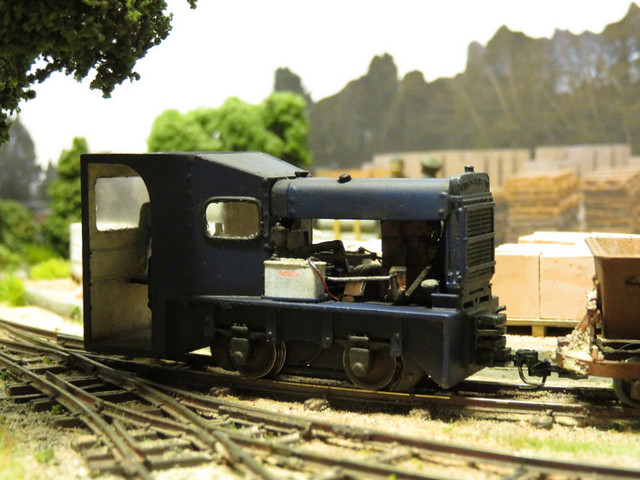
Up top, I've got rather carried away with the detailing. Having such good reference photos it was hard not to, and with such an open bonnet area the detail can be seen, so bits of plastic, microstrip, wire, etc. were used to represent the visible parts. The castings for the radiator, engine, clutch, fuel filter, and coupling block have been used from the kit, but the bonnet had to be made to fit.

IMG_1706

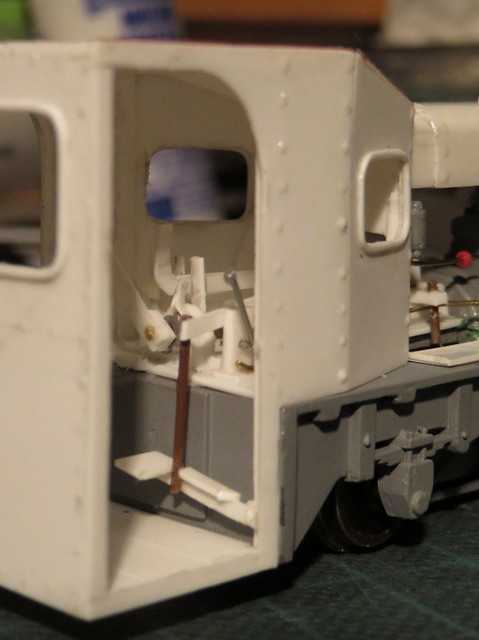
I even reproduced the levers and rods that form the modified cab controls. The kit does include the controls for the "standard" loco as built, but the modified Thakeham loco controls were easier to make from plastic and wire. So the driver has hand throttle, clutch foot pedal, two levers to select gears and a ratchet lever for the hand brake.

IMG_1707

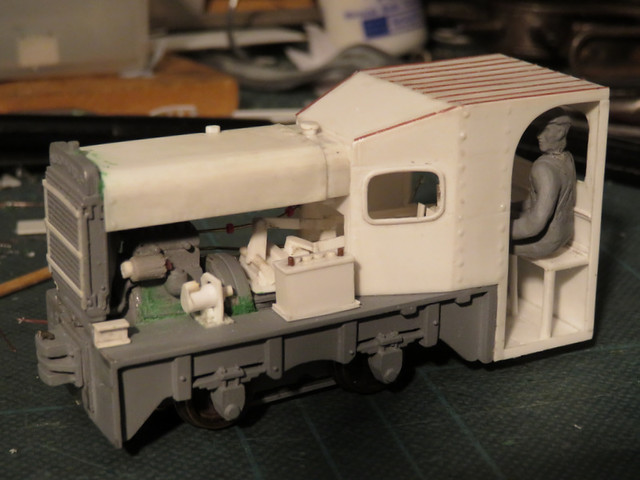
Engine bay details added include the starter, alternator, and batteries, though the latter are separate for ease of painting. I've added some rivets from glue, though they may be a bit over-size. They aren't too obvious though, like those on the prototype.

Last week I was discussing the model with Chris Ford, and whether I could find a suitable driver. The next day he passed me some figures. As he'd predicted, the plastic figure was somewhat of a midget, but this whitemetal chap looks just right - though being so far from the wheelbase I was worried about weight distribution. In fact the engine, radiator, coupling and other castings make the front so heavy (OK the bonnet is stuffed with lead too) that the addition of the driver, even so far back, nicely puts the centre of gravity between the wheels. He's got a pin up is posterior though, to make sure he doesn't slip off the seat!
Wednesday, 12 October 2016

Thakeham Hunslet Progress

Earlier in the year I mentioned starting on a model of one of the Thakeham Hudson Hunslets, using the Nonnesminstre kit as a basis. I'd prepared a motor bogie, and assembled the frames and footplate. In July I managed to take measurements of the prototype thanks to the helpful folks at Amberley.

Then, out of the blue, I was asked if I could take Thakeham Tiles to EXPO-NG as another layout had pulled out. Since Thakeham was built for the EXPO Dave Brewer challenge three years ago I'm delighted that the organisers think it worthy of showing again, in it's own right, as it were. However it struck me that if I was going to build a Thakeham loco to run on the layout, now is the time!

IMG_1644

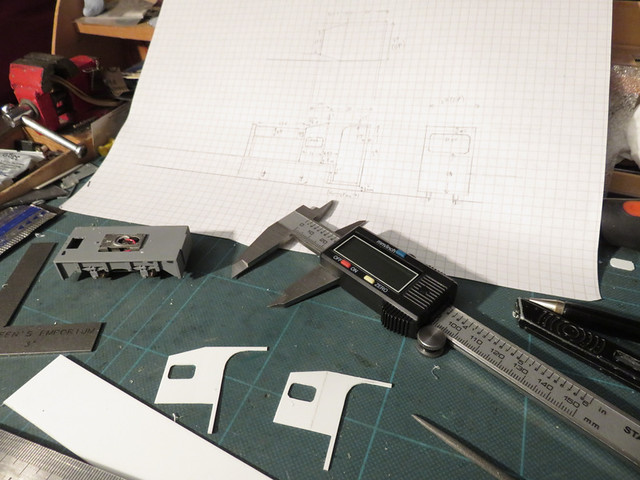
So the dimensions were translated to a scale drawing, albeit at 1:40 scale to match the kit (slightly over scale for 1:43) and a couple of tweeks to match the kit frames. Then it was time to start cutting plasicard to see if I could get the cab looking right. I find calipers invaluable for marking up plastic; as well as setting and transferring measurements, they can score a faint mark which with pencil rubbed in, becomes the cutting guide.

IMG_1646

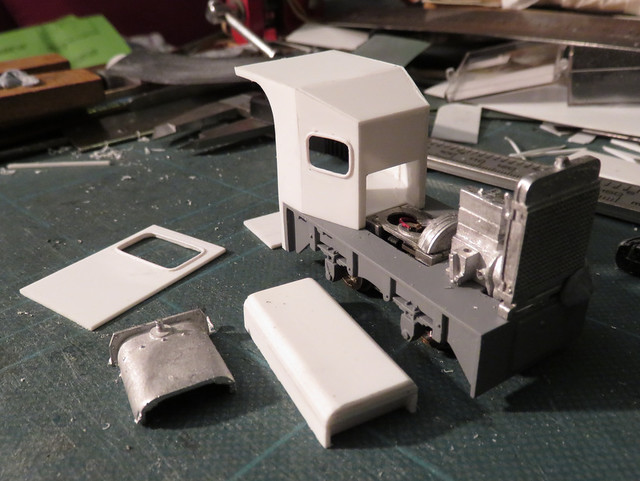
The cab sides are 20 thou plastic with the roof, floor, front, and rear from 40 thou. The windows were a challenge, the beading is formed from micostrip, which is then shaped with a fine blade and emery paper to give a rounded appearance. It's a little over-scale but they are a distinctive feature so needed to be present. Glazing has been cut to fit, and put away for later. Getting the tapered front to the cab to fit together was tricky too.

IMG_1648

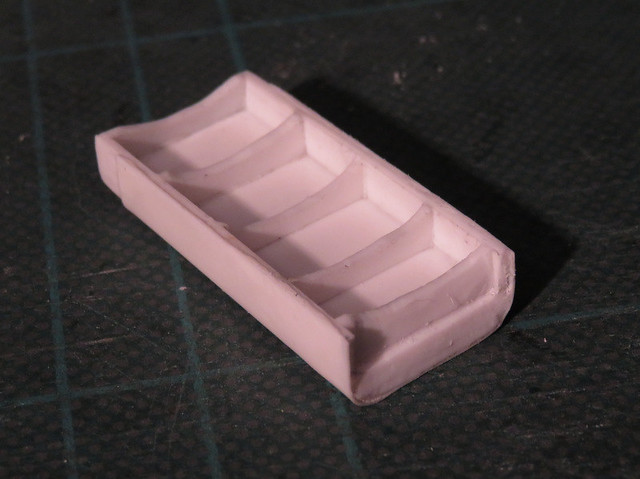
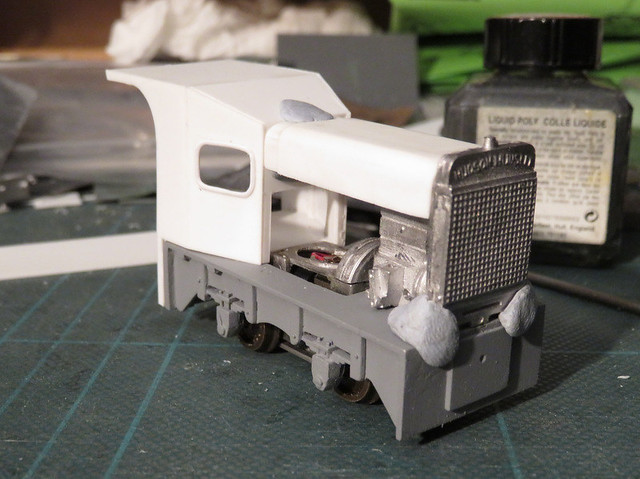
The next challenge is the bonnet. The prototype has an extended bonnet from the original loco, so the kit component wouldn't work. An inverted tray was made from 40 thou plastic, with a triple layer top for shaping, and internal bracing. Once the curve looked right, a sheet of 10 thou plastic was fitted over, warm water helping the shaping. As with the prototype this finishes short of the cab, sitting on the fuel tank.

IMG_1647

So the outline shape comes together, so far it looks OK but there are a lot of details to add. Nothing is assembled yet.

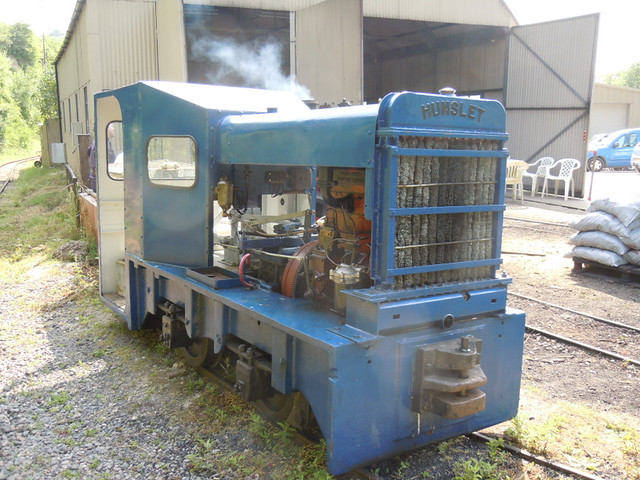
As a reminder, here's the prototype. You can see how open the internals are, with just some linkages and cables filling the space behind the engine, which adds to the challenge of a convincing model!

DSCN5655

Monday, 4 April 2016

Thakeham at Steyning

It was a short drive over the sunny South Downs hills to Steyning, where Thakeham was quickly set up at the Wealden Railway Group show. With the information board I think it made an attractive display, and being shown just a few miles from Thakeham a number of visitors were interested in the local connection. As usual, kids were fascinated by the "unloading" of the skips, and a few even had a go pushing the lever. I'm pleased to report the layout performed without issues.
IMG_0371

This year the show was held in a larger hall than before, which meant more space in the aisles (which have previously been somewhat cosy!), and some larger layouts, but all fitted the club motto of "Layouts you can live with", that is they are home-built and kept in modest spaces. Thakeham certainly fits that description...

IMG_0408

So does Simon Hargrave's tiny folding 009 layout, surely an answer to anyone believing they don't have space for a layout! It is superbly modelled and surprisingly uncluttered, given it's modest size.

IMG_0377

This nicely done industrial layout was shown by John Bruce, who I know better for small 009 layouts.

IMG_0411

Thunder's Hill was one of the larger layouts, a fine exercise in 3mm scale, modelled to a high standard. The station is reminiscent of the Sussex style, including those of the Bluebell Railway.

That's just a taster, all the layouts were excellent, and you can see more photos here. As usual the relaxed show format - with a free hot drink for visitors - made for a friendly show.