Showing posts with label Paul Windle. Show all posts

Sunday, 3 September 2023

Bagnall and Kerr Stuart completed

Both the Narrow Planet little Bagnall kit and the Paul Windle Kerr Stuart refurbishment are now finished. I decided to break out the airbrush using Vallejo mid green, of course I had to clean the airbrush before use as my previous clean clearly wasn't good enough. I struggled to get a good finish to start with so the first coat was perhaps a little orange-peely, but in the end got a reasonable finish. 


Black was also Vallejo acrylic but brush painted, the red buffer beams used cheap artists acrylic - a terrible idea, couldn't get a good finish, will keep those for scenic work only I think! Detail painting was with enamels as I have a bigger selection of colours. A well-thinned enamel wash was used for weathering, aiming for an oily clean finish that could reflect a well used but cared for loco in industrial use or even preservation, neither prisine nor decreptit, supported by some subtle weathering powder for coal dust and ash. Finally, a coat of Testors Dullcote toned the lot down. The Bagnall cylinders looka little shiny not having been Dullcoted. 


I'd wondered how to fix the Bagnall to its chassis, then noticed the keeper plate protrudes past the rear of the chassis block and had a screw hole, presumably to fix the original body. Of course, this keeper plate blocked the hole I needed to screw the coupling in, and the hole in the keeper plate was in the wrong place. A few moments with a burr in the dremel opened the hole out rearwards along with a countersink, allowing the Microtrains screw to pass through the keeper plate, body, coupling, and into the body again, securing them all together. 


The loco is tiny, so the crew were recuited from the HO scale Faller truck drivers pack - and still don't really fit, although a cab full of motor is forcing them half out the doorways anyway. The drinks can roof is suitably thin and doesn't look like a replacement, but I can see paint wearing off the brass steps pretty soon! A little coal in the bunker and glazing in the window and she is ready to go. 


A superb slow runner, she looks right at home on Loctern Quay where I expect she'll take up shunter duties, today I've been "testing" it including for reliable coupling operation. 


The Kerr Stuart Haig crew are from the Dapol recruitment agency. Not sure where the bits on the side tanks came from, amazing what shows up in a photograph. In the flesh, the new paint job has really tidied up the tatty body, and I think the green looks better than the black. 


Once warm the running is fair, but not as good as the looks sadly, with both surging related to the motor mount, and a tendency to stall which may be failings in the pick-ups or the wobbly wheels due to the stub axles. I expect it will see duty on Slugworth and perhaps Hexworthy but not Loctern Quay, which is why I didn't bother to change the couplings. Maybe one day I'll have a brainwave of how to improve the motor mount and pick-ups, but for £5 and a little work I'm pretty pleased!


Tuesday, 1 August 2023

Bagnall and Kerr Stuart detailing and ready for painting

With the chassis now sorted, I could crack on with the build of the little Narrow Planet Bagnall kit. I'd already primed the 3D printed body and cleaned up any lines (mainly the boiler and smokebox), and primed the etched parts on the fret too. I decided to fit Microtrains couplings, so cut square holes in the body print in the appropriate places, and rather than try and modify the etched buffer beams, I cut new ones from 20-thou plasticard using the etched one as a template. These and the etched tank sides and cab front and rear were superglued in place, and the chimney, dome and clack valves added too. The wire cab-side handrail was added as per the instructions.


So far all pretty straightforward, but it looked rather bland. I dug out my copy of The Rye and Camber Tramway (Laurie Cooksey) and some pictures of Polar Bear for inspiration for details. I added some wire pipework to the clack valves, probably not correct but impressionistic, plus a blower pipe on the left side, and a representation of a reversing lever on right. I made a crude impression of a lubricator from a sewing pin and a slice of wire insulation to fit behind the chimney, and a whistle from bits of plasticard and plastic rod to fit to the front of the cab. I use a piece of fine wire to make an impression of the smokebox door handle, it's not great but looked better than nothing. 


I also added some cab steps folded up from brass, Camber and Polar Bear don't have them but the slightly larger Victoria did, they should have a "waisted" vertical but by cutting skills don't run to that. The chassis slide bars didn't have a vertical support at their rear end, so I made one from 20 thou black plastic, a fiddly job! You can see I've filled any gaps with green Squadron Putty, including where the etched cab front and rear meet the body. The footplate had developed a slight curve at the front and in attempting to straighten it while fitting the front bufferbeam I broke the corner off, fortunately it superglued neatly in place and the filler hid the gap. The loco body then got another coat of primer, another rub back and filler touch-up, and a final coat of primer.


The Paul Windle Kerr-Stuart has also had some attention. The cab rear looked to have been dislodged and glued back in place, or slightly out of place. I have cleaned up the glue as much as possible, relocated the uprights and supergued them. The body was cleaned up with a damp brush, and even scraping the accumulated crud with a screwdriver, to clean it up ready for painting. The tank sides were lightly rubbed down with fine emery paper where the paint had become scuffed. 

The sanding gear operating rods were repaired. I also added some cab side handrails as they seemed to be lacking, but otherwise the detailing looked fine. It was then sent for a coat of primer, which showed up a couple of gaps needing a little filler, and some spots needing a rub-down, before a final coat of primer.

Both loco bodies are now ready for painting...

Wednesday, 30 November 2016

Uckfield Show 2016

A little while back - well, 6 weeks ago - I went to the Uckfield Model Railway Exhibition. This, as I discovered a few years ago, is always an excellent show with good quality layouts and a range of useful traders.

IMG_1698

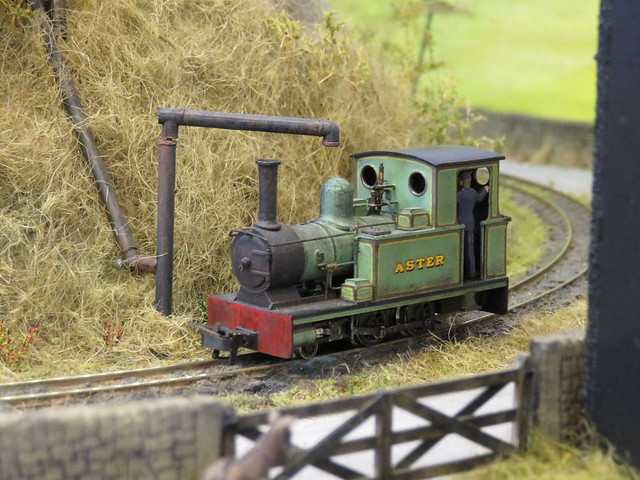
Star of the show for me was High Stamley (009) by Paul Windle. Paul is well known as a master builder of 009 locos (I have a few in my collection), but also builds superb layouts. This one may not have a lot in it, but is full of atmosphere - here the loco sits along side the road, the water crane swings out.

IMG_1650

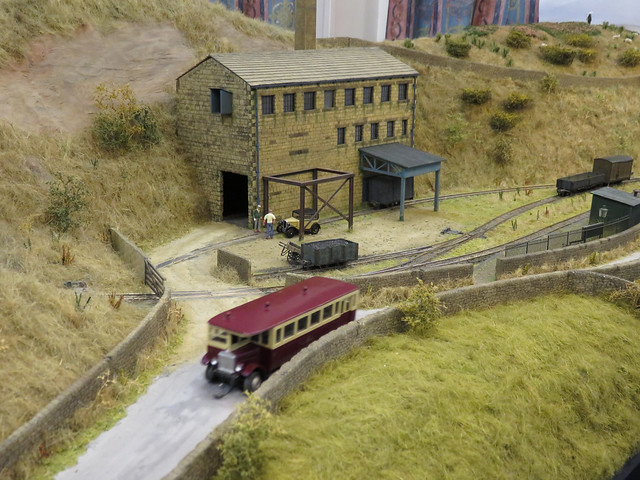
Even the road vehicles operate on High Stamley - that's an idea I'd like to use one day.

IMG_1681

Castlederg (0012) by Andy Cundick is a model of the station of the Castlederg and Victoria Bridge Tramway in Ireland. A fine example of prototype modelling, and another side of Narrow Gauge modelling.

IMG_1662

I do like Portwenn (O-16.5), now owned by Si King - and good to see it in safe hands.

IMG_1668

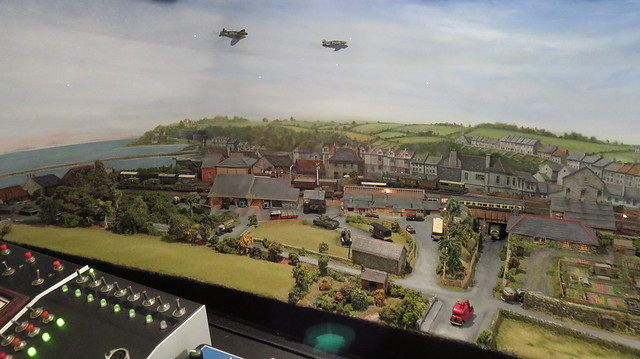
A stand-out layout was Brixham Bay (N) by Kevin & Judith Cartwright. To be honest the trains are a small part of the well presented layout, the buildings and backscene are superb and detailing - including the planes overhead - really sets the WWII scene. It even gets dark - with fibre-optic stars!

IMG_1687

Finally Wadebridge (2mm Finescale) by John Greenwood, although incomplete it looks great, and clearly will be of a consistently high standard despite the size.

That's just a selection - there are a few more photos to enjoy here. But I'm sure it gives a taste of the quality of the layouts.

Wednesday, 2 June 2010

A Naming Ceremony

A little over a year ago my latest Paul Windle loco arrived, just a couple of days after my daughter. It seemed like a loco that needed a name, and my daughter's name "Lucy Ann" just seemed to fit, so my wife suggested I get some name-plates. Well, suitable bespoke name-plates proved hard to come by and not cheap, so when a freind started offering etched nameplates via the NGRM forum I was delighted! So here is Lucy Ann, along with a reasonable representation of Hunslet style works plates too!


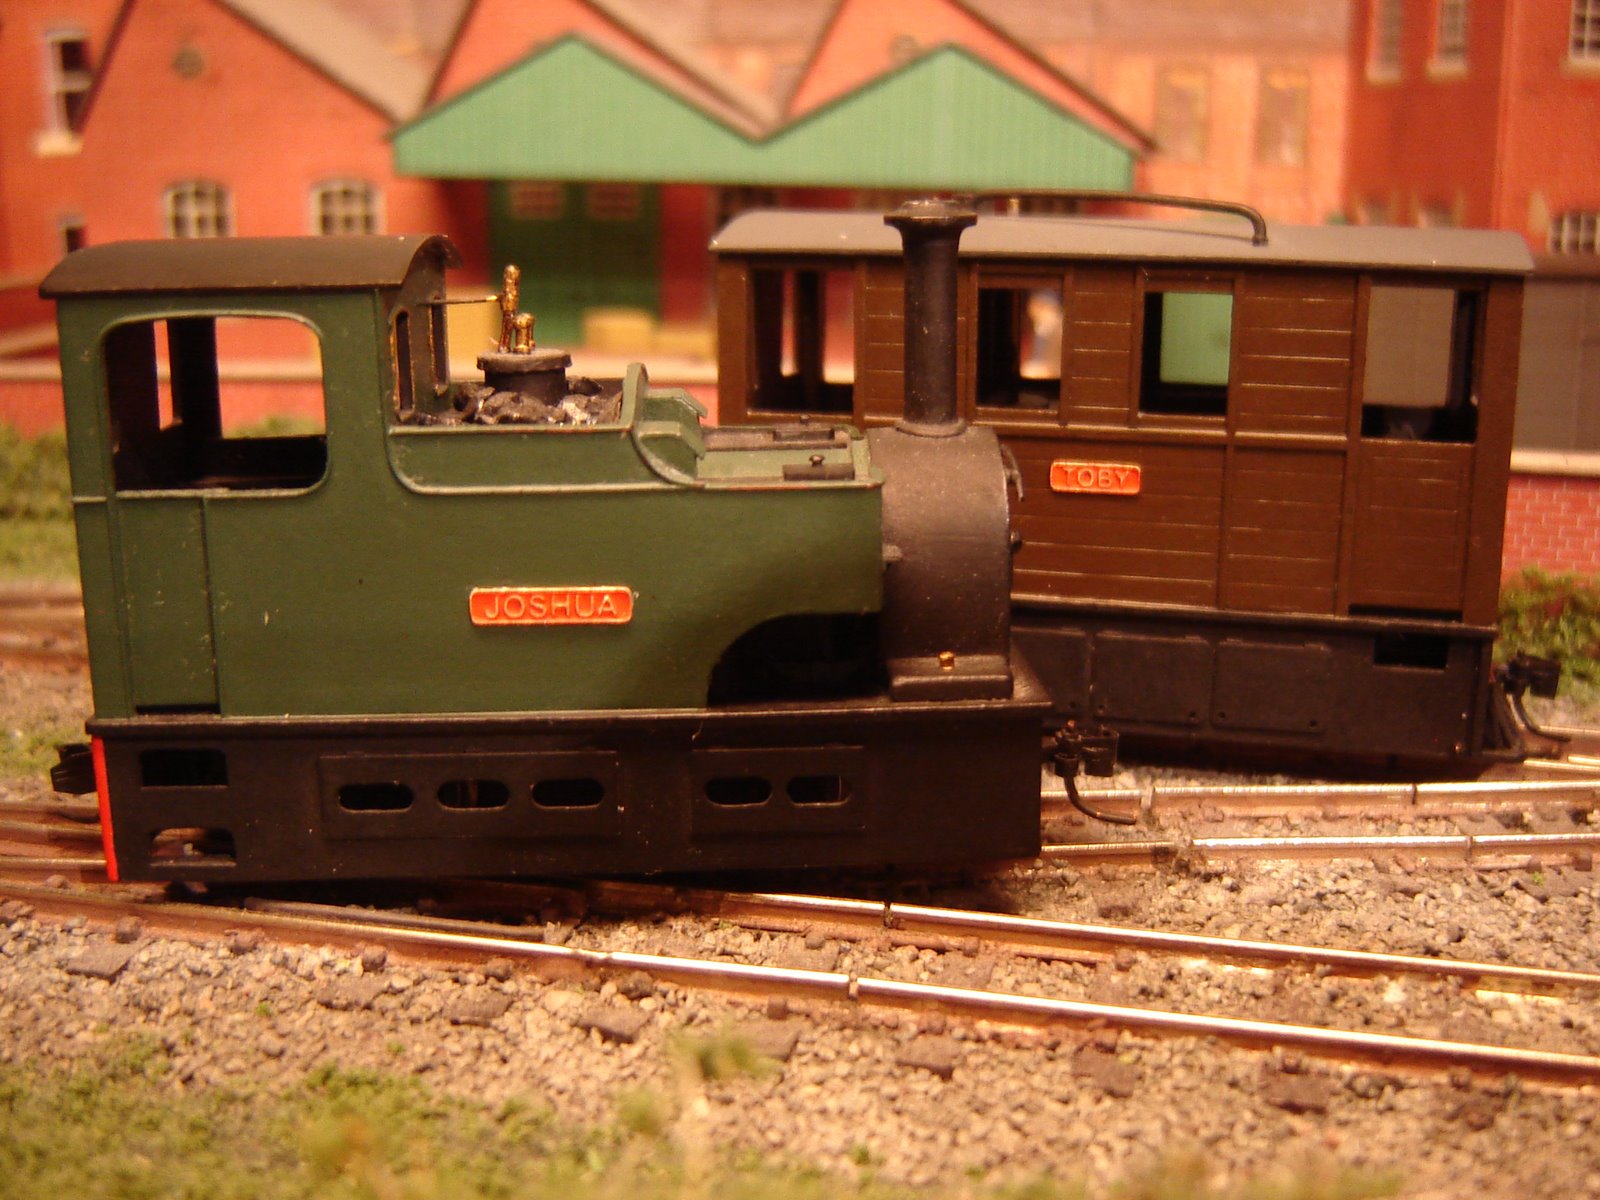
While I was at it, in the interest of sibling equality, I got a set of "Joshua" plates, which seemed to fit the Sharp-Stewart tram nicely. And as for the LNER style tram loco, well that just needed the name "Toby"! Both are also Paul Windle models. The plates are finely etched, but do need a background colour. I chose red, just Humbrol matt enamel, and after it had dried I removed the paint from the raised letters and edge with a scalpel blade, and by rubbing gently over some fine wet-and-dry. I lined them up on the side of the loco's against masking tape to get them level and central, and stuck them on with a little PVA, on the basis that it should provide sufficient bond without damaging the paint in case of excess.

Considering that the name plates are just 2mm (a scale 6 inches of course) high, they are very sharp and really add to the locos' appearance, but I am not sure the photos do them justice. If you are interested you can find out more and order your own from
Narrow Planet, who also do works plates and are planning other related products. Now I'm sure I have other loco's in need of names ...

Posted by Picasa

Wednesday, 22 April 2009

Another new arrival!

OK, so it isn't anywhere as significant as the last post, but a small parcel arrived in the post today (along with various parcels of little pink dresses etc.) containing the Paul Windle Hunslet loco I ordered at EXPONG back in October (actually it arrived earlier than expected, Paul had suggested May). And what a super little loco it is, with a rather elegant outline. Here's a photo of it pulling it's first passenger train out of Awngate. 

Paul suggests that some ballast would improve running, so I shall have to fit some lead, but it does seem to run smoothly. Also, like several of my loco's, a crew wouldn't go amis! However Paul has even fitted the microtrains couplers already, so it is literally "ready-to-run", just as well given my available modelling time at the moment!

Posted by Picasa