Tuesday 31 January 2017

Disaster Recovery

Remember back in September, I was struggling with the valve gear on the WD Hunslet build? At the time I thought I'd nearly got there, but soon realised I hadn't. Whatever I did the loco didn't run smoothly, or stopped with some difficult to find bind. After several attempts at assembly and some useful advice via the NGRM forum, I discovered:
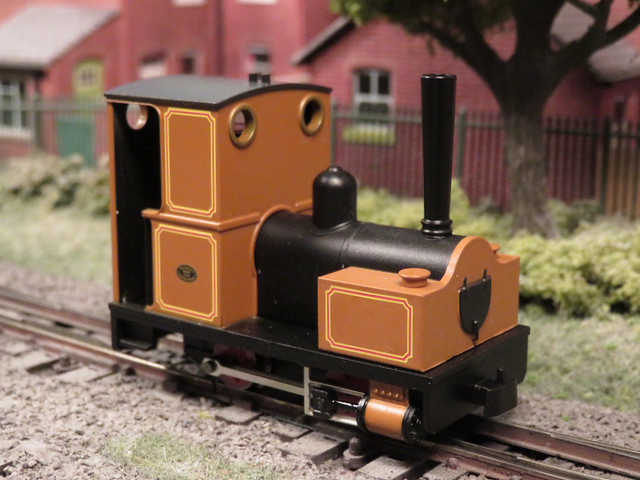
  1. The centre driving wheels were fractionally smaller than the others. This works fine, except that I'd managed to swap them to be the front set during the rebuild - leading to the loco rocking and poor pick-up problems
  2. The axles are linked by idler gears, with a little slack. However the wheels are linked with coupling rods, with a little slack. This makes it extremely difficult to assemble the chassis with the wheels quartered and the idler gears in place - and if one wheel is one tooth out, it may look OK but will bind
Just as I thought I'd resolved these issues and got the valve gear assembled correctly and started to test run the chassis, the con-rod and valve gear disconnected itself on one side. It seems that after the umpteenth assembly the return crank/crank pin has snapped at the crank pin, and had almost sheered across the crank arm too. This appears to be a cast part, and clearly not in a strong material, though to be fair it's a second hand chassis with lots of butchering having taken place.

IMG_2033

This left me stuck and somewhat down about the project. After all it would be a pretty difficult spare part to get, and really meant a complete set of valve gear was needed, so the project was shelved. However. a week or so back I was given another chassis by Martin Collins at a Sussex Downs group meeting. It was sans pony trucks, and he said it didn't run well (though he may have been trying to make me feel better about cannibalising it), but it did have complete valve gear, so I set about the transplant.

IMG_1643

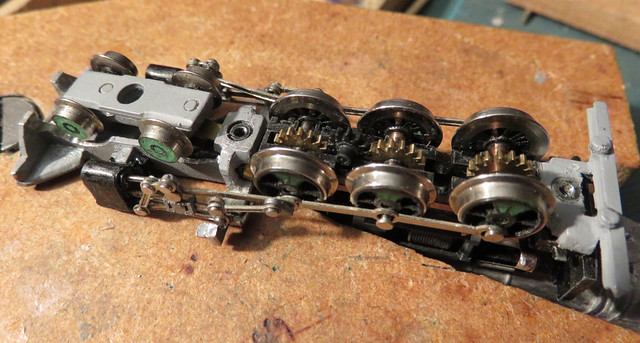
The first challenge was reassembling the chassis after removing the wheels to get the broken crank pin out. After the previous attempts, this time I knew I had to get the wheels and gears in mesh so the crank-pins aligned before fitting the coupling-rods. Sounds easy, but there's enough slop in the gears to make it not quite clear when they are aligned, while moving one axle meant one of the other axles or idler gears popping out - still, it only took a couple of hours this time.

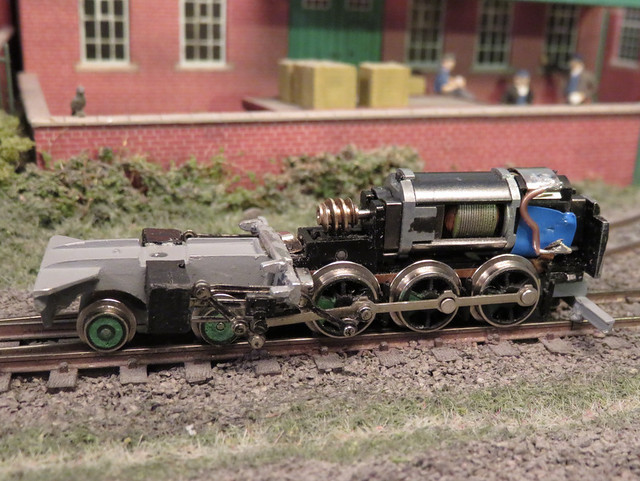
I noticed a couple of differences with the replacement chassis, apart from the motor being mounted vertically. The return crank/pin was made from the same stuff as the rest of the valve gear, possibly steel, and not cast from mazak or cheese or something. Also the eccentric rod that attached to the return crank was, at it's other end, slotted to move back and forth on a pin, rather than being jointed to a representation of the rocking die link. That saves a piece and a riveted joint, while the machined crank pin was probably more robust, so I guess this is a later "improved" (cheaper and stronger) version of the chassis.

IMG_2179

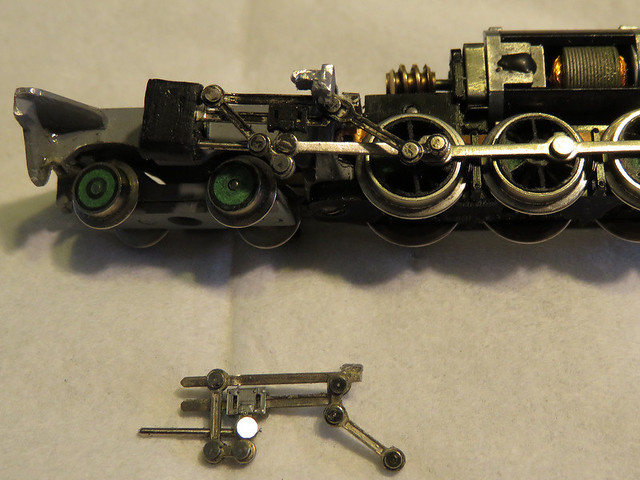
Here we have the new valve gear fitted, with the old gear below - note the extra link top right. But I still had binding, so much adjustment was carried out with the motor disconnected from the gears, rolling the chassis to detect any issues, and after some time I identified several causes:
  1. The slotted end of the eccentric rod could hit the crosshead if the piston was at the rear of its travel while the return crank was at its closest point of rotation. This meant setting the position of the return crank so the eccentric rod was further back, and tweaking the angle of the end of the slide bar so they didn't hit..
  2. The slotted end of the eccentric rod could hit the whitemetal cast outrigger that supports the valve gear at the upward end of it's movement. Careful filing of the casting was required, it now being rather thin at that location, along with care in positioning the valve gear assembly.
  3. If the slide rods are too far forward the slotted eccentric rod came to the end of it's travel and jammed, too far back and as well as that the wiggly bit (technical term) hanging from the crosshead pulled taut and jammed
IMG_2182

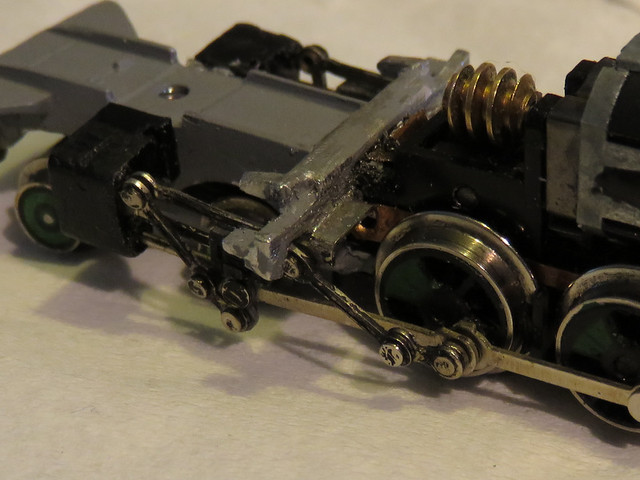
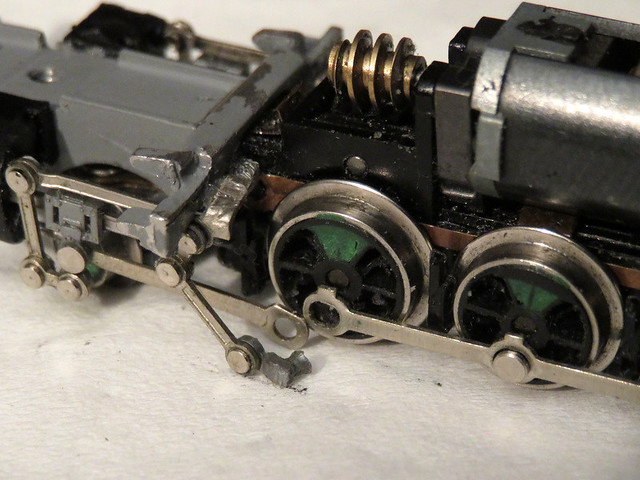
Close-up you can see how the bracket at the end of the slide bars sits on a ledge at the back of the cast cross-member, with the filed out slot for the slotted eccentric rod. Compare to the photo at the top of the page with the "original" valve gear.

IMG_2178

Finally I have an assembled chassis that appears to work without binding. It could do with some lubrication and extra weight seems to help the pick-ups,and of course the motor grinds away in the Minitrix way, but I'm hopeful I'm back on track...

Sunday 29 January 2017

A long time ago, in a galaxy far, far away...

Last summer we visited Disneyland Paris on our summer family holiday. While the kids were raiding the gift shop I found myself a toy - an etched kit for the Star Wars Millennium Falcon! The format of this Metal Earth kit will be familiar to Railway Modellers, but this isn't brass or nickel silver, but steel.

IMG_2165

I got around to assembling it just before Christmas, and was impressed with the design of the kit. No glue or solder is required, each piece is attached with tiny tabs fitting into slots, and either bent over or twisted to secure it. The accuracy of the pieces is superb, the steel is strong but bends easily, but assembly is fiddly. While the exploded diagram instructions are very good they need to be followed carefully or it is easy to go wrong, and many of the parts are very small - the whole model is only about 2 inches long.

IMG_2167

Then, for Christmas, my Son gave me another kit from the same series, for R2D2. As with the Millennium Falcon the likeness and detail is excellent, and the kit is well made and designed, though I think this one was even more fiddly. Each took around 4 evenings to complete, taking things slowly.

IMG_2164

A diversion from Railway Modelling, but rather fun and resulting in nice shiny display models.

Monday 16 January 2017

Bognor Show

Last Saturday I took my son over to Felpham near Bognor, for the Bognor Regis MRC exhibition. It's all you'd expect for a local club show, with a good selection of layouts, though my favourites were of course the narrow gauge ones.

IMG_2148

Tokar is a 009 layout by Peter White, set unusually in the desert in 1930's Sudan. This view of an oasis really sets the scene.

IMG_2147

At the other end a busy scene in a desert town is full of life. An interesting and fun layout in a small space.

IMG_2162

This O-16.5 layout I can't find in the program, but the station is named Nore Wood, and has some rather nice scenic work and buildings.

IMG_2151

Not narrow gauge, but I liked this little train on a diorama - I think by one of the club's junior members. Very Titfield Thunderbolt, and nice weathering.

The show had good trade support too; my son managed to find a second hand Diesel loco (well priced) to spend his Christmas money on, while I managed to spend some money with what he calls my favourite stall - locally based Squires. I must have new project plans...

Wednesday 4 January 2017

Three little engines

Modelling may have been a bit thin on the ground lately, but Christmas has brought an interesting bunch of new projects!

IMG_2143

At the back there's a EuroNG kit for an NS2 Diesel, I rode behind one of these on Holiday this year and it's a nice little loco. I already have the Minitrains chassis for it, so it will be a good runner too.

IMG_2145

Another Diesel, and like the NS2 it's a 3D print. It's a CWR model of a Hunslet as used by Royal Navy Armament Depots, a number of which have made it into preservation. This uses the Kato 4-wheel chassis, which I also received for Christmas - so this could be a quick project.

IMG_2111

Star of the show is this Minitrains Bagnall IST (inverted saddle tank). The release of this model was a bit of a surprise to me, but it has it's origins at the 009 Society convention three years ago, where there was a Minitrains-sponsored competition to build a model on a Minitrains chassis. There was a rumour that the winning model would become a production model - and indeed here we have a model of the winning model, which was built by Charlie Insley. That means it has the same compromises that Charlie made to fit the Minitrains chassis, and like many Minitrains model it isn't an accurate model of a particular prototype, but it is an attractive loco that runs very sweetly. I liked Charlie's model, and so I had to have my own! Also, I wonder if it is the first mass-produced ready-to-run 009 model?

Other railway-related presents were a few books, including one on the Corringham Light Railway, and one on industrial locos, plus a set of rust paints for weathering. So plenty of inspiration and projects for the new year.

Happy New Year to you all!