Showing posts with label 0-14. Show all posts

Monday, 2 May 2016

Motor-Bogie Rebuild

At Sparsholt I spotted this on the 7mm NGA stand:


Branded Keykits I guess it's pretty old, but it looks like a Wrightlines motor bogie, which is currently unavailable (like much of the Wrightlines range, sadly). It's essentially a Tenshodo motor bogie replacement, but with a Mashima motor mounted with it's widest dimension vertical to allow the wheels to be pushed in to 14mm gauge - very useful given the number of 7mm scale kits that utilise the Tenshodo unit. This one had crudely fitted pick-ups, mismatching bolts and a broken wire - but the motor turns when it got power.


It didn't take long to dismantle. I checked and adjusted the wheel back-to-backs, and found some M2 bolts that were a good fit - the nuts are secured with Araldite. I moved the PCB down away from likely body fitting and closer to the wheels, and attached new pick-ups from phosphor-bronze strip - which I find much springier and more effective than wire. With the motor refitted, wires reattached, and keeper plate bolted in place the unit was running.


Now I know these things can be a little fast, with relatively high gearing, but a few lumps of whitemetal on top slowed it a little. The motor seems to run quite hot too, I don't know if it could do with more airflow. However it dos occasionally stop at low speeds, seemingly at the same spot, and I think more of a mechanical bind than pick-up issues - though I can't see anything wrong with the gears. I'm hoping some running in will help.

Sunday, 27 March 2016

Thakeham comes out to play

Thakeham will be at the Wealden Railway Group exhibition next Saturday 2nd April, in Steyning. So I've retrieved it from the loft and removed it's cover to check it out. A bit of dusting and a vacuum was in order - some sawdust from fitting the cover mostly - and in some places the printed paper block-work has bubbled, but it's minimal and not normally noticeable.

IMG_0282

I've applied a fresh rubbing of graphite to the rails and test run, which revealed a mystery short circuit when the points were thrown. After some investigation it was found to be a point blade that had shifted along to touch the frog rail - this is a problem as the blade is electrically connected to the stock rail and the frog is switched. Forcing a blade into the gap shifted it back, I'm still thinking of a more permanent solution.

IMG_0295

That aside running was smooth and problem free. I will need the super-glue to a couple of details that have fallen off though. However while it was out I took the opportunity to take some photos on my new camera, using a tripod and playing with the manual settings. I'm rather pleased with how they have come out.

IMG_0300

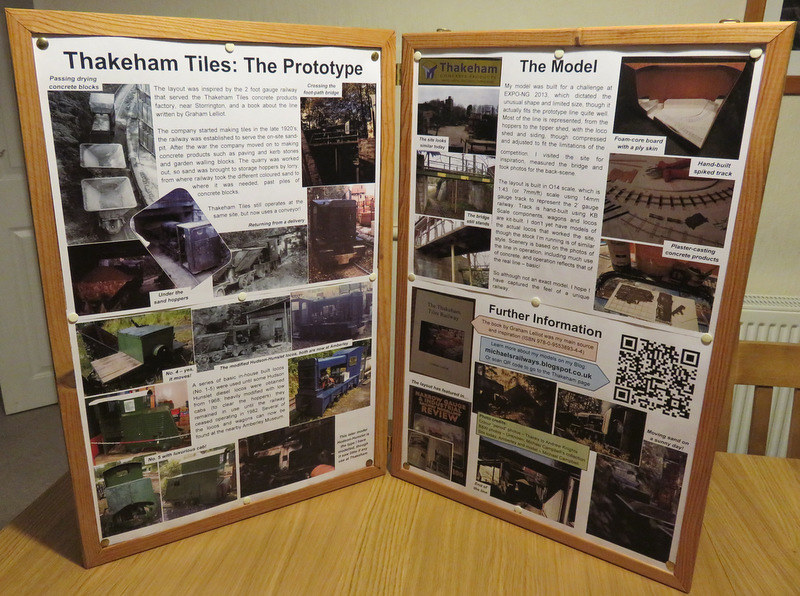
I've been asked to provide some information about the prototype and the model, and exhibition organiser Andrew Knights shared some photos he'd taken of the railway shortly before it closed, so I put together a display using them along with photos I'd taken of the locos now at Amberley, the site today, and the model under construction. The board is simply two cork-boards attached with a pair of small hinges I'd put together some time ago for something my wife was involved in - I knew it would come in useful again!

IMG_0056

If you get along to the show do say Hi...

Thursday, 4 December 2014

Point Maintenance

In-between train-set updates here's a quick post showing some maintenance on Landswood Park.

The tight kick-back siding point had failed some time ago, which didn't matter that much as it was rarely used (little can get round the corner anyway). However when one of the other points failed it was time to do some repairs. Both had failed the same way - the soldered joint between the blades and the tie-bar, a common weak spot on hand-built points.


Fortunately I had thought ahead when I built the layout and that part of the point was covered in plastic chequer-plate rather than set into clay setts. The plastic was simply eased off, exposing the joints that needed re-soldering. Once repairs were complete and tested, a little impact adhesive was used to secure the plastic back in place.

The points on Thakeham Tiles were constructed with much more thought and have pivoted joints at the both ends of each blade, so shouldn't suffer this issue, but as Landswood Park is built in a box-file there was no space underneath the board for such tricks.

Monday, 27 October 2014

EXPO Narrow Gauge 2014

So once again EXPO-NG proved to be a highlight of the year for any narrow gauge enthusiast, with a superb range of quality layouts and lots of specialist trade.

This year I was helping the Sussex Downs group with the 009 society stand, which entails a little demonstrating and a good deal of chat (I got half-way through a wagon kit, which is about right!), I got the feeling there were a lot of visitors new to 009 modelling. Most had joined the society but had the usual questions about what to buy, what couplings to use, and so on; I think this is evidence that recent new products, promised releases, and publicity about 009, are increasing interest in narrow gauge modelling.

We managed a good turn-out to man the stand so there was plenty of time to mooch round too, and meet lots of familiar faces. I spent a little money too, mostly in the society sales room (though by the time I got in there in the afternoon it was starting to look quite bare!), but you're probably interested in the layouts. This being 2014 there was an emphasis on O14 layouts (geddit?), which was great for me as it is one of my favourite scales.


I'd been following the build of Abbey End by David Malton on the NGRM forum; it's a model of the end of the Abbey Light Railway in Leeds, a passenger line which sadly closed a couple of years ago that David used to work on. The layout is simple but brilliantly executed, capturing the peaceful woodland brook-side setting and with models of the actual locos and stock. David has presented the layout attractively and professionally too, it deserves to do well on the exhibition circuit.


David had commented he had concerns about the reliability of his loco fleet, this being his first exhibition, so I offered back-up power in the shape of my Hudson Hunslet from Thakeham. I'd fitted some Bemo couplings in place of my Microtrains, using the same pocket and screw, which allowed it to work with the Peco couplings David uses. As it happens his loco stud performed fine, but it was nice to see David using the Hudson too.


Simon Hargraves' South Brierly Sewage Works is an old layout by contrast, one of the first O14 layouts on the exhibition circuit, and based on a prototype which was featured in the Roy C Link handbook. It's got a lot in common with Thakeham in size and operation, and was also built as a competition entry! No surprise then it's my kind of layout.


Rhyd by David John is a different kind of O14 layout, and clearly captures the spirit of the Welsh Slate railway in the Ffestiniog area. A brilliantly modelled scene and top quality stock too, and since the owner lives waaay up Scotland it's unlikely to make many shows in the South, so it was good to see it.


John Clutterbuck is a bit of a pioneer and evangelist for O14 and the 'Review has often featured details of the construction of his long-term layout project, the Pentewan Light Railway. John has vowed this is the only outing for the layout so it was a rare privilege indeed to see it (well, the part of it shown) in the flesh. I love the way the railway winds through the bleak Cornish moorland, giving a real sense of distance, while the modelling is to the highest standard possible.


Not all the layouts were O14, but several were unlikely to be seen again. Another superb layout that caught my eye was Regionale Tramweg Moulburg in HOe by Jan van Mourik, from the Netherlands. It packed a lot in - town, harbour, two stations, goods yards, engine sheds... but was full of character and detail.


Edge, the latest 009 model by fellow blogger Chris Ford, on it's one and only exhibition before passing to it's new owner. Chris built the layout to illustrate an up-coming book but it is to his usual high standard, perhaps the new owner will exhibit it?


Finally this was the last outing for Pagham Harbour, the well-known 009 layout by Richard Glover. It's featured in the 009 news many times though it's 3 incarnations over the last 20-odd years, and it's peaceful character has been widely admired. Indeed it won two awards at EXPO-NG! Like Edge it has now been sold, so perhaps it's time is not yet over.

Well I've run out of space but do explore further, my rather large photo collection from the show can be found here.

Saturday, 18 October 2014

Thakeham in print!

The latest issue of Narrow Gauge and Industrial Railway Modelling Review landed on my door-mat today. It's a special extra-large 100th edition, so it is even more of a privilege to find my article about my Thakeham Tiles layout included!


I'm very pleased with they way it has come out, my photos seem to have come up good, but Bob has done a great job of presenting the article over 10 pages.

What's more the rest of the issue is top-notch, with superb modelling by well-reputed names. Illustrious company indeed!

I'm showing Awngate at the Uckfield show this weekend, today went well but do say hi if you're there tomorrow, and I'll post some pictures later.

Wednesday, 21 May 2014

Fettling Thakeham

In the run up to the SWING show I had Thakeham set up for a practice. I had forgotten how fiddly it was to load the wagons without derailing them! The magnetic stick works fine, but to get the load into the skip and off the magnet requires a steady hand and a careful twist of the stick. Then I had a cunning plan...


It's a simple sheet of black plasticard set carefully to just clear the back edge of the skip wagons, which stops them being pushed or tipped off the rails. Since the wagons are always propelled under the hopper there's no issue of clearance for other stock. However it does make the process of loading them much easier: the magnetic stick is used to push the load down into the sip, then slid forwards, as the wagon is held by the plastic the load is pulled from the magnet, and the stick can be lifted away.


Also while testing I was not happy with the way the O&K loco ran, it's always had a grinding noise when running in one direction and occasionally seemed to stick, so I stripped it down to apply drops of oil to the gears. The construction of the chassis means that without the body on the layshaft driving the rear axle (under the driver) is free to rise up. I wondered whether the body was not restraining it enough, so I folded a small strip of bass and superglued it into the recess in the top of the chassis so it holds the layshaft in place.


With the chassis now able to be tested without the body it ran smoothly, so I added the body, only to find it wouldn't then move at all! Slackening the bolts off allowed it to move, but the grinding noise was louder than ever, so it was clear the body was catching. There is a recess in the footplate to clear the worm gear seen above, using a burr in a mini-drill I deepened and widened it as shown. With the body refitted and the bolts done up tight the chassis ran without any grinding.


That said, it's still hardly a quiet chassis, none of my O14 locos are, due to the low gearing and metal bodies. The bigger wheels means it can do a reasonable speed without the motor screaming as the Lister (with similar gearing) does. But it does run reliably and slowly now, and spent Saturday alternating with the Hudson Hunslet running on Thakeham.

Monday, 5 May 2014

Thakeham gets a spruce-up

I was rather pleased with the tidy plywood fascia of Thakeham, though I confess the neat front corner joint was more good luck than skill. However I'd always intended to smarten up the bare wood, it just wasn't top priority to get the layout finished in time for EXPO, and after that the house move disrupted things.


So as you can see I've taken advantage of the recent fine weather to give the plywood a coat of woodstain. It's come out slightly darker than I intended (you can never judge by the tin) but it looks good. The view below taken of the layout in our lounge shows off the neat finish, though the lighting is rather harsh! Also just visible is that the gap between the top of the sky and the upper edge has been painted in matt black.


Thakeham will be appearing at the SWING show in Bognor on the 17th May - which is the catalyst for this spruce up - so do pop by and say hi!

Saturday, 29 March 2014

Microtrains Uncoupling Tool

The Microtrains couplings generally work well, I've got practice at setting them up so they will uncouple over a magnet (usually!), and the magnets have to the the right strength and position. They couple up easily and don't give unwanted uncoupling. However if you need to uncouple where there is no magnet - such as in a fiddle yard - they can be a right pain. OK, you can do it by lifting one item of stock, but that isn't always desirable. So I thought I'd make a tool to help.


I think you can buy a tool like this in the US, but it isn't hard to make. I started with some plastic sprue from a kit, about 2mm diameter and roughly round, I shaped one end to a square section then tapered to a point. To make a handle a couple of diameters of plastic tube were used, then in the other end I stuck a tiny round magnet - only because I had one, and it allows the tool to hang from a steel screw in a convenient place.


To use it is simply pushed in between the couplings from above then twisted, the square section pushes the couplings open and apart. With lighter stock such as these wagons it takes care not to derail them, but gentle finger pressure on the stock can ensure they stay firmly on the track. However it works rather well and proved useful at Shepton Mallet, in fact I might make another because I am bound to lose it!

Thursday, 30 January 2014

A tour of Thakeham Tiles

I've not a lot to show this month, there has been some activity preparing Awngate and stock ahead of the NGSW show next month, but wheel cleaning and scenery hoovering don't make an exciting blog post. However I do have this photographic tour of Thakeham that I never got around to showing after it was finished. Click on the photos for a bigger view.


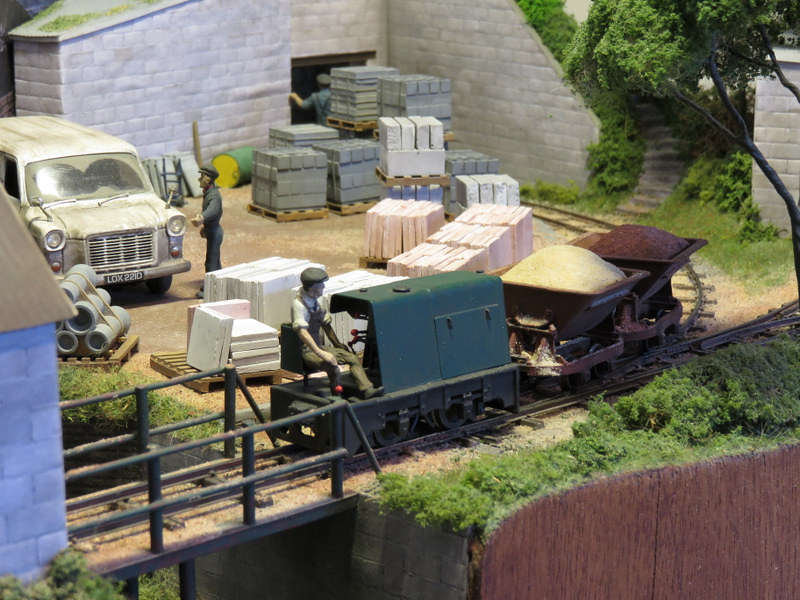
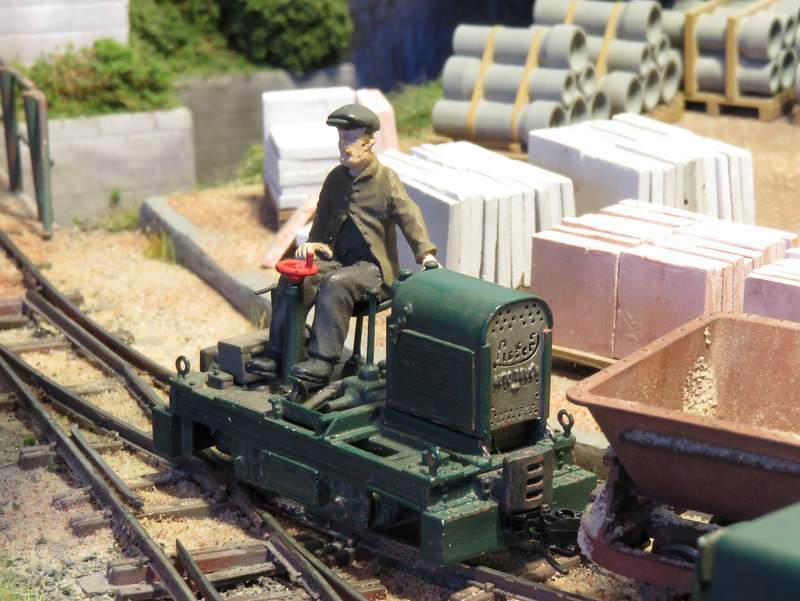
The foreman watches on as the skips are filled with sand under the hoppers. The track in this area is almost buried under spilt sand. The loco is a Hudson Hunslet built in the mid 1950's.


Looking down from the top of the path to the hoppers we see the train climbing the gradient to the tipping shed, the two colours of sand in the skips can be seen clearly. The loco is passing the engine shed on the left, while on the right pallet-loads of concrete blocks, kerb-stones, and paving slabs await dispatch.


That last picture has been posed to match the photo on the cover of Graham Lelliot's book about the line, which was the inspiration for this model. I think I've captured the essence of the site, though as you can see, I could do with a lot more pallets of concrete products!


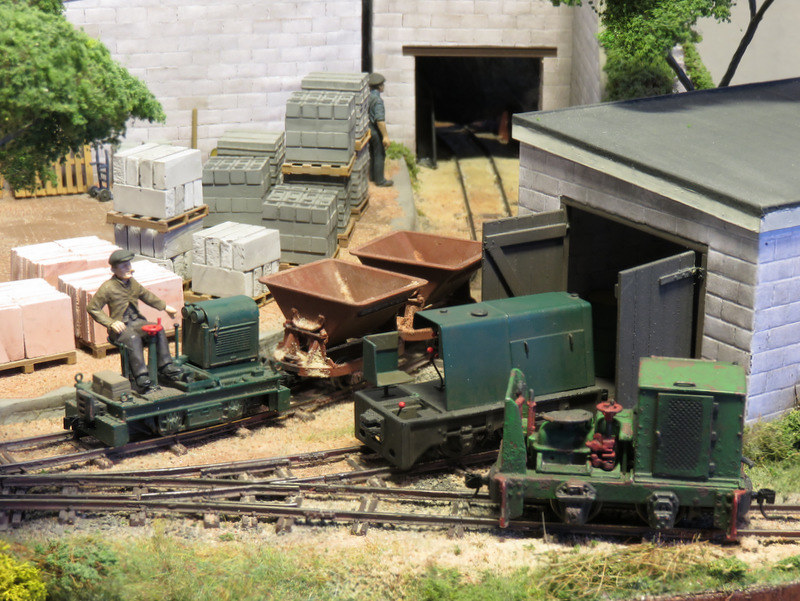
As the train passes the engine shed we see that another loco waits in the doorway, perhaps it has been pushed out for maintenance under better light, or just to make more space for work in the shed? This is a pre-war O&K and is showing it's age with flaky rust breaking through the paint, while the newer Hudson is a little grubby but well kept. In the foreground the "portable" track sections can be discerned, with steel sleepers and even the fishplates visible. In places wooden sleepers can be seen under the steel ones, though the sand does seem to get everywhere!


On the footpath that crosses the site a Labrador listens to the rumble of the train over the steel bridge above, as it enters the tipping shed. Or has he seen a rabbit? His master waits nearby.


The bridge still stands today, though there are no trains, just a conveyor belt. (The striped beam in the foreground carries a pipe, and I omitted it from the model)


With the skips emptied into the appropriate chutes in the tipping shed the loco slowly pushes them back over the bridge, and past yet more concrete products.


In the yard a local team of builders have arrived to pick up some paving slabs, though they seem to be distracted arguing about whose turn it was to clean the van. In the background are rows and rows of concrete slabs, and piles of pallets waiting to be used. The footpath cuts though the site on the left.


The train rattles back down the grade to the sand hoppers, to repeat the process again and again. Behind the skips can be seen the steps up to the top of the hoppers, which are set into the old quarry, though now the sand arrives by road.


At the end of the day the skips have been left near the hoppers, while a spare skip wagon is in the siding by the shed. The skip body is upended in the bushes, presumably to prevent it filling with water. The O&K has been pushed back into the shed - mysteriously, it also seems to have turned around!

Thakeham Tiles will be at the SWING narrow gauge show in Bognor on the 17th May.

Friday, 3 January 2014

Happy New Year! Here's to a busy 2014...

Happy New Year to all readers! I notice many Bloggers are posting reviews of 2013. The modelling highlights of the year for me were completing Thakeham for EXPO in October, and the 009 Society Convention in September, plus seeing Landswood Park in print in the Industrial & Narrow Gauge Review. I also finished some interesting stock projects in 009 and O14, and got to some good exhibitions.

The end of the year was dominated by a house-move, things are now settling down but of course modelling time has been limited, and may be for a while yet, and much of my modelling tools and materials is still in boxes somewhere. However Awngate has been given a new home on top of an Ikea shelving unit in our new lounge/diner. One of those box-files also contains a layout!

 
Christmas has brought some interesting presents including a new controller (of which more later, but first I need to find a DIN plug), a Langley kit for a WW1 Hunslet loco, and a book about yet more obscure and interesting railways!

 
So with the projects I listed back in November yet to be tackled as well, I have plenty to get on with in 2014. It is looking like it will be a busy year, as I also have some exhibitions lined up:

  • Awngate will be at Narrow Gauge South West, Shepton Mallet, on the 15th February, so I need to make sure it still works!
  • Thakeham Tiles will be at SWING in Bognor, on the 17th May
  • Awngate will also be representing the Sussex Downs 009 Group at a show in Patcham, Brighton, on 14th June.

This in addition to the DIY jobs that are being lined up, and once I have got around to decorating my son's bedroom he'd like a bigger train set!
Posted by Picasa

Monday, 28 October 2013

Thakeham on show!

EXPO-NG proved to be an excellent show, as usual. I'll post some pictures of the layouts in due course, but first an update on how Thakeham performed!

Set-up didn't take too long, the simple stand and light made a big difference, finished with a name-board and simple information display. Operation was from the right-side so I grabbed the end of the table of challenge entries, and pulled up a chair! That left time for a quick look round and a visit to the 009 Society sales stand before the show opened...


My 6-year-old boy was insistent that he wanted to come and help! I wasn't sure how helpful he'd be, but in fact he proved quite competent at operating - when he wasn't too excited! Here he is loading the wagons, a somewhat fiddly job.


I was helped by the Sussex Downs group; Simon Wilson, Phil Savage, and Mark Holland all did turns at operating that gave me comfort (and sanity-restoring) breaks and so I managed to see a lot of the show in short stints, so thanks to all. Mind you they were only to quick to give the controller back when I returned! Here's Phil at the controls while viewers wonder where the sand loads went.


To my relief and surprise the layout performed very well. There were a few incidents of loads sticking in the wagons resulting in derailments when unloaded, traced to an oversize load, plus one occasion of the loads jamming in the chute (gravity failure). We learned that if the rod was not pulled right back hard the loads may not be pushed off the magnet. And the act of loading up quickly took practice! However the unloading generally worked smoothly and attracted interest. The Hudson performed smoothly all day, as did the Lister when given a run in the afternoon, but the O&K had an occasional sticky moment in one direction which I shall have to investigate.


I may not have won the challenge this year but I am still very pleased with the layout: it's my first ever (almost) prototype model, it looks good and works well. It attracted lots of nice comments which is very encouraging, so thanks if you were one of those that made them! There were even some potential show invites so there may yet be more to come from this little triangle.

Thursday, 24 October 2013

Making an Exhibition of Thakeham

What's this hinged piece of wood with dowels sticking out? An agricultural tool? Implement of Torture? No, just a support for the layout.

 
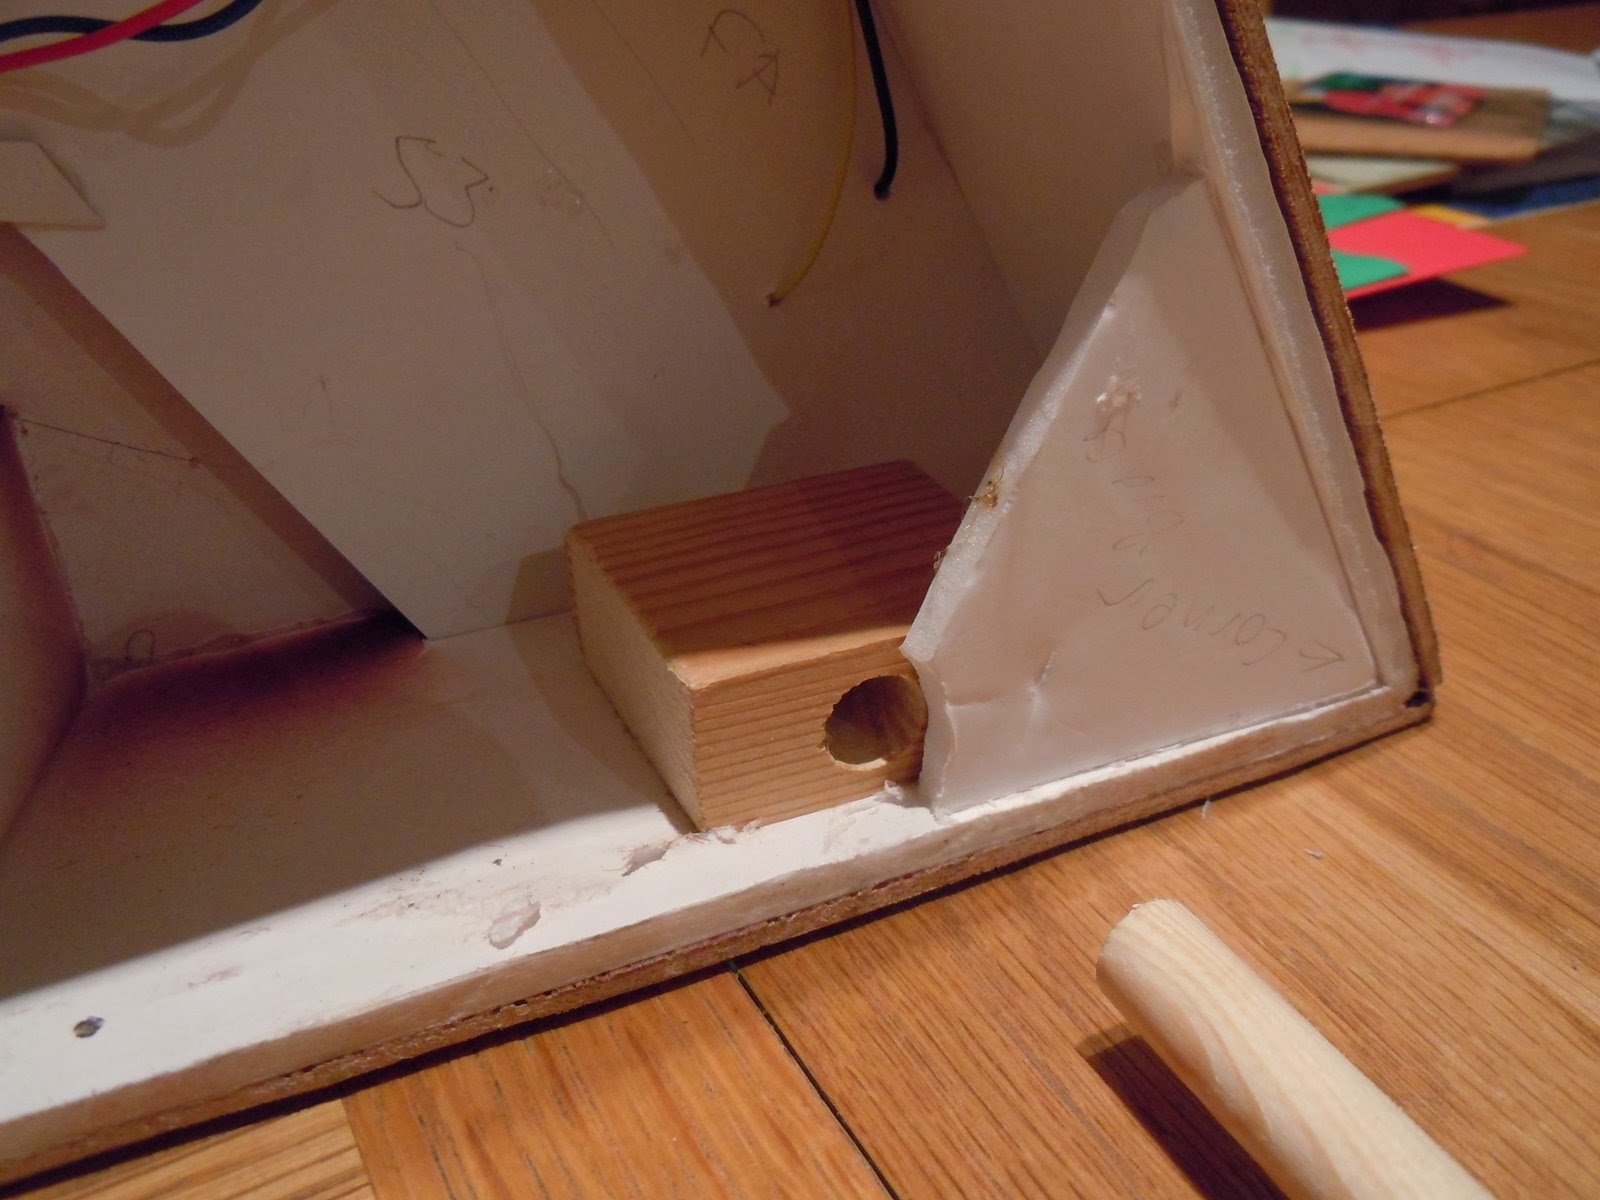
Three blocks of wood are glued under the layout with 12mm holes drilled to take the dowels, the support is opened out and slotted in place. This raises the layout about 6" above the table, to something like kitchen worktop height, a much more comfortable viewing height while still being operational from a chair.

 
I printed out a name-board and stuck it to a piece of foam-core board, which is attached to the top of the layout back-scene with some Velcro. If permanently attached it would get damaged, and the layout wouldn't fit in the car boot!

 
I've also made up a brief information panel with some photos using the foam-core display board I'd made for Landswood Park. With these simple refinements, and the angle-poise type florescent light attached as previously described, the layout is ready to be shown. I have even spent a couple of evenings test-running it to make sure it works as well as it should - well, at least it does before it leaves the house...

 
There is plenty more I could have done but a challenge like this is time-bound. In fact I completed the layout a couple of weeks ago, as we will shortly be moving house and, amongst other jobs, I have had to pack away my modelling kit. It would have been nice to add a few more details, make more concrete products, do better trees, paint or varnish the fascia ... but I have achieved what I set out to and I am happy with the result.

If you can get along to EXPO Narrow Gauge on Saturday do say hello, I believe the challenge layouts will be on Stand 5 in the main hall. If you can't, I'll post more pictures soon.
Posted by Picasa

Monday, 21 October 2013

Remote Unloading

With loads that can be popped into the wagons while hidden under the hopper, I need a way to unload them at the other end of the line - inside the tipping shed. Of course the other end of the line is the far corner of the board - OK, it's only about 3 feet away, but out of reach from the operating position, so how can I do it remotely? You might be expecting something clever, mechanised, automated, finely engineered ... you may be disappointed!

I made up a lever with a cross-bar from offcuts of plastic sprue and plasticard, with a neodymium magnet at each end of the cross-bar. This was meant as a mock-up ahead of making something stronger from bits of rail and copperclad board, but it worked fine as it was! The lever is mounted into the centre of a couple of chutes made of plastic, pivoted on a paper-clip wire, and has a length of steel wire fixed to the bottom end, a coating of graphite lubricant for Kadee couplings keeps it all moving smoothly.

 
This chute contraption is mounted into the board next to the track inside the tipping shed. From below you can see the steel wire-in-tube curving round to meet a wooden dowel, to which it is attached using an electrical choc-block connector, the screw is an end stop to limit movement. The dowel runs across the board to poke through the fascia next to the switch panel, the off-cut of MDF seen here is a more solid mounting than the foamboard.

 
Having considered gears and levers and even motors, I settled on this as the easiest method, and amazingly it works! About an inch of travel of the operating rod moves the lever through a little over 90 degrees.

 
So this is the view from behind the back-scene as a train enters the tipping shed, note the essential "buffer stop" (every millimetre of this layout counts so the loco is run against the stop). On the left is the chute and the lever is about half-way down through its arc towards the wagons.

 
Looking from above (shed roof removed), once the lever has touched the tops of the wagon loads when pulled up brings them with it - remember the small magnets set in their top? When the lever reaches the top of its travel the cross-bar recesses into the "hoods", which push the loads off the magnets, whereupon they drop down the chutes.

 
All that is then required is to collect them in a tub, and repeat... I made up 5 pairs of wagon loads, so the process can run for a good, er, 5 minutes. Fortunately I can reach the tub to retrieve them from the operating position!

 
Posted by Picasa