Monday 23 September 2019

Paint and Light

Having added the back-scene, wing panels and lighting rig, the next step is to get out the paint and make it all presentable. The external surfaces of the layout used the same grey primer (Wilkinsons) as used on Slugworth and Hexworthy. And I mean the same paint, I bought a second tin to do Hexworthy but the original 1 litre tin from Slugworth had plenty left, and now it's done a third layout too! It does require two coats with a light rub-down in between but the slightly satin grey gives a good finish.


Sadly the pale blue paint used for the back-scene on Slugworth had run out, so I popped to the DIY store to find something similar, but without much luck in the wood paint ranges. The original tin was actually a left-over from the bespoke colour mixing service, from the bargain basket, actually an emulsion paint for walls but I had used it directly on the wood back-scene of Slugworth and it had worked fine, with a nice matt finish. So I checked out the bargain basket of left-overs. There was a 1 litre tin of "blue hoo" which was the first shade of blue from white - basically white with a blue hint - not quite blue enough, but it was £2.50 so I picked it up, along with a couple of tester pots of a light blue emulsion - these were then mixed in to make my own shade of pale blue!


The result is a very pale matt blue, and works well for a hazy sky background. I don't plan anything else on the back-scene, just the low-relief buildings. Ideally the back-scene would curve around the rear corners but that was impractical in this small layout (particularly due to the sector plate and buildings), but with a plain background the corners are not obvious.


I'd removed the switches from the fascia for painting, before refitting I stuck a new print-out of the schematic diagram on with pritt-stick. Two versions had been drawn (in MS Word) - one with the outlines of the switches and marking-out lines, used for drilling holes, and this one without. The clear plastic was screwed on and the switches refitted through the holes from behind. The result looks tidy and is easy to follow (I hope) while being simple to make. Of course on testing it I'd got two of the switches swapped, but that was soon rectified...!


The final task for layout presentation was the lighting, again I used the left-over strip of "natural white" LED's used on both Slugworth and Hexworthy - full details can be found here. I have found that arranging the LED's to point straight down is not as effective as pointing them backwards. The lighting beam is arranged to sit an inch or so forward of the front of the layout, and angled so the inside of the fascia - where the LED strip is attached - is pointing down as well as back. Even so it seemed there was lots of light towards the rear and on the back-scene but items at the front were not so well lit, so I added short additional strips attached to a mounting at 45 degrees to the fascia - this means they are pointing down and back at about 20 degrees to the vertical. The mountings were knocked up from plasticard - quick, cheap and easy, but I had to take care soldering the wires to the strips!


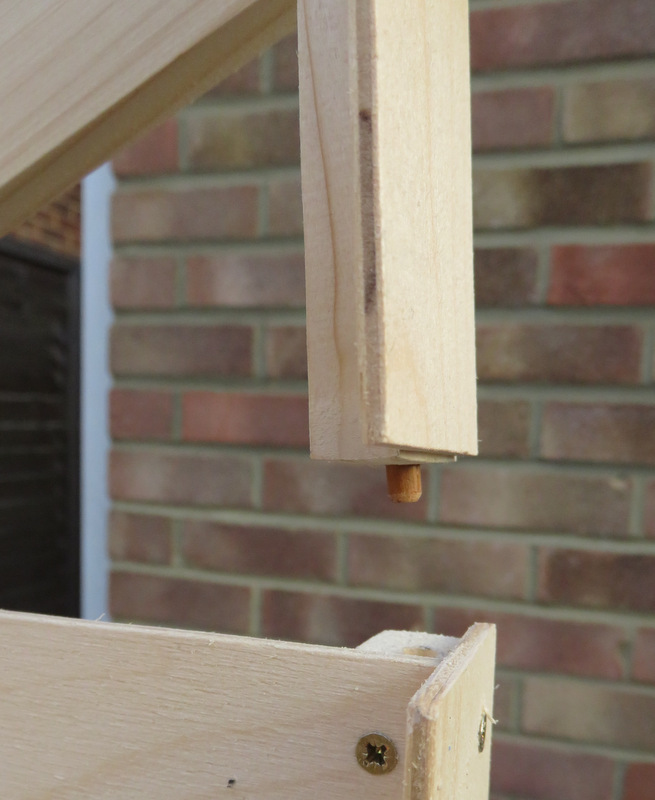
The wires were then run back under one of the pivoted support arms to a socket, which was secured under the "tab" that rests on top of the end of the layout when the lighting is folded down. The socket accepts a standard wall-wart power supply.


So here's the finished layout "structure" seen from my standing eye level, and I've placed the buildings so far to get a feel for the scene. The folding legs lift the layout closer to the viewer, the back-scene cuts out background distractions, the lighting illuminates the modelled scene evenly, and the top fascia and side panels frame the scene, hiding the lighting and ends of the back-scene. All simple elements to add to a layout but really improve it's presentation. There are other ways of presenting a layout, but I would argue that some kind of backdrop and lighting are essential if a model is to be appreciated.

Friday 20 September 2019

Buildings progress

Last time I posted about the "Brown & Sons" warehouse it had the brick paper applied. Having increased the depth the supplied card roof wasn't going to fit, so I made a new removable roof from black plasticard on triangular formers, with new barge-boards too. I then realised the roof formers fouled the back - which is of course in the centre of the roof-line - so had to make a new back too.


I thought the large slates by York Modelmaking would work well, and I had some left over from Hexworthy station. Although pre-cut and self-adhesive it is quite time consuming to apply. Having learned from the station I fitted the barge-boards first and fitted the slates over them. Finally I could add the painted stone details, doors and windows. The interior is painted black, I'm not planning interior details, though I might get around to fitting gutters.


So here is the line-up of buildings so far, the bookshop I made earlier in the year plus the three new warehouses.


I've been planning the other buildings, despite the small size this layout needs a lot of them. I've been making simple card mock-ups, such as this warehouse - I thought a barn-style building with a curved roof would be interesting, but it took three attempts to get the size and shape looking right.


Unlike Goldilocks, I decided the middle size looks "just right" in-situ. Just need to build it properly now.


Not just that, but I've just taken delivery of four more Petite Properties kits...!


Saturday 14 September 2019

Lynton and Barnstaple Railway

While on Holiday recently we ventured West from Minehead, up the steepest A-road in Britain, and over Exmoor to Woody Bay, to visit the Lynton and Barnstaple Railway. This well-known railway is one I've wanted to visit for some time, even though there is (currently) only a short length of line operating.


The preservation group have not only recently completed the replica build of "Lyn", the Baldwin 2-4-2 that ran on the original line, but also recreated a rake of the original coaches. Both the loco and the coaches are built to a high standard - even interior details of the coaches - and are kept pristine.


The station and grounds are also nicely restored and well kept, yet the atmosphere is friendly and informal, the tea room is a marquee for example. This is still quite a "young" preserved railway, but has big plans to reopen many miles of the old line. I wish them well.


It also has to be said that the setting is quite beautiful!


Wednesday 11 September 2019

Back-scene boards, legs and lighting rig

I prefer a layout to have a back-scene, even if it is plain, it is rather like framing a picture. On the face of it adding boards to the back and ends of the challenge boards is simple enough - 3 sheets of ply (left over from Hexworthy) cut to size, and joined by strip-wood at the corners outside the ends. I also added "wing" strips to neaten the front edges.


However as usual I couldn't help but complicate matters, because I also wanted to add lighting, and some short legs to lift the model above table height. I figured it would be nice if both legs and lighting rig were attached to the board, and hinged out for use...


The result works well enough, but it was rather fiddly to achieve! The lighting rig hinges up for more height, and will hopefully have LED strips behind it that shine down on to the layout, the angled pelmet should be useful for that. It is supported by flaps that hinge down and sit on top of and act as an extension of the side wings.


A close-up of the lighting rig supporting arm shows the hinge and the support piece. When folded down the lighting pelmet overhangs the front of the layout, hopefully it will be useful as a support for a protective cover in due course.


To locate the support I simply used a small piece of dowel as a peg, that sits in a hole at the top of the back-scene/wing support, it's enough to stop the lighting rig collapsing.


The legs are made in pairs and are bolted at the top to the back-scene supports, the bolts also act as pivots. These bolts will have washers and locking nuts, once the board is painted/ A third bolt is added to hold the legs in place, and will have a wing nut. Note the power socket is now in place too.


With the locking bolt removed the legs rotate 180 degrees and stow up the ends of the layout, the locking bolt is fitted back in another hole to hold them in place.


The photo below shows the layout from my eye height, it looks neat enough despite my dodgy woodwork, and takes seconds to set up and stow away. It should work well at exhibitions, which is just as well as it already has an invite...!


Now it all needs painting. And I need to get on with some buildings.

Sunday 8 September 2019

West Somerset Railway

We recently had a family holiday in Minehead, coincidentally (!) this was very close to the terminus of the West Somerset Railway. Minehead station is right on the sea-front between the town centre and the Butlins holiday camp. (I discovered Morrisons car-park is adjacent to the station throat, I think this is now my favourite supermarket car-park!)


It's a long line but we only travelled as far as Watchet, a pretty little fishing port with a short walk from the station to the harbour. This was originally the terminus of the (then broad gauge) branch until it was extended to Minehead, and was once busy with harbour sidings.


The line seemed quite popular, with three trains in service of about 8 coaches each, and they seemed busy enough. Some nice big locos in service too, and looking well kept.


Back at Minehead one loco seemed to be undergoing repair, conveniently opposite the platform!


Saturday 7 September 2019

Rifles and Railways

Now I'm a fan of obscure and long forgotten railways, especially if there is a narrow gauge connection, but it has to be said that the latest book I've been sent takes obscure to new levels. I never knew this, but Britain has a National Rifle Association established in the mid 19th century, and it had both standard and narrow gauge railways. The National Rifle Association - Its Tramways and the London and South Western Railway by Christopher Bunch tells the story.


The early part of the book covers how the NRA came about, and held annual meetings on Wimbledon Common. There is a lot of coverage of the relationship with the L&SWR and other railway companies that brought members to the event, but more interesting to me was the establishment of a narrow gauge tram to transport people across the common to the furthest butts - which gained a neat little tram locomotive. This railway was dismantled after the meeting and reconstructed the following year.


The NRA then moved to a permanent site at Bisley in Surrey, where a standard gauge branch was built into the site from the local station. Operated by the L&SWR this line handled large numbers of people for the week or two of the annual meeting, sometimes including through trains direct from London, but had a quieter life the rest of the year. It was extended to adjacent military camps during the world wars.


As well as the branch line, the narrow gauge tramway was re-established at Bisley. There were other narrow gauge railways too, from the short manually operated tracks for moving targets, to more extensive lines to service the other targets, which for a while had industrial locos.


Although a very niche subject, this book has a bit of an identity crisis, being both a railway book and - in places - giving a history of the NRA. As a railway enthusiast with no interest in the NRA I could have lived without that aspect of the book. It's also quite a text-heavy book, with lots of extracts from contemporary sources, although there are also plans and maps, and some well reproduced photos (more photos would have been nice, but I suspect they are somewhat rare). It's a good sized hardback of good quality, and despite the depth of content is easy to read. Overall it seems a well researched and produced publication that will find interest amongst those who like obscure railways, and also no doubt those with an interest in the NRA (which is still in existence at the same site).

As a modeller I often look at the potential for modelling obscure minor railways, and the book probably contains enough information for a reasonable model of the standard and/or narrow gauge lines to be built. It would make a rather different layout theme, but I suspect operation would be rather dull! The narrow gauge tramway locomotive would make a very attractive model (original drawings are reproduced in the book). However I now know about an unusual railway location that I'd bet few railway enthusiasts would ever have heard of.

Monday 2 September 2019

SEEP point motor switch

I was pleased, and slightly surprised, to find the electrics all worked first time. However extensive playing testing revealed that one of the points had a dead "frog" - crossing vee and blade - when switched on one direction, this is despite the electrical feed being switched by the point motor.

The SEEP motors have an in-built switch consisting of contacts on the PCB base and a washer sprung against them moved by the solenoid armature. The problem can be the washer not reaching the contact because the motor is mounted off centre (though I am sure this one is central), or the armature travel is not far enough (it is borderline with 009 points, keeping the pin long helps). I have to say I have rarely come across this issue despite having used dozens of these motors, but with this old re-used motor I think the contacts may have worn away too, making things worse.


In an attempt to ensure good contact I cut a small piece of phosphor-bronze strip (seen bottom right of the photo above), which was twisted and bent, then soldered to the contact so the washer presses against it at the end of it's travel, as can just be seen below. I also cleaned the contacts as best I could, though it is hard to clean the washer.


It works, but I'll admit I don't know how robust it will be - the solenoid moves with some force. If it does fail the options are:

  • Clean the point blade and rely on that for contact - I don't want to do that!
  • Fit an external switch, such as a microswitch, which is easy in theory but fiddly in practice
  • Use the working contact to drive a change-over relay, perhaps the easiest solution if suitable relay power can be arranged to the layout
  • Replace the motor with a new one - which shouldn't be too difficult

For now I'll see how it goes.