Showing posts with label ballasting. Show all posts

Tuesday, 2 September 2025

Rail200 - ballast, gravel, and water

Time for an update of progress over the last week, which has been focused on the ground cover around the tracks. I wanted a mixture of ballasted track and areas buried in gravel/ash, so for the latter areas I started with a layer of DAS clay. 


A simple jig allows the clay to be rolled out to a consistent depth. 


This was laid between the tracks on a coat of PVA, trimmed around buildings, and smaller pieces or offcuts used to fill the gaps between the sleepers, so bringing the ground up to sleeper height (or slightly below).


Ballasting was surprisingly tedious. I didn't want dilute glue finding its way down between the wooden base of the "modular" track and the surrounding foamboard as I'll need to remove that later. So, I applied neat PVA alongside that track and sprinkled the ballast on. 


Neat PVA was also applied around the moving parts of points and ballast applied, acting as a dam to keep the dilute PVA from getting where it shouldn't. After that ballasting took my usual route - applied dry, misted with water with about 20% IPA added from a spray bottle, then diluted PVA dripped on using a pipette. Then ages spent picking ballast from where it shouldn't be...

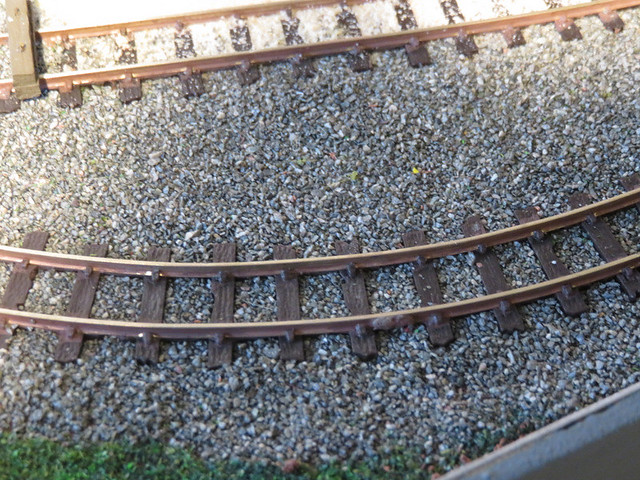
The ballast is a bag of granite chippings I've had for years and there must be the best part of a kilo left, so it will do a good few more small layouts. This time, the ballast had a slight greenish tinge when the glue dried, I've heard of others having this problem but I've never seen it - perhaps because this was cheap PVA rather than Resin W?


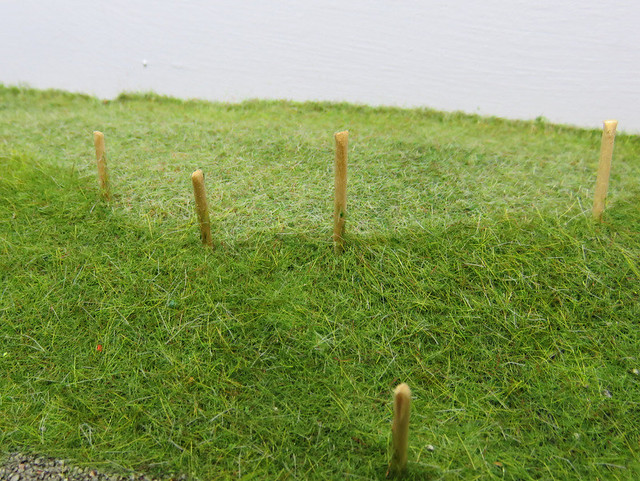
For the gravel/ash surface I applied fine sand (rescued some years ago when the kids grew out of the sandpit) over a layer of dilute PVA. The sand is applied through a tea strainer which helps give an even covering. The cocktail sticks (halved) hopefully protect the holes for the canopy supports.


I'm looking for a better solution as the sand needs painting! I applied a couple of coats of a dirty grey, changing the shade slightly for variation. 


When dry I applied a wash of dirty brown in a slightly patchy fashion, followed by an even more patchy application of smoke grey weathering powder over the still damp surface. 


The result is intentionally uneven and varied, although perhaps a little darker than I was aiming for as ash surfaces look surprisingly light from a distance. The shape of the sleepers just showing through the surface works quite well, the area providing easy access by foot although with the rails proud. I'd like the change from fine gravel/ash to ballast to be more blended, but I can't figure out how to do it. 

The ballast also had the dirty brown wash, which has removed most of the greenish tinge as well as toning it down. While the paints were out I painted the pond surface a muddy green colour, and blended it to a muddy brown colour near the edge, using acrylic paints applied very wet. This had previously had several coats of dark brown with a rub back in between to smooth the ply. Once dry, the water was added using Deluxe Materials Aqua Magic, a thin layer first, then a thicker (~2mm) later which was left to dry for a couple of days. I'd dammed the front with masking tape, the Aqua Magic is thick enough not to leak through it, but thin enough to self-level, and I did have to use a scalpel to remove the masking tape! The result is pretty much what I was aiming for - a still pond. 

Sunday, 11 April 2021

Ballasting Hexworthy

Before ballasting I needed to glue down the platform - thus far it has not been in fixed, and was in two pieces, which was convenient for working on. However, the fixing of the slabs had caused a slight curvature to the 3mm foam-core platform pieces, so I needed to be sure it would lie flat. Gentle working between the fingers got the pieces flat before they were stuck in place with PVA. Clearances were double-checked with some larger locos to ensure the position was correct, and the larder raided for some weights to ensure it stayed fully flat while the glue set.


Ballasting isn't most people's favourite job, in fact it is rather tedious, but worth taking a little time as it covers a significant part of most layouts. I use fine granite ballast, I got a big bag many years ago and I'm still working my way through it. 

The area to be most careful is around the moving parts of the points, my approach here is to carefully apply neat PVA around the tie bar area positioning it with a screwdriver tip or something, making sure it is well clear of the tie bar, then add stones. This is left to dry before ballasting around it, the idea is the carefully positioned stones form a protective "dam" around the tie bar area.


Since the baseboard is foam-core board it was easy to cut a drainage ditch between the platform and loop roads. Because of the steep sides I applied neat PVA and stones first here too. 


The process is well established. I apply the ballast from a tea spoon, tapping it to carefully dispense it where needed, I spread it with a finger and a cheap, stiff, flat brush. Tapping the spoon on the rails helps the stones settle and shakes some off the sleepers, but there is still a need to brush off any stones that remain on the sleepers or up against the rail sides. Next is a vital step - the ballast is wetted with a fine mist of water/IPA mixture, water with washing up liquid works too but the IPA seems to work better. This allows the water to soak into the ballast without disturbing it. 


Finally the glue is added, PVA glue diluted about 50:50 with the drop of washing up liquid to reduce the surface tension. I use a plastic dropper and gently drip the glue into the ballast, which shouldn't disturb it and thanks to the prior soaking with water/IPA it is drawn right into the ballast. The tricky bit is seeing which bits have been done, as all the ballast looks wet!


So a slow process I tend to do in small areas at a time, an hour or so in one go is enough. Fortunately this is a small layout, but even so it took four or five sessions. As this will represent a preserved line the ballast needed to be fairly neat, which I've achieved. 


Thursday, 6 February 2020

Ballast and gravel

Last time I said the next step is the ballasting. First I fixed the point levers in place. The ballast is fine granite - no idea of the source as I've had a big bag for years! This is placed with a brush to fit between but not on the sleepers - tapping the rail sometimes helps shake the granite off the sleepers. I then mist it with a fine water spray, then drop dilute PVA (with a drop of washing up liquid in) over it using a dropper. This soaks into the granite without disturbing it. Care is taken around points - I place neat PVA exactly where I need it around moving parts and sprinkle the ballast on, for more control and to keep glue and ballast away from bits that move.


Even on a small layout it is, I admit, a tedious job, but very necessary and the layout looks better for it. I then used some fine sand (taken from the kids play pit sand years ago) to make gravel areas, sprinkled onto diluted PVA, then sprayed with the fine water mist to help it bed down to the glue.


The sand forms the roadway and pathway areas, that may be gravel or (in the setting of this layout) ash. Of course it needs painting...


A mid ash-grey seemed to suit. Now things are looking much better.


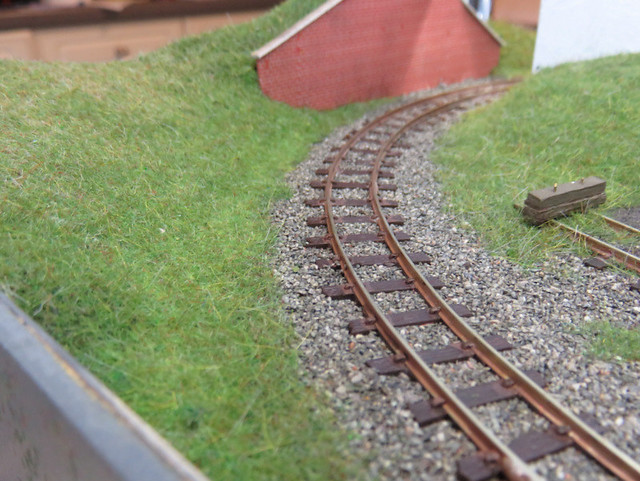
The ballast is then given a wash of well-thinned brown enamel to weather and tone it down, the effect is quite subtle, further coats could give dirtier track but this seemed enough for sidings. The sleepers had been dry-brushed with grey before ballasting, and of course the rails given a dirty rusty brown colour, resulting in a pleasing track effect. Note the use of the sand "gravel" path has disguised the uncoupling magnets, now they are assumed to provide a crossing for the shunter to access the point lever.


Further weathering of a darker brown-black was applied where locos might stand, including on the rail sides. It all helps make things look less uniform.

You might also notice a first cover of green scatter as a base for static grass, and in this shot, a fence has appeared at the front secured with wire "posts". This acts as a safety barrier in case of derailments and careless fingers, being right at the front of the layout.

Monday, 1 October 2018

Grey and Green

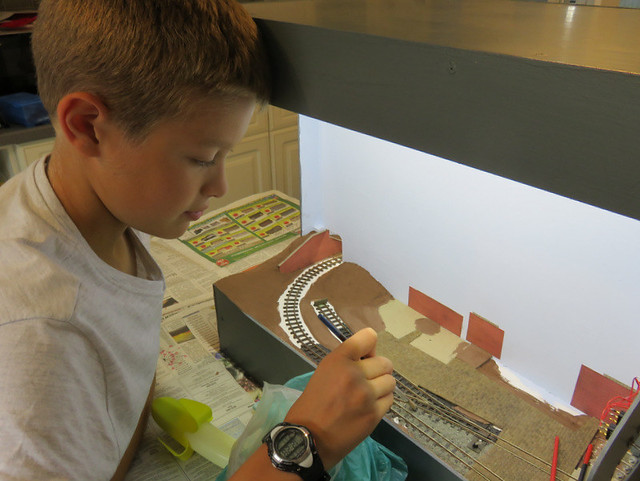
The next step with Slugworth was to ballast the track, using fine granite. It's one of those jobs that many find tedious, although on a small layout it is not too onerous. In fact Joshua rather enjoyed ballasting, leaving me to tidy up the edges and carefully do the points.

IMG_5266

One tip we found useful was to tap the rail with a spoon, which shakes the ballast off the sleepers into the gaps. When in place the ballast was misted with a fine water spray, then dilute PVA dropped in.

IMG_5592

After it was all dry a wash of thin brown acrylic paint was liberally applied over ballast and sleepers to tone it down a little.

We then moved on to grass. First we applied a layer of conventional scatter as a base layer, then on top of that, static grass. My cheap "fly swatter" applicator is sufficient for a small layout like this. We mixed different colours and lengths of fibres to get a realistic look.

IMG_5652

We tried to vary the grass mix according to the use of the land, with longer strands and more lush looking grass on embankments for example.

IMG_5645

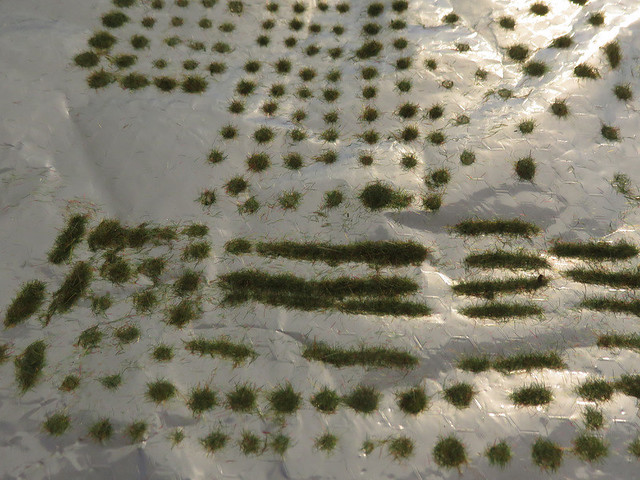
Finally, while the static grass was out, we had a go at making our own tufts on a sheet of tin foil. It kinda worked, but the PVA glue blobs were very difficult to remove from the foil, and often showed up under the tuft. Perhaps there's a better glue to use for this?

IMG_5648

Friday, 30 August 2013

Ballasting

The final job before ballasting was to put in the concrete wall that separated the trackbed from the paved area, this was done with DAS clay rolled out, squared up, and stuck in place, before being painted.

 
I wanted to control the initial ballast layer carefully so I applied dilute PVA with a brush around the sleepers, and sprinkled the ballast on to it. The ballast is very fine granite, probably intended for N-gauge, and more like gravel in 7mm scale, but that seems to suit.

 
The second layer of ballast was more conventionally applied dry, brushed into place, then sprayed (misted) with water from a plant mister before having dilute PVA dribbled in from a pippette. Both the water spray and dilute glue have a drop of washing-up liquid to minimise surface tension.

I'm pleased with the result being quite even, and still allowing the wooden sleepers to be visible and a decent gap apparent under the rail. It will get dirtied up with a brown wash later on, and lots of spilt sand over it too.

 
You may have noticed in the last update that the roof of the rear building had developed a distinct upward curve at the edges despite my best efforts at bracing it. To reverse this it was clamped to a piece of wood, with a little packing at either end, then boiling water poured over it.

 
Posted by Picasa

Tuesday, 17 November 2009

Ballasting - Quarry style!

Pen-Y-Bryn now has a new owner, but before passing it on I said I'd touch up the ballast from the mouse-attack damage. On this layout, and some other layouts I have built, I have used an unusual mthod of ballasting to give a half-buried look and a fine ballast, suitable for narrow gauge lines, quarries and sidings. Now I don't claim it to be original, but I don't recall seeing it used elsewhere.

The ballast mix contains plaster/pollyfilla, sand, and poweder paint mixed dry. I can't say the preportions as I mix it dry, but it needs to be about 50% plaster to stick properly. The sand came from the nearest beach and is quite coarse, and powder paint colours vary according to the effect required - normally a lot of black, with red, blue, and green mixed in. Here I wanted a greish colour that fitted with the stonework, cliffs, etc.

The dry mix is then applied to the layout with a tea-spoon, often through an old tea-strainer to ensure no lumps of paint or plaster get through, and brushed into place around and between the sleepers with a cheap stiff paintbrush. It is built up around the track and may cover the sleepers a little, but that is the effect required in a quarry. Once in place I use a plant sprayer to spray the whole lot liberally with water that has had a squirt of washing up liquid added, that is to reduce the surface tension rather than make bubbles, if the water forms droplets add more washing up liquid or adjust the spray pattern. It helps to start spraying away from the layout to build up pressure, otherwise the first spray splatters.

Once it is all well wetted more ballast mix can be sprinkled on to build up certain spots, and the process can be repeated as often as necessary. As always be careful around points, especially the tie-bars, and of course the track will need a good clean up afterwards. The rails should be painted before ballasting, but the sleepers get coloured with the ballast so I didn't bother painting them.

The photo below shows the tools required - the teaspoon has some ballast mix in but the jar containing the rest is not in shot. In this case I had mixed more than required when I built the layout, and kept the leftover in a jar, which meant touching up the damaged ballast was just a case of sprinkling it on and spraying.


The next two shots are supposed to show the dry ballast brushed into place, and the same after spraying with water. Not sure that it comes out, but I'm sure you get the idea!
The same technique has many uses. I use the same mix with different preportions of sand and colours to make roadways, gravel or ash yard areas, and even in a smoother brown mix, use it to cover all the open areas of the layout as a "soil" base for grass etc. In that case it can be mixed with water before applying, in effect a textured and coloured plaster mix.
Posted by Picasa