Showing posts with label Narrow Planet. Show all posts

Sunday, 3 September 2023

Bagnall and Kerr Stuart completed

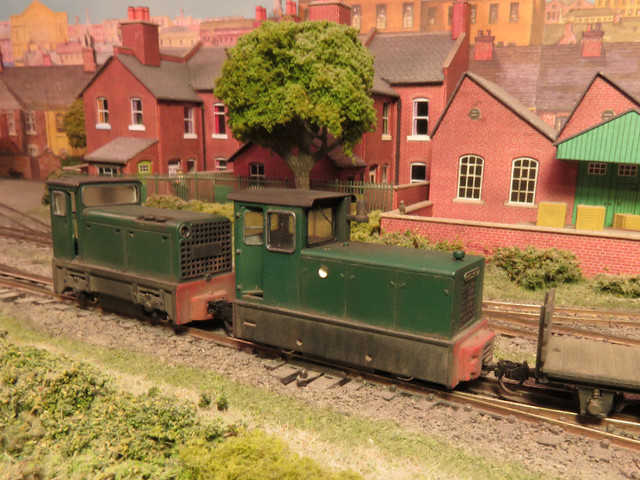
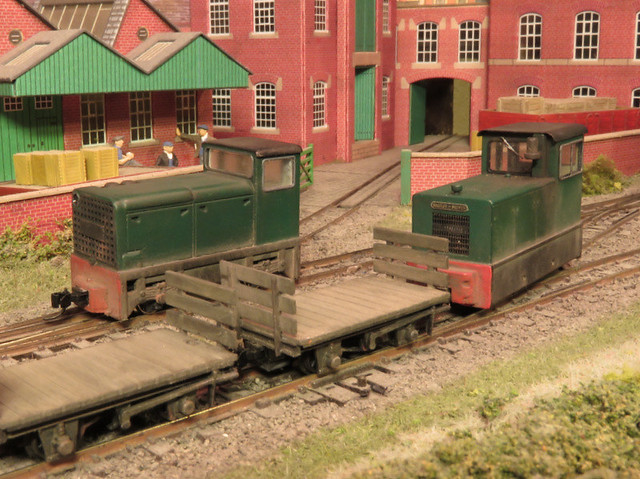
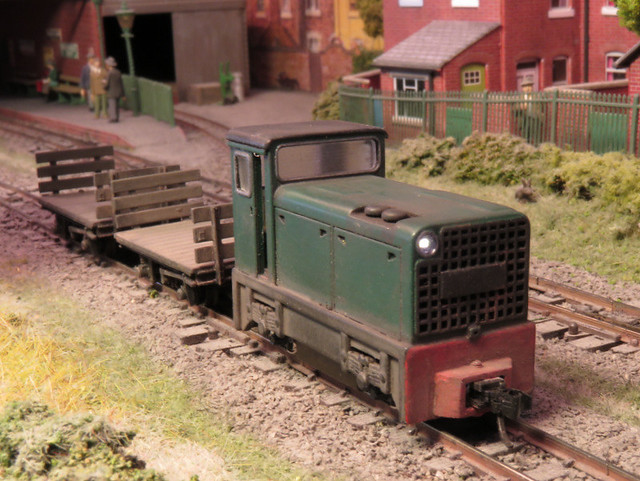
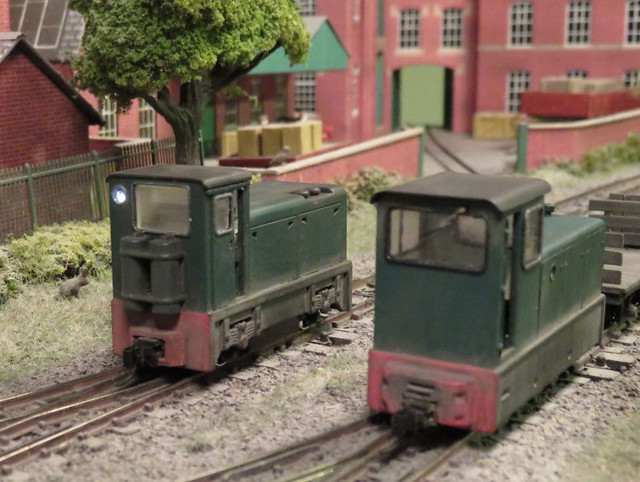
Both the Narrow Planet little Bagnall kit and the Paul Windle Kerr Stuart refurbishment are now finished. I decided to break out the airbrush using Vallejo mid green, of course I had to clean the airbrush before use as my previous clean clearly wasn't good enough. I struggled to get a good finish to start with so the first coat was perhaps a little orange-peely, but in the end got a reasonable finish. 


Black was also Vallejo acrylic but brush painted, the red buffer beams used cheap artists acrylic - a terrible idea, couldn't get a good finish, will keep those for scenic work only I think! Detail painting was with enamels as I have a bigger selection of colours. A well-thinned enamel wash was used for weathering, aiming for an oily clean finish that could reflect a well used but cared for loco in industrial use or even preservation, neither prisine nor decreptit, supported by some subtle weathering powder for coal dust and ash. Finally, a coat of Testors Dullcote toned the lot down. The Bagnall cylinders looka little shiny not having been Dullcoted. 


I'd wondered how to fix the Bagnall to its chassis, then noticed the keeper plate protrudes past the rear of the chassis block and had a screw hole, presumably to fix the original body. Of course, this keeper plate blocked the hole I needed to screw the coupling in, and the hole in the keeper plate was in the wrong place. A few moments with a burr in the dremel opened the hole out rearwards along with a countersink, allowing the Microtrains screw to pass through the keeper plate, body, coupling, and into the body again, securing them all together. 


The loco is tiny, so the crew were recuited from the HO scale Faller truck drivers pack - and still don't really fit, although a cab full of motor is forcing them half out the doorways anyway. The drinks can roof is suitably thin and doesn't look like a replacement, but I can see paint wearing off the brass steps pretty soon! A little coal in the bunker and glazing in the window and she is ready to go. 


A superb slow runner, she looks right at home on Loctern Quay where I expect she'll take up shunter duties, today I've been "testing" it including for reliable coupling operation. 


The Kerr Stuart Haig crew are from the Dapol recruitment agency. Not sure where the bits on the side tanks came from, amazing what shows up in a photograph. In the flesh, the new paint job has really tidied up the tatty body, and I think the green looks better than the black. 


Once warm the running is fair, but not as good as the looks sadly, with both surging related to the motor mount, and a tendency to stall which may be failings in the pick-ups or the wobbly wheels due to the stub axles. I expect it will see duty on Slugworth and perhaps Hexworthy but not Loctern Quay, which is why I didn't bother to change the couplings. Maybe one day I'll have a brainwave of how to improve the motor mount and pick-ups, but for £5 and a little work I'm pretty pleased!


Tuesday, 1 August 2023

Bagnall and Kerr Stuart detailing and ready for painting

With the chassis now sorted, I could crack on with the build of the little Narrow Planet Bagnall kit. I'd already primed the 3D printed body and cleaned up any lines (mainly the boiler and smokebox), and primed the etched parts on the fret too. I decided to fit Microtrains couplings, so cut square holes in the body print in the appropriate places, and rather than try and modify the etched buffer beams, I cut new ones from 20-thou plasticard using the etched one as a template. These and the etched tank sides and cab front and rear were superglued in place, and the chimney, dome and clack valves added too. The wire cab-side handrail was added as per the instructions.


So far all pretty straightforward, but it looked rather bland. I dug out my copy of The Rye and Camber Tramway (Laurie Cooksey) and some pictures of Polar Bear for inspiration for details. I added some wire pipework to the clack valves, probably not correct but impressionistic, plus a blower pipe on the left side, and a representation of a reversing lever on right. I made a crude impression of a lubricator from a sewing pin and a slice of wire insulation to fit behind the chimney, and a whistle from bits of plasticard and plastic rod to fit to the front of the cab. I use a piece of fine wire to make an impression of the smokebox door handle, it's not great but looked better than nothing. 


I also added some cab steps folded up from brass, Camber and Polar Bear don't have them but the slightly larger Victoria did, they should have a "waisted" vertical but by cutting skills don't run to that. The chassis slide bars didn't have a vertical support at their rear end, so I made one from 20 thou black plastic, a fiddly job! You can see I've filled any gaps with green Squadron Putty, including where the etched cab front and rear meet the body. The footplate had developed a slight curve at the front and in attempting to straighten it while fitting the front bufferbeam I broke the corner off, fortunately it superglued neatly in place and the filler hid the gap. The loco body then got another coat of primer, another rub back and filler touch-up, and a final coat of primer.


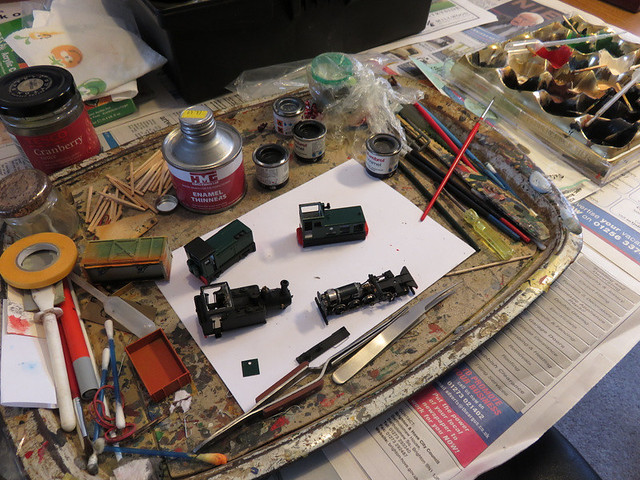
The Paul Windle Kerr-Stuart has also had some attention. The cab rear looked to have been dislodged and glued back in place, or slightly out of place. I have cleaned up the glue as much as possible, relocated the uprights and supergued them. The body was cleaned up with a damp brush, and even scraping the accumulated crud with a screwdriver, to clean it up ready for painting. The tank sides were lightly rubbed down with fine emery paper where the paint had become scuffed. 

The sanding gear operating rods were repaired. I also added some cab side handrails as they seemed to be lacking, but otherwise the detailing looked fine. It was then sent for a coat of primer, which showed up a couple of gaps needing a little filler, and some spots needing a rub-down, before a final coat of primer.

Both loco bodies are now ready for painting...

Monday, 17 July 2023

Reviving a Minitrains Porter

Some time ago I started a Narrow Planet kit for a little Bagnall tank using a Minitrains Porter 0-6-0 chassis. The Porter body had to be removed, which involved cutting part of it away from around the motor as I recall, but after having done so the chassis didn't run smoothly. I then noticed the motor looked wonky, and on closer inspection I found one of the retaining screws had a stripped thread and didn't tighten. After some frustration I put the kit away to think about what I could do about it.

Having made some progress with the Kerr Stuart Haig chassis I figured I'd pull this kit out to see if I could revive the chassis too. The first discovery was that the two screws that hold the top plate of the chassis down are the same M1.4 thread as those that hold the motor, although very slightly shorter and countersink head. However, one could be carefully screwed into the motor in place of the stripped screw, the motor thread is damaged too but not so bad that the new screw couldn't bite. This is made far more difficult by wheels being in the way preventing a screwdriver being lined up straight. The old screw went into the top plate of the chassis where it is not under strain. 


The motor still looked wonky, and the chassis still ran badly, jerking and clunking. With the screws backed off slightly the worm slipped. I tried adding packing (10 thou plastic) under the front of the motor tilt it back slightly, but then it wouldn't run at all. I then rotated the motor 180 degrees, which seemed to result in less of a lean - I've no idea why. The chassis was still jerky and clunky. 

With the motor removed it span freely under power - but the chassis didn't roll smoothly, with a definite clunk once per revolution. Gently, the rear crank-pins were prised out to free the con-rods, but the clunk remained. Finally I had to accept I would have to do what one should never do with these chassis... open it up!


Tiny screws, tiny gears, even tinier washers. Scary. Anyway, on close inspection I discovered one of the gears (on the middle axle) has a damaged tooth. These teeth are tiny so it is very hard to see, but just visible in the picture below - look for the unequal gap between teeth. 

I have no idea how this can have happened, but the real question is how to fix it. I can't fix the gear, but I could swap the axles so the damaged gear is at the front, and remove the idler gear, leaving the just rear and middle axles powered. Of course, getting the two axles in place with the idler gear and their crank pins aligned was rather tricky, but I suppose the same challenge with 3 axles and 2 idlers is even harder. Fortunately it all went back together in the end, and the chassis ran smoothly as a 2-4-0. Encouraged, I then re-attached the coupling rods and connecting rods, first omitting the middle axle crank pins to drive the front axle from the rear, the middle axle appeared to rotate with it's crank pin holes in line so I added the middle pins too. Somewhere along the way one of the tiny washers from behind the coupling rods pinged off the tweezers into space, but it seems to manage just fine. 

Yes, amazingly after all that work, the chassis actually works, and appears to run as smoothly and sweetly as you'd expect a Minitrains to, despite it now lacking an idler gear and relying on the coupling rods to drive the front axle. 


You see from the video the body is placed on. Before giving up on the chassis I'd spend some time smoothing the visible parts of the 3D print and given it a coat of primer. I added another coat, but found the lightweight body blew away from the spray can! It needs weight anyway to balance the chassis and aid pick-up and traction, so I added some lead. The "Swiss rolls" are slid into the boiler, and the flat pieces into the small side tanks, wiped with a little contact adhesive to hold them in place. As you see from the video this is enough to aid good running. 

Chassis problems fixed, I can now continue the build of this dinky little loco. 

Friday, 13 August 2021

RNAD Crew Van

Encouraged by success fitting couplings to the bogie Hudson wagon, I decided to have a go at another kit that has sat in the pending pile for a while because the bogies looked challenging for couplings. This is the Narrow Planet kit for the crew van used at RNAD munitions sites, and now found on several preserved railways for permanent way duties. It's a multimedia kit with 3D printed chassis and interior and an etched brass body, but the bogies are Dundas plastic mouldings used with small modifications. Here the parts are laid out, but I've already blackened some of the smaller parts on the etch, and tackled the first bogie. 


Although the bogies are different to those in Hudson bogie open I used the same "under-set" (type 2004) Microtrains couplings. These are a little more fiddly to make than the standard 1015 type as the cover for the draft box doesn't clip into place, but requires a touch of a soldering iron to melt it into place! 


The low-set coupling body can then be set under the bogie frame, after cutting and filing a rebate and drilling a hole for the screw, which needed shortening. I tried to cut down a screw with a cutting disk in my Dremel but it just bent! I realised it must be a soft metal, so I cut it down with side-cutters, which worked just fine. 


With the bogies sorted far more easily than I'd originally feared, it's on with the body, which folds up from the brass etch in two parts that join at the door recess. I opted to solder them together, though I guess epoxy would have worked. The parts slot together, so I smeared some flux along the inside edge and placed three small slices of solder onto the flux, then it just needed a touch from a tinned soldering iron until the solder flows into the join. Actually even my tiny pieces of solder were too much as some solder appeared outside the join, but was easily cleaned up. The mini clothes peg adds a little weight to the upper part but also allows me to hold it with a finger without burning myself during soldering, while the pliers are just weighting the body down.


Handrails are also bent up from etches, and I decided to solder them too. A piece of thin card was slid behind them to space them from the bodyside, and a sprung tweezer used to clamp the handrail in place. With the piece turned over flux and a tiny piece of solder were added behind, then a touch of the iron to fix. The windscreen wipers were added in a similar way. After the soldering is done the body was cleaned in Cif to remove any flux residue.


The assembled body slots neatly onto the 3D printed chassis/interior, which I'd already given a coat of primer. I've also glued strips of lead under the seats. The odd shapes of brass strip under the roof form the vents and tabs to locate the roof, it's a complex piece of origami but cleverly folds up, and I soldered it in a similar way to the other parts. It did need care to get central though, which matters for the roof to sit central on the body, and at first it was slightly skew. Fortunately it was fixed by levering the part sideways with a screwdriver while softening the solder with the iron. 


In the end it wasn't a difficult kit to put together, and after some thought (and selecting the right type) the couplings were not challenging to fit. At present the roof is loose and the body just slotted onto the chassis, which will make painting easier. 

It's an unusual but attractive little vehicle which will add interest to the permanent way train for Hexworthy, in a preservation setting. My next challenge is what colour to use? Most of my wagons are grey, but I did add yellow ends to the excavator wagons. Perhaps this could be yellow all over, like this one spotted at Amberly - though I'm not brave enough to try the stripes!


I might also tone down the weathering, and I'm really not even sure what colour the van on the right is...

However, I rather like the blue seen on this 4-wheel version, also at Amberly. Maybe blue with yellow ends? Or perhaps green with yellow ends? 

Friday, 1 September 2017

A Duo of Diesels

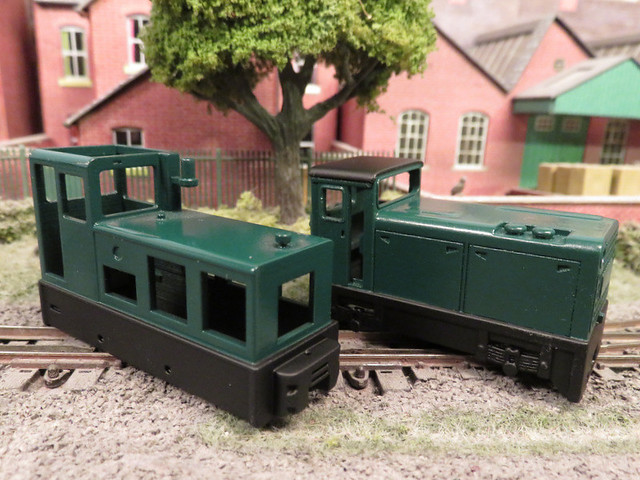
I've finally (after about 8 months) finished the pair of 3D printed, Kato chassis powered, ex military diesels: the CWR produced Hunslet left) and the Narrow-Planet Baguley Drewry (right). Both are relatively straightforward but tasks like fitting couplings, painting, glazing, and weathering have been completed in occasional modelling sessions.

IMG_3759

Fitting the couplings to the Baguley was easy enough, with a slot cut into the buffer block for the Microtrains draft block and plenty left for the screw. There's plenty of space inside for some lead which helps tame the sprightly Kato chassis. Glazing was a little fiddly but templates in the instructions helped with cutting out, the brass etched frames were painted separately and fitted afterwards to hide any join - however I couldn't help getting spots of superglue on the paint, which had to be hidden by a little "dirt".

IMG_3756

The Hunslet had no space for the couplings even after I cut a square hole in the buffer beam due to the chassis fitting flush inside, so I made up a mounting block using plasticard stuck to the face of the bufferbeam. Such blocks were common on NG locos and it holds and disguises the coupler draft box, providing something solid for the screw too. 3D printed glazing was provided, it's a little milky with some faint layering visible (and sanding it would make it worse!) but I used it anyway - it's convenient and looks OK. Here you can see I've also finished painting and weathering a couple of RNAD wagons too.

IMG_3769

The Hunslet's party trick is the working headlights. The headlight openings were glazed with a drop of Micro Krystal Klear, and the micro SMLED's stuck behind them. The PCB was pushed into the bonnet so the contacts touch the Kato chassis when fitted. The lights work really well, the circuit suggested by my friend Harry does the job of keeping the LED's lit at a constant brightness and reasonably flicker-free, and I think I've got the brightness about right. The circuit meant less space for lead, but I still squeezed a little in around it and it runs fine.

IMG_3765

Both locos have been weathered using a little dry-brushing, a dirty wash, and some powders (which may get toned down a little), the idea is to capture locos working in preservation service on maintenance trains - generally clean bodies but with some track and exhaust dirt. They could both do with a driver (and the Baguley could use a representation of an interior) but otherwise they are ready for service. Despite my reservations about 3D printing, I am very pleased with the end results.

Thursday, 29 June 2017

Emery paper and masking tape

I have been making slow progress over the last few months with two 3D printed Diesels, a Narrow Planet Baguley-Drewry and a CWR Hunslet, both as used at RNAD depots. I was keen to get a good surface finish so spent much time with fine emery paper, then a coat of primer, more rubbing down, this was repeated 4 or 5 times until I was happy the print lines were gone. These were both good quality prints, but the effort in surface preparation is worthwhile.

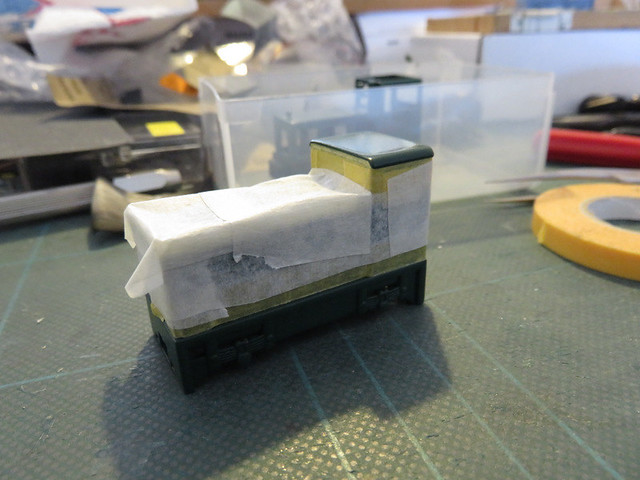
The recent fine weather was a good chance to spray with the top coat - I chose Halfords enamel dark green, as I've used for other locos, and looks rather smart. The rattle cans give a good finish with little effort, so I decided to spray the black frames and roof too.

IMG_3316

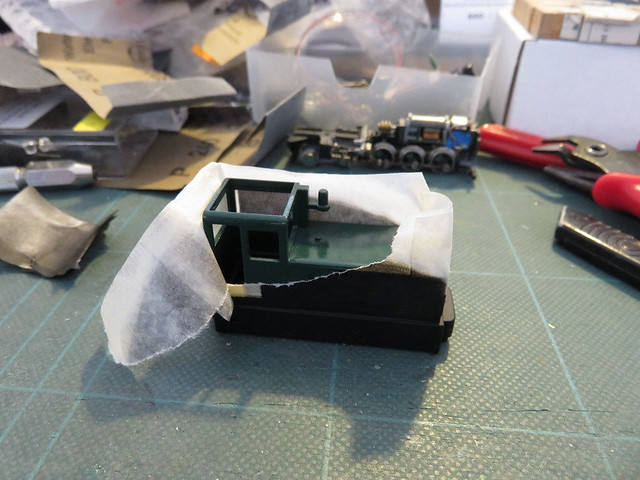
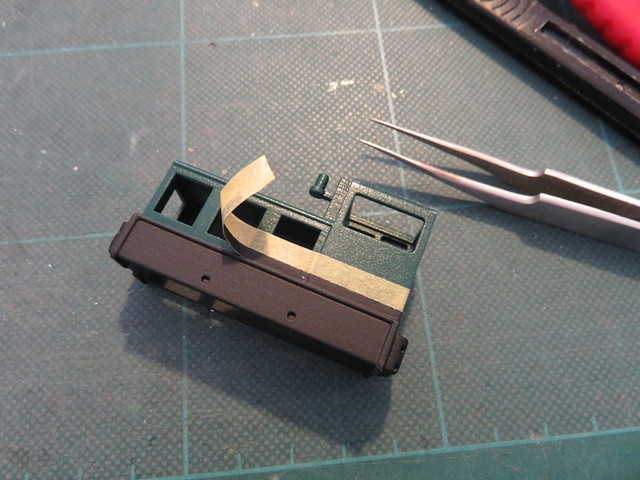
This is the first time I've used masking to spray different colours, and I was very pleased with the result. It helps that the break is between body and footplate so lining up the tape straight is easy, and there's little chance of bleed under the tape. I used Tamiya tape (yellow) for the edges, which sticks well with a clean edge but low tack, and "domestic" masking tape for covering the bulk of the model in between.

IMG_3314

After spraying a few coats of Halfords black enamel, the exciting bit is peeling back the tape!

IMG_3311

The Tamiya tape was carefully pulled away with tweezers. I'm very pleased with that finish!

IMG_3313

You may notice I haven't yet fitted the etch components including the bonnet sides, I thought it might be easier to paint this way. The etch has been blackened, primed, and painted separately.

So now the details are being brush painted with enamels. Buffer beams get a coat of white followed by two of red (I considered yellow and possibly even wasp-stripes, but I do like red with the green). Cab interiors are cream. You may notice another loco has made it to the paint shop too...

IMG_3317


Wednesday, 27 January 2016

Plastic and Nickel Silver

Once I'd done the prep like modifying the coupling pockets the rest of the Hudswell Clarke kit came together quickly. Assembling the cab is a little fiddly, but otherwise it is straightforward. However I did struggle with the roof; the kit has tabs on the top of the cab front and rear that fit half-etched slots under the roof, but I found the slots further apart than the cab was long and the slots too shallow for the tabs. In the end I filed the tabs off altogether, and resorted to another method of aligning the roof - soldering small tabs of phosphor-bronze (it was the thinnest metal I had) to sit inside each edge. For now the roof is loose for painting but they should help to glue it in place when the time comes.


The kit is well detailed as supplied so there's not much to add (I've left brake pipes off for painting, and mine is vacuum braked so I've not fitted the air brake pump). I did notice it was missing handrails so fitted some to the cab, through drilled holes in the floor (would have been much easier if I did that before fitting the cab!) and glued the tops to the inside of the cab sides. I guess I could fit a smoke-box hand-rail too?


I was left with a few small gaps - at the cab edges, the holes for the fuel rails (I didn't use) on the tank top, and the etched grooves under the cab roof. Nothing a spot of filler couldn't resolve. The final task was to do something with the American style cylinders of the Minitrains chassis - photos of Hudswell Clarke locos had European style smooth (lagged) cylinders. In the end I cut a strip of 10-thou plastic to fit between the flanges and secured it to the valve chest side and around the cylinder. I'll see how this looks with a spot of primer on, it may need a little filler too.


Other than cleaning up, and perhaps metal blackening, it is ready for primer. That will wait for warmer weather though. However I do like the look of the loco, chunky and elegant. One thing needs looking at though - it runs with a whine, I think the flywheel is rubbing on the cab front...

Wednesday, 20 January 2016

A Narrow Hudswell Clarke

Back at EXPO-NG I picked up the new Narrow Planet Hudswell Clarke kit, and thinking it would be a quick and easy build, I made a start. It's in their usual style of a 3D printed core with etched nickel-silver overlays to get a good quality surface. However Christmas preparations and family distractions soon got in the way and it was only a week or so back that I actually made any progress.


The first step is to cut down the chassis and replace the outside frames with those in the kit. At first this appeared to introduce a bind to the running, though I could not see a reason. A bit of re-fitting and it has gone, I think drooping pistons were to blame and the con-rods catching the fly-cranks, I've fitted a piece of plasticard over the cylinders allowing the plastic screw to hold them level better.

Next the boiler and side tanks were stuffed with lead - I use sheet roofing lead offcuts which meant cutting into little strips and feeding in from the cab end with tweezers. The "liquid" (balls) variety might have been easier to pack in but isn't as dense as real lead, so overall I've probably achieved the same weight - it's adequately balanced the motor at least. I even cut a piece to fill that void under the front footplate.


I had to open out the coupling pockets to fit Microtrains couplings, requiring an evening with small files and an abrasive bit in the mini-drill, going carefully to avoid damage to the print - especially where the rear pocket is used to locate the body to the chassis. So after several evenings work with little visible progress it was good to be able to start sticking body panels on! At this point I had to make decisions - the kit is rather like a "Vari-kit" with two styles of cab, and two shapes of side-tank, as well as other details. I chose the enclosed cab (more suited to the UK) with straight tanks and without tank-top fuel rails (for wood or cane).


The Nickel-Silver cab etches can be glued but are recommended to be soldered for strength, yet that frightens me as there is a risk of melting the printed core. I soldered the right-side to the front off the model, holding the parts together with magnets, then fitting them before soldering the left-side on. The cab rear and buffer-beam have been soldered together, after the photo was taken they were superglued to the buffer-beam and when that is solid I'll solder the top corners together. A line of flux along the join with some tiny pieces of solder on it, dabbed with a quick touch of the iron, seems to be the safest way to go.

Wednesday, 2 June 2010

A Naming Ceremony

A little over a year ago my latest Paul Windle loco arrived, just a couple of days after my daughter. It seemed like a loco that needed a name, and my daughter's name "Lucy Ann" just seemed to fit, so my wife suggested I get some name-plates. Well, suitable bespoke name-plates proved hard to come by and not cheap, so when a freind started offering etched nameplates via the NGRM forum I was delighted! So here is Lucy Ann, along with a reasonable representation of Hunslet style works plates too!


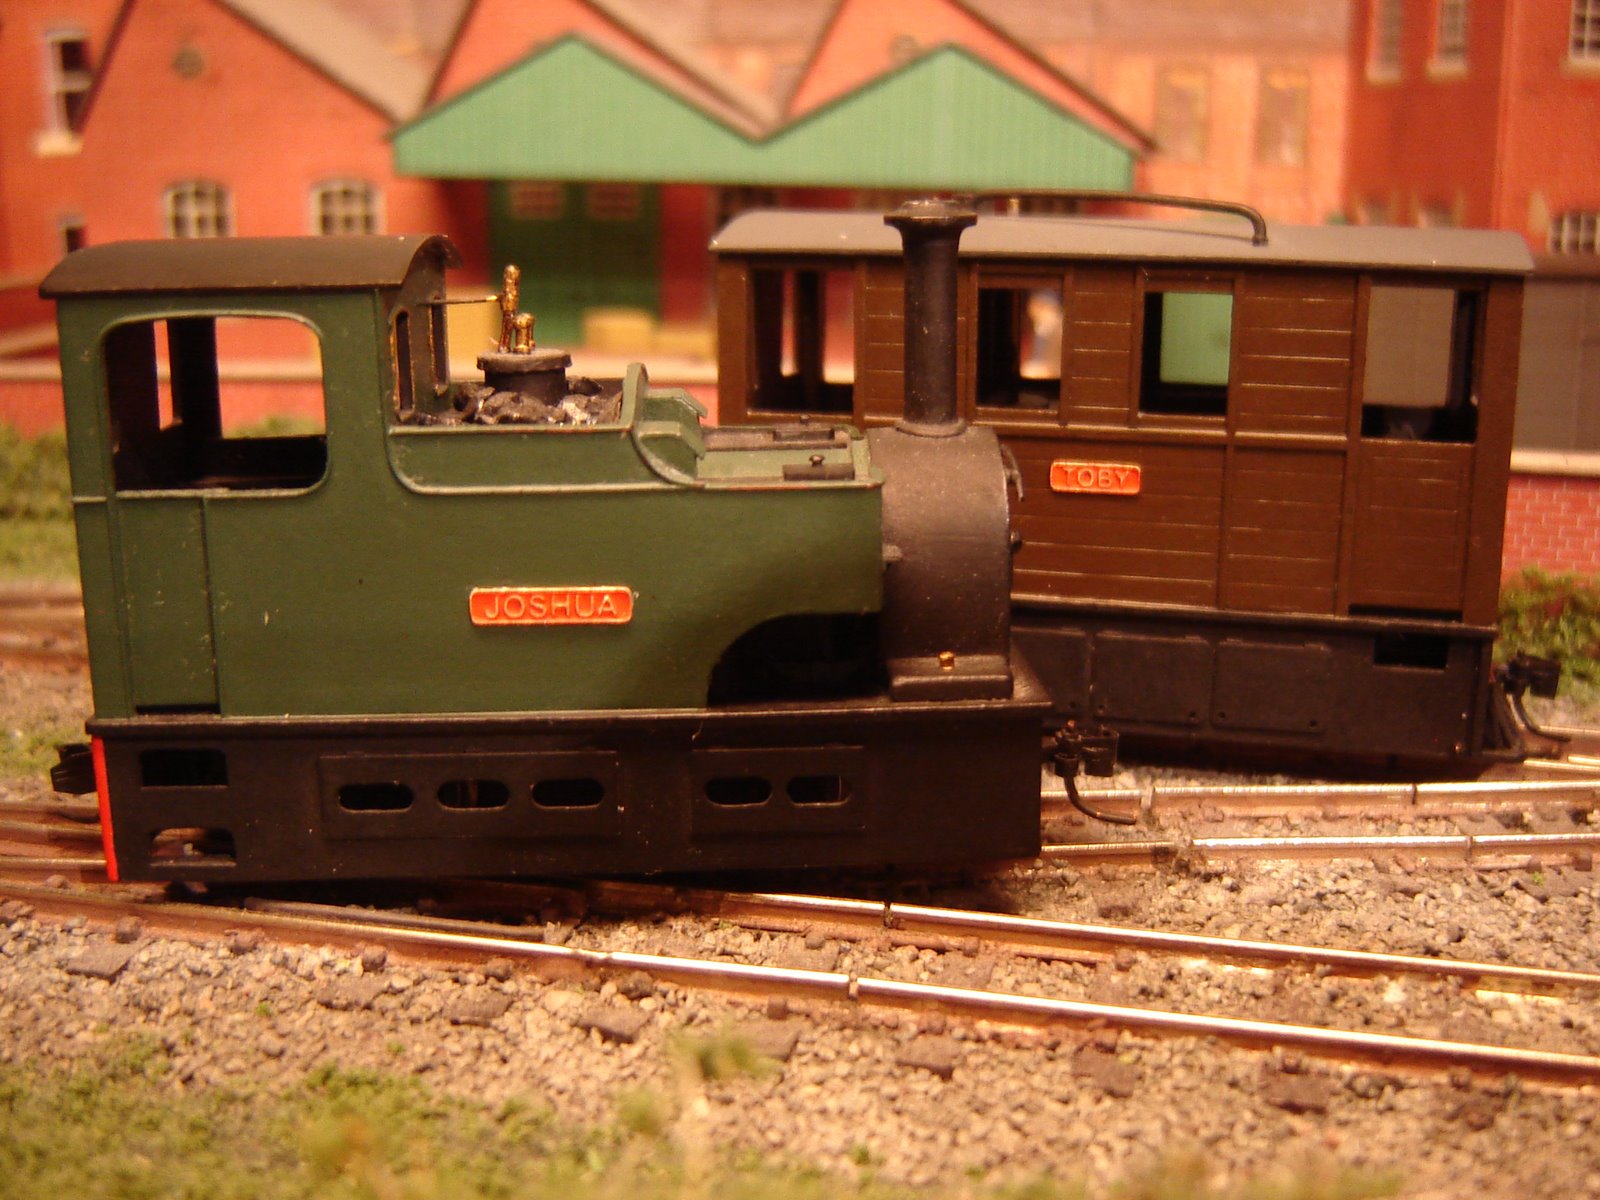
While I was at it, in the interest of sibling equality, I got a set of "Joshua" plates, which seemed to fit the Sharp-Stewart tram nicely. And as for the LNER style tram loco, well that just needed the name "Toby"! Both are also Paul Windle models. The plates are finely etched, but do need a background colour. I chose red, just Humbrol matt enamel, and after it had dried I removed the paint from the raised letters and edge with a scalpel blade, and by rubbing gently over some fine wet-and-dry. I lined them up on the side of the loco's against masking tape to get them level and central, and stuck them on with a little PVA, on the basis that it should provide sufficient bond without damaging the paint in case of excess.

Considering that the name plates are just 2mm (a scale 6 inches of course) high, they are very sharp and really add to the locos' appearance, but I am not sure the photos do them justice. If you are interested you can find out more and order your own from
Narrow Planet, who also do works plates and are planning other related products. Now I'm sure I have other loco's in need of names ...

Posted by Picasa