Showing posts with label Baguley Drewry. Show all posts

Tuesday, 29 October 2024

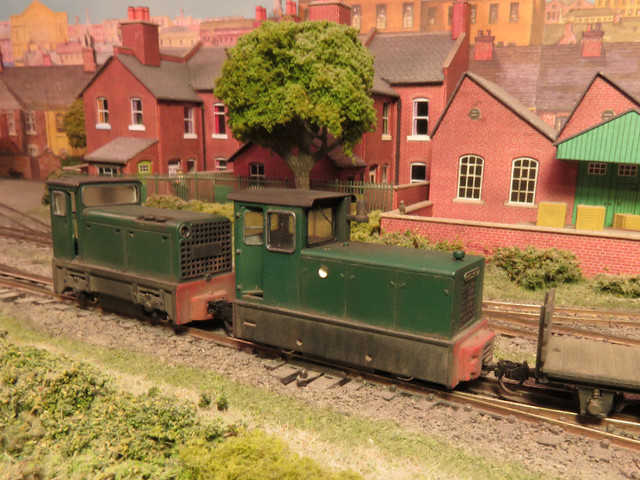
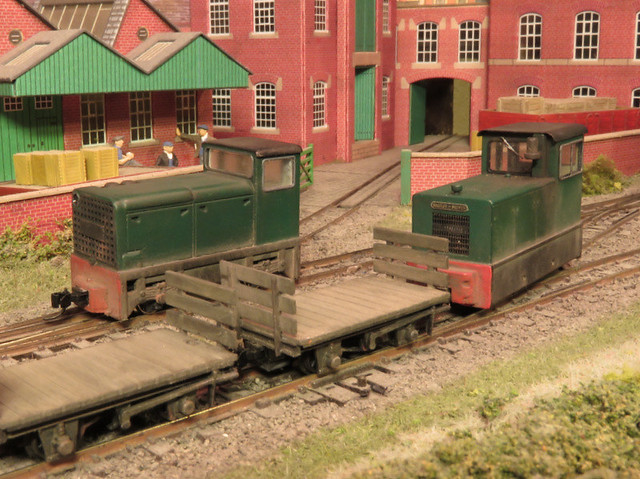
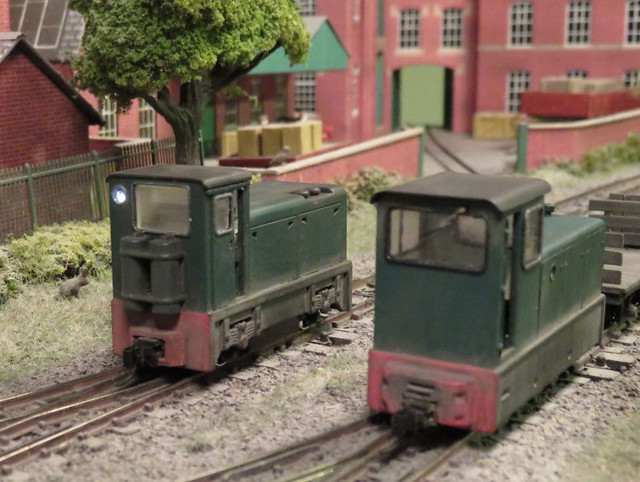
Bachmann Baguley-Drewry 70hp - commissioning

The Bachmann Baguley-Drewry 70hp is a lovely model, and I wanted to use it on works trains for Hexworthy, but my wagons are all fitted with Microtrains couplings and the Bachmann models come with the standard 009 type coupling. I know the Bachmann EZ mate couplings can be swapped in, but while they'll couple to Microtrains, they don't work reliably in uncoupling. 

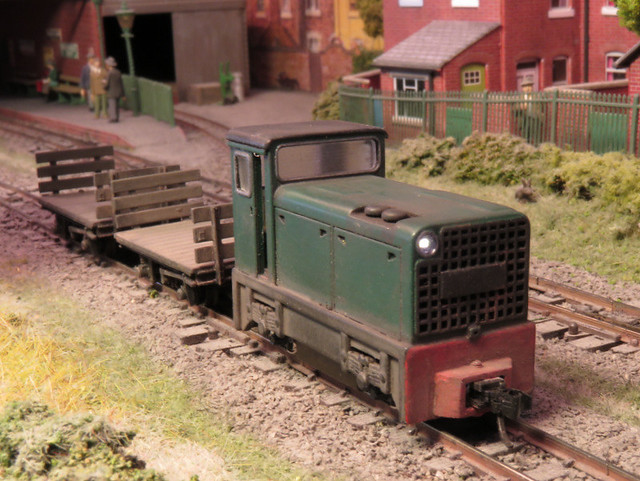
The large buffer blocks have a big square opening to clear the standard coupling, that is pretty close to the size of the Microtrains draft box which can be accomodated after a few strokes of a file. The model is supplied with alternate buffer blocks without the coupling hole, for which long coupling pins are provided, these look ideal to secure through the centre of the Microtrains draft box. 


However, the back of the coupling fouled against the coupling mount on the chassis block. Four screws release the body and skirt to reveal the chassis block, so I took a file to the coupling mount. It's now nearly flush with the block above, but while the centre screw socket has been flattened it is still intact, so the standard couplings could be refitted. 


The buffer blocks were clipped back in place with a smear of superglue as they pulled off slightly too easily, and would now have to take the strain of the coupling. The Microtrains coupling then fits in place, with a little superglue gel either side and on top (not near the moving parts), and the coupling pin inserted through the top of the block through the centre hole of the coupling. 


While the body was apart I fitted a driver from the Preiser truck drivers set, painted with added high-vis of course. A lever (gearbox?) needed trimming back as it fouled the seat such that no driver could sit there - it was that or amputate his left leg. 


While I didn't want a heavily weathered look, any working loco has a little dirt. I used water soluble oils to make a dark wash for the body, and a mid-brown wash for the frames. This is applied liberally, then a damp brush used to take off the excess - I spend longer removing it than applying it! This allows panels to be largely clean albeit slightly dulled, while emphasising shadows such as panel gaps and grilles. The airbrush was used to give a very light dusting of soot on the top (diesels produce soot too!) and track dust along the lower edges, similar to the coaches. 


Other detail painting included touching in the cab grab handles in black, and dry brushing a hint of rust and gunmetal over the edges of the buffer beam casting, corner steps, and cab steps. These help bring out the detail and provide signs of use. 


I'm pleased with the result, subtle from a distance but more realistic. 

The couplings work perfectly, and the loco looks great with the works trains, adding a splash of colour. 


It makes a good partner to the 90hp (Narrow Planet kit), noticeably shorter of course and with differing details (such as the side grilles), but clearly of the same family and the nicely detailed kit compares well to the RTR model. 

Saturday, 7 September 2024

A Baguley and a pair of Bug Boxes

A few additions to the stock list today. A couple of Ffestiniog bug-boxes and a yellow Baguley Drewry. 


The bug boxes will of course go well with the England and Double Fairlie locos. The Baguley will probably end up on works trains, I don't really need another modern diesel but it is nicely detailed, looks great on the layout, the yellow pops out, and of course it runs sweetly. 


However, I was also drawn to it because of the one at Amberley, in which I had a cab ride a year or so back. 


My model will no doubt get some weathering to make it look like a well-worked loco, but I don't think I'll go as far as the "weathering" on the Amberley loco!


Saturday, 22 July 2023

Amberley

The Amberley Museum hold an annual rail gala weekend with lots of narrow gauge trains running and a model railway exhibition in the railway hall, and as usual the Sussex Downs 009 group support with our society stand, which I helped with today. 


We have a small demo layout and a showcase to show what is possible in 009, and a modelling demo to show how, and answer questions. Here's Tim and John. There were a handful of layouts and traders, although it's not a big exhibition. This event is unusual in that it is both narrow gauge railway interest and a general public/family attraction, so a real mix of visitors, and the model railway exhibits in the railway hall are a side attraction to the rest of the museum and the full-size railway goings-on. That means at times it can be quite quiet in the hall, so having some modelling to do is useful! 


Outside amongst lots of interesting 2-foot gauge industrial trains, it was nice to see three of the four Thakeham locos, The blue Hunslet was in use on demo freight trains. 


With Polar Bear out of service for a boiler overhaul an alternative yellow loco was on passenger duties, this relatively large and modern Baguley Drewry. I was lucky enough to have a cab ride, thanks to Gerry Cork (seen driving) and Pete Smith. 


The cab is spacious and comfortable, if a little noisy, and the view through the large windows is excellent. Here's a view over the nose with Peter waiting. From above, it's clear the bonnet really needs a repaint! 

Always nice to see Peter in steam, a charming loco. A pity the rain came in by the afternoon, the demo freight trains had to stop as they slipped on the wet rails, and the afternoon loco "calvacade" was cancelled, not that many would have stood around in the rain to see it anyway. 

Friday, 1 September 2017

A Duo of Diesels

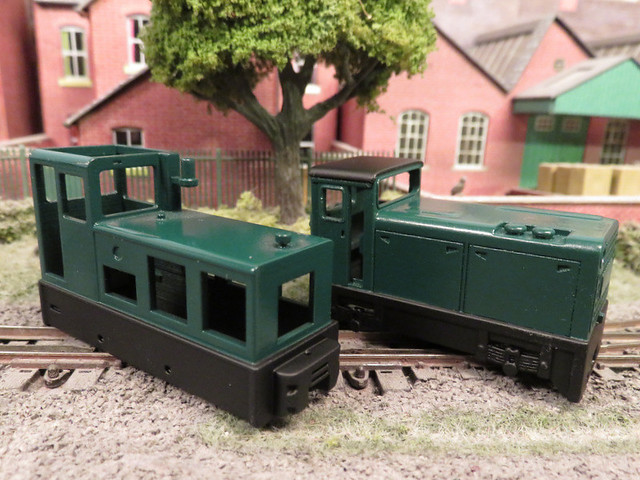
I've finally (after about 8 months) finished the pair of 3D printed, Kato chassis powered, ex military diesels: the CWR produced Hunslet left) and the Narrow-Planet Baguley Drewry (right). Both are relatively straightforward but tasks like fitting couplings, painting, glazing, and weathering have been completed in occasional modelling sessions.

IMG_3759

Fitting the couplings to the Baguley was easy enough, with a slot cut into the buffer block for the Microtrains draft block and plenty left for the screw. There's plenty of space inside for some lead which helps tame the sprightly Kato chassis. Glazing was a little fiddly but templates in the instructions helped with cutting out, the brass etched frames were painted separately and fitted afterwards to hide any join - however I couldn't help getting spots of superglue on the paint, which had to be hidden by a little "dirt".

IMG_3756

The Hunslet had no space for the couplings even after I cut a square hole in the buffer beam due to the chassis fitting flush inside, so I made up a mounting block using plasticard stuck to the face of the bufferbeam. Such blocks were common on NG locos and it holds and disguises the coupler draft box, providing something solid for the screw too. 3D printed glazing was provided, it's a little milky with some faint layering visible (and sanding it would make it worse!) but I used it anyway - it's convenient and looks OK. Here you can see I've also finished painting and weathering a couple of RNAD wagons too.

IMG_3769

The Hunslet's party trick is the working headlights. The headlight openings were glazed with a drop of Micro Krystal Klear, and the micro SMLED's stuck behind them. The PCB was pushed into the bonnet so the contacts touch the Kato chassis when fitted. The lights work really well, the circuit suggested by my friend Harry does the job of keeping the LED's lit at a constant brightness and reasonably flicker-free, and I think I've got the brightness about right. The circuit meant less space for lead, but I still squeezed a little in around it and it runs fine.

IMG_3765

Both locos have been weathered using a little dry-brushing, a dirty wash, and some powders (which may get toned down a little), the idea is to capture locos working in preservation service on maintenance trains - generally clean bodies but with some track and exhaust dirt. They could both do with a driver (and the Baguley could use a representation of an interior) but otherwise they are ready for service. Despite my reservations about 3D printing, I am very pleased with the end results.

Thursday, 29 June 2017

Emery paper and masking tape

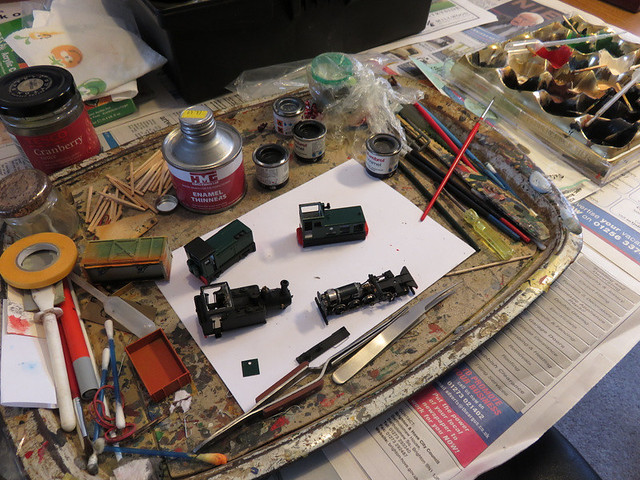
I have been making slow progress over the last few months with two 3D printed Diesels, a Narrow Planet Baguley-Drewry and a CWR Hunslet, both as used at RNAD depots. I was keen to get a good surface finish so spent much time with fine emery paper, then a coat of primer, more rubbing down, this was repeated 4 or 5 times until I was happy the print lines were gone. These were both good quality prints, but the effort in surface preparation is worthwhile.

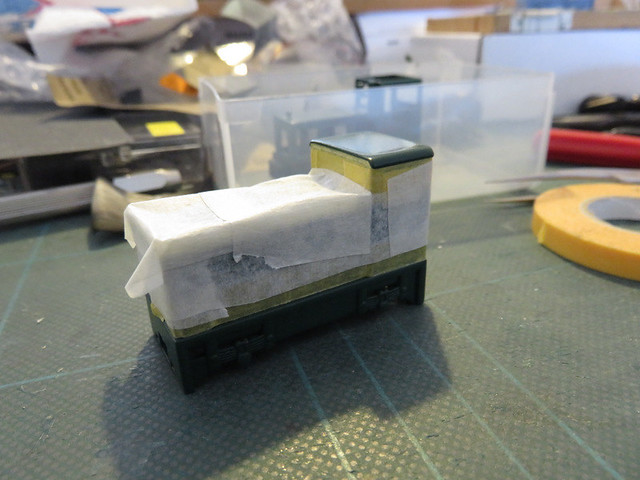
The recent fine weather was a good chance to spray with the top coat - I chose Halfords enamel dark green, as I've used for other locos, and looks rather smart. The rattle cans give a good finish with little effort, so I decided to spray the black frames and roof too.

IMG_3316

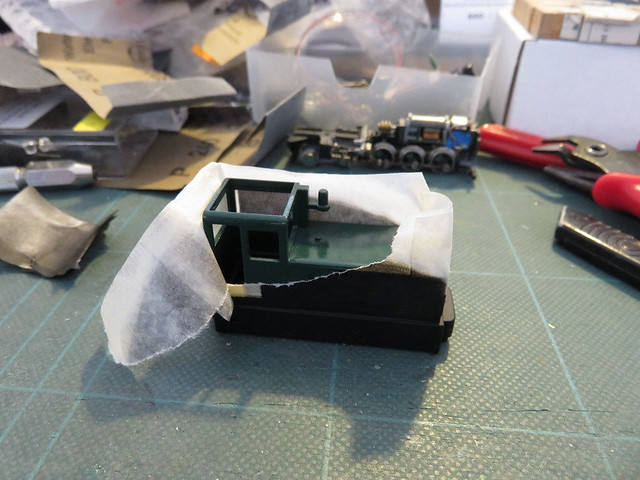
This is the first time I've used masking to spray different colours, and I was very pleased with the result. It helps that the break is between body and footplate so lining up the tape straight is easy, and there's little chance of bleed under the tape. I used Tamiya tape (yellow) for the edges, which sticks well with a clean edge but low tack, and "domestic" masking tape for covering the bulk of the model in between.

IMG_3314

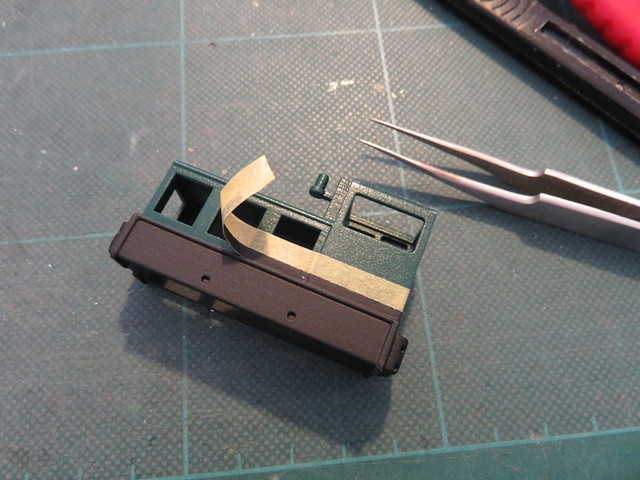
After spraying a few coats of Halfords black enamel, the exciting bit is peeling back the tape!

IMG_3311

The Tamiya tape was carefully pulled away with tweezers. I'm very pleased with that finish!

IMG_3313

You may notice I haven't yet fitted the etch components including the bonnet sides, I thought it might be easier to paint this way. The etch has been blackened, primed, and painted separately.

So now the details are being brush painted with enamels. Buffer beams get a coat of white followed by two of red (I considered yellow and possibly even wasp-stripes, but I do like red with the green). Cab interiors are cream. You may notice another loco has made it to the paint shop too...

IMG_3317


Saturday, 10 July 2010

Railcar painted

The Railcar has been with my friend Rob Kaczmarczyk for painting, and today I got it back. And he has done a great job!

Despite the fact that all my other passenger stock is green, this railcar seemed to suit red best - although I have no idea why! And so red it is. I also wanted a "wiped-clean" look, not uncared for, but a well-used look. Rob's sublte touches with the airbrush have really brought out the panelling and underframe detail. All it needs now is the couplings re-fitting (in case of a luggage trailer being required), and of course some passengers!

Rob takes commissions so if you are interested, check out some of his other work.

Posted by Picasa

Tuesday, 30 March 2010

Railcar ready for painting

I've just completed the final details, so the railcar is now ready for painting. Well, it needs a good clean and polish first, but there's not much point in doing that until I am ready to paint it! The trouble is, I don't have any etch primer and I'm not sure my usual Halfords primer will be the best for brass, so painting might be a little delayed.

Final details included door handles (bent s
taples), the ventilators over the doors (from the etch), a battery box and more unkown rodding under the side shown, and a starting handle on the "front" (right of coupling in the lower photo). The glazing cut previously was trimmed to clear door-handles and roof and slid back in (of course it will be removed for painting). I did wonder about putting driving controls inside, but since they are not visible in photo's and I am not sure where they would be, I thought better not to guess and get it wrong. However I will also need to amputate the legs of some passengers!


So final verdict on the kit? Well I am still not a fan of brass, plastic kits are much easier and to my mind, the results just as good. Also the description of a "scratch aid" kit is spot-on, although the sides are nicely etched and you don't have to cut the windows out, the rest of the model has to be scratch built, and to build anything approaching the prototype research is required too. I have found a lot of help on the NGRM forum as well as through comments on this blog, a real benefit of the internet! But for models of less-well known prototypes the Worsley Works range are a big bonus.

That said, while it has not been an easy project, it was not exactly difficult either, just challenging enough to make it interesting and enjoyable. I have managed with standard tools found in just about every modellers toolbox, and my average skills, and has taken a couple of months at my sedate pace of about 3 evenings a week, so it should not be beyond the capabilities of anyone with a little kit-bashing experience. It's been fun, and has resulted in an attractive and unusual model I think!

Now, what colour to paint it?
Posted by Picasa

Sunday, 28 March 2010

The railcar, a kettle, and some plastic ...

OK progress has been interrupted a bit lately, but I have completed the roof!

The kit didn't come with a roof - and I'm not sure I could have rolled a brass roof to the right shape anyway, so again I have reverted to my usual plasticard. The trouble with plastic is that it doesn't stay bent - unless that is you give it a hot bath! So two pieces of 20-thou plastic were cut to the lenght of the roof but over width, and taped to a used tin can. Then I put the kettle on ...


... no not more tea! Here's how it is done. Put said tin into jug and pour in boiling water. Allow to stand for a while (now have your tea!). Empty away, rinse in cold water, and then remove the tape. Hey presto, curved plasticard! Simple but effective, and not my idea - I've done it before but can't remember where I first hear about it. This tin was pretty close to the right radius, slightly too tight, which is fine as it is forced to the right radius later.


I said two pieces of plastic were bent - one was trimmed to the roof size with slight overlap over the bodysides, the other cut to fit just into the bodyside, then the two were cemented together - there is no way that bend is coming out! To make it even stronger I cut a piece of 40-thou plastic to fit inside the body like a ceiling, and - here's the fiddly bit - 4 small pieces to the curve of the roof to act as "ribs" like this: ( - which were glued to the false ceiling, then the curved roof stuck over the top. It is now really solid, and exactly the right radius! It is a faily tight fit into the body and helps hold the sides rigid, especially when being picked up, when painted a spot of PVA will hold it in place such that it could be prised off if needed.


Finally I found some lamp ventilators in my bits box - whitemetal castings of unknown origin - and added a couple as per the photo's I have. Also some fine microstrip makes the rainstrip along the edge of the roof.

Posted by Picasa

Thursday, 11 March 2010

Railcar - Tackling the underside!

Recent progress with the railcar has focussed on the underframe and all detail below the body. This has highlighted that as a "scratch aid" kit there is an awful lot of scratchbuilding involved!

First two layers of 40 thou plastic plus further packing has been added below the floor, which had been set further up the body to get the chassis the right height. The plastic extends slightly below the lower beading as per the photo's I have. Then an underframe was added from plastruct "H" section - allowing for couplings. The very distinctive radiators under the ends were made from plasticard scored with a razor saw, giving the grille effect, then detailed with microstrip strapping, though they have been cut around the coupling.


The Kato chassis has had as much of the "N-gauge" detail removed as possible, but the plastic frames hold the wheels and motor in place so care was taken not to weaken them. Very simple detail was then added for W-irons, axleboxes, and truss-rods, from plastic. Not much of this will be visible! Incedentally the chassis is now a fairly tight fit into the plastic hole left under the body!

Much thought was given to the steps - although the prototype has two steps to each door, I settled on one, as this model has been built lower and on smaller wheels than the prototype. I was also concerned that lower steps might hit platforms, as well as being very vulnerable! The steps were made from off-cuts of the brass etch and soldered to springy wire, which was then bent to suitable supports and glued into holes in the floor behind the solebars. Hopefully this would make them robust enough!


Finally the prototype railcar has some unusual and distinctive rodding (or pipework?) along the side of the chassis, I think these are controls to the driving positions but I'm not sure. Since they are always in shadow, and hard to see clearly on prototype photos, I have made a representation from micro-rod.


This view of the underside of the body, and the chassis removed, shows the basic detail on the chassis as well as the plasticard packing under the body, supports for radiators and details, the brass and wire steps, and how the Microtrains couplers are screwed into place - they can be removed for painting.

Posted by Picasa

Saturday, 20 February 2010

Railcar Interior

The railcar has been making steady progress recently, an hour or two at a time in an evening, although it doesn't look like dramatic progress! Layers of 40-thou plasticard have been added above and below the floor, cut to be a tight fit around the chassis, such that it seems to stay in place with friction at the moment! However the main focus recently has been on the glazing and the interior, which because of the large windows all round, will be very visible.


In the corners of the body, between the doors and the end, plasticard was built up to make the recesses behind the handrails. Strips of 20-thou plasticard were cut for the panelling up to the windows, and these were glued in place with packing strips so that they form a slot for the glazing - cut from 20-thou plasticard - to slot into. The end glazing also slots behind the plasticard corner pieces. The pictures hopefully show this better than I can describe.

I've been given a drawing of the interior, which has been most helpful. I thought the best way to hide the chassis was with a dummy floor, made from 40-thou plasticard. This left enough space either side of the chassis for a couple of strips of roofing lead - in this scale the more weight the better, and it does help make the running more smooth.

With the dummy floor in place (the cut-out is to clear the capacitor, which is the highest part of the chassis) the tops of the seats have been glued on, and the end seats made up. The wide strip at the right-hand end would be the engine cover. The floor is about 3mm higher than it should be to rebate the chassis to the right ride-height., and the dummy floor over the chassis is only just below the window line, so any passengers will have to suffer major surgery in order to fit!
Posted by Picasa

Wednesday, 3 February 2010

Bold as Brass

Now I've not worked with etched brass much before, other than a simple diesel kit (where I used epoxy glue) and the cab of the Ruston I built a few years ago. So this is a bit of a first, and I did consider glueing the body together around a plasticard inner body. But that would be cheating, and more to the point, I knew it would be much stronger if soldered. I'm used to soldering wires when wiring up the layout, but I don't have flux, special solders, shaped iron bits, etc., however in this case I have managed (just about) with conventional multi-core solder and a standard Antex 25W iron. Reading Phil Parker's guide in this months Hornby magazine, other than the lack of flux I was not far wrong! Still, it seems to have worked ...

First challenge was to form the tumblehome on the sides, I did this by rolling them heavily with a wooden dowel onto a piece of card, a little at a time until the profile matched the ends. Then I soldered each end to each side, using the brackets supplied soldered to the ends first. The kit comes with no instructions, so thanks to the NGRM forum on tips of how to assemble.


Eventually I got the whole body assembled, pretty square and without much solder on the outside. The corner joints have come out pretty well, so I'm pleased with the result!


Here it is on the chassis, posed next to a Vale of Rheidol brake van (by Parkside Dundas) to give an idea of size. I mounted the brackets for the floor 3mm up the ends, so the chassis is set about 2.5mm up inside the body, which looks about right - possibly slightly lower than the prototype but will look in keeping with my other stock.


Don't forget this kit isn't designed for any particular chassis, so I have had to cut a hole in the floor to accommodate the Kato chassis. That was hard work, I don't find brass as nice to work with as plasticard. The floor is intended to bolt up into the body using the holes in the brackets at the ends, as shown below, thus allowing the chassis to be attached to the floor and glazing to be fitted after painting.


However here I am not sure. The body will be much stronger if I solder the floor in place, using the side tabs to reinforce the body sides. It will be easier to add glazing and an interior from above, as will be painting it without a roof, so I will have to make the roof (not supplied) removable anyway. In any case, those bolt holes will clash with where I would want to mount couplings, and I will need to add underframe detail below the floor too. So that leaves me with the problem of how to mount the chassis - I can't get it to clip in, I might be able to drill holes through the coupling pockets for bolts, but that means new holes in the floor ...

Posted by Picasa

Friday, 29 January 2010

A Railcar Project

I've finally got around to starting a railcar kit that I picked up at Expo NG in October. Well, I say kit, but it is a Worsley Works "Scratch Aid" kit, and consists simply of the sides, ends, and a floor for the railcar, etched in brass. I also got a Kato 4-wheel chassis that should fit nicely, albeit with somewhat small wheels, but I doubt that will be obvious when complete. So there will be quite a lot of extra work involved with this one, mating the body to the chassis (it isn't designed for any particular chassis), adding glazing, interior, a roof, underframe, and all the other details needed to complete the model.


The prototype for this railcar was one Drewry supplied to the West Clare railway in Ireland in 1927, it was actually made by Baguley. Of course it was also 3' gauge, but it was quite small so will look fine against my stock, which is mostly based on 2' to 2'6" prototypes. The specs were:

- weight: 5½Tons
- engine: 4 cyl petrol; 40hp?
- driving wheels: 24"
- wheelbase: 8'9"
- length: 20'0"
- width: 6'9"


Thanks to help from the NGRM forum, I also found some prototype photos, which seem quite hard to come by, at the Clare Library website, Here and Here. The Weston, Clevendon, and Portishead standard gauge light railway had a similar design of railcar from the same company, as seen here.

Now I've fancied a railcar for Awngate for a while, but many seemed to be too modern, required turning or running in pairs, or just looked a bit tricky to model! This one seems to have the right character, size, and being a generic sort of design from a company that sold to anyone (rather than a design associated with a certain line), it should seem at home on Awngate. I've already made a start on assembling the body, so more updates should follow soon.