Monday 22 December 2014

Knobs and Switches

It struck me that in order to run trains from either oval to the station, and to be able to shunt the station while running trains on the main lines, the wiring for this train set was way beyond connecting a controller to each circuit! I decided I'd better allow for three controllers, even if two would suffice most of the time, which meant having to have rotary switches rather than just 2-way. I settled on 4 main sections that can be switched to any controller, and 7 sub-sections that allow locos to be isolated. Hopefully the control panels make this all clear, and it will allow enough flexibility in operation.


I made up two control panels by printing out a schematic drawn in MS Word. These were mounted on some thick plastic sheet I'd picked up somewhere, then covered in sticky-back plastic (very Blue Peter!). I'd already drilled holes for the switches so they could be fitted, then I wired the switches to a loom ending in a screw terminal "choc-block" before fitting the panels to the layout.


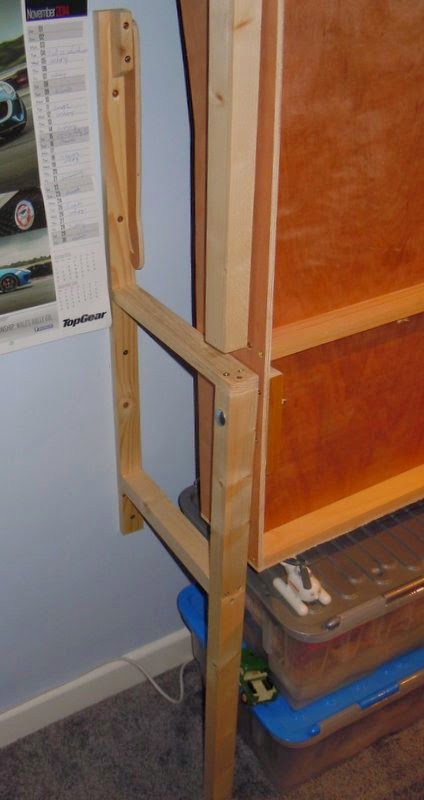
The panels are fitted into the side of the station board, the plywood being cut away to clear the switches and allow the wiring through. The Gaugemaster controller in the middle provides controllers A and B.


With the screw connectors stuck in place (hot glue works well for this) wires are run to the relevant tracks on the layout, and the "temporary" connections of the two circuits to the controllers changed to the switched arrangement.


Further screw terminal blocks were used on each board and wires run from the feed rails to them, via small holes next to the rail, then they were connected back to the blocks by each panel. As the boards are permanently joined I haven't bothered with connectors, though the cables could be released from the terminal blocks if needed, provided they were labelled to aid re-connection! As you can see different coloured wires are used to help identification, it certainly makes wiring up easier. For example I used:

  • Blue: Common return (all outside rails)
  • Red: Main switched sections
  • Orange or Yellow (when I ran out): sub or isolating sections
Plus whatever other colours I had to hand for the controller feeds.


Another block connects the panels to the controllers, and joins all the "common returns" which greatly simplifies the wiring. There is a sticky label by each terminal block with wire codes marked on. The DIN plug on the left is connecting the third controller (C) to a 5-pin DIN socket.


As I've used the same socket as on my other (more serious) layouts, and connected the 16V AC from the Gaugemaster controller, I can use one of my usual hand-held controllers, such as this AMR example (left). However I've also wired a plug to the end of an old Hornby controller, which works surprisingly well. Either way the third controller can be used by someone outside the layout, so friends (and visiting grown ups) can operate without having to squeeze into the centre well.

So after a little planning and careful wiring, I was pleased when the layout worked first time. Even better my Son is very happy, he got the hang of the somewhat complex control knobs quite quickly, and he enjoys running trains in and out of the station from the main line. He's also enjoying shunting the goods sidings!

Sunday 14 December 2014

Track Pins

I'm a bit behind with the story of my son's train set, so let me finish the tale of track-laying. Of course it wasn't long after half-term I was being pestered to create the upper station. 


These are the tools I use: pliers and small hammer for the pins, the end-cutters and screwdriver are useful for levering out pins when required. The scalpel is for trimming sleepers and slicing off the "chairs" to let the rail joiners fit. The orange-handled cutters on the left are Xuron track cutters, for years I used a slitting disk in a mini-drill which is certainly effective but the trac cutters are quicker and quieter. A fine file is used to clean up the rail end.


Talking of track pins, here's a comparison. At the centre are PECO pins, long and thin and frankly useless. They only really work with "Sundeala board" which is basically compressed paper, sags, disintegrates, and is generally useless as a baseboard top. Even then you need to drill the sleepers with a 0.5mm bit - never mind tedious you'll be forever breaking bits too! If you use set-track you'll find the pre-drilled holes too big. Also they often protrude through the baseboard, ready to slice fingers and knuckles! The bent pin tells it all - these area fast route to frustration.

So for years I've preferred Hornby pins (top left), these are strong enough to be hammered into most baseboard surfaces (including ply) without a pre-drilled hole, and are a tight fit in set-track pin holes. They will go through a sleeper too, though pre-drilling is probably a better idea I rarely bother. The head is bigger and more visible, but when laying track on a "serious" layout I glue it, adding pins around the rails and sleepers to hold it, and pull them out afterwards. So many of these Hornby pins have been used several times already!

When I was running low I popped into Gaugemaster (fortuitously quite local to us) to get more Hornby pins, but saw that Gaugemaster sell their own variant (GM66 if you are interested). These are very similar to the Hornby ones but with a flatter head, and you get more in a pack for similar money. They do a "PECO" style of pin too, but these shorter ones are the ones I'd recommend!


Anyway here's the finished track layout, with platforms being fitted for the upper station. The next task was to wire it all up!

Thursday 4 December 2014

Point Maintenance

In-between train-set updates here's a quick post showing some maintenance on Landswood Park.

The tight kick-back siding point had failed some time ago, which didn't matter that much as it was rarely used (little can get round the corner anyway). However when one of the other points failed it was time to do some repairs. Both had failed the same way - the soldered joint between the blades and the tie-bar, a common weak spot on hand-built points.


Fortunately I had thought ahead when I built the layout and that part of the point was covered in plastic chequer-plate rather than set into clay setts. The plastic was simply eased off, exposing the joints that needed re-soldering. Once repairs were complete and tested, a little impact adhesive was used to secure the plastic back in place.

The points on Thakeham Tiles were constructed with much more thought and have pivoted joints at the both ends of each blade, so shouldn't suffer this issue, but as Landswood Park is built in a box-file there was no space underneath the board for such tricks.

Tuesday 25 November 2014

The Train Set Runs!

I promised a picture of the board in the folded-away position, so here it is!


The protrusion into the room is quite small - around 12", and doesn't block the window. There's space for some storage underneath too, though admittedly it isn't pretty! The black strips you can see are foam pipe lagging, to soften the blow when crawling under the layout and coming up too soon!


This is a close-up of the rear leg and the frame that holds it off the wall, the pivot bolt can be seen. Above it the front leg hangs, and in this picture the safety catch is not in use!


So base-board done there was pressure to lay some track! First the board was painted grey (with emulsion tester pots) where the track was to go, realistically ballasting isn't going to be high on the priority list but a grey base looks better than plywood. The end curves are 2nd and 3rd radius set-track and the points to the inner "loop" line are Hornby set-track, but the crossover and the branch to the upper level use Peco Streamline, and the straights are flexi-track.


There's no 3rd radius set-track point (a major omission I think), so I used a 2' radius streamline point which is a little larger in radius but flows well. The transition between point and straight, and the inner track at this location, were laid in flexi-track to match. Laying flexi-track and streamline points takes more work - trimming sleepers and carefully lining up the rails - but the result looks better and runs well too.

Much of the track came from my train-set around the loft of my parents house, it has since spent many years in their shed too, so was well tarnished, nothing would run on it. Some vigorous cleaning with a track rubber and fibreglass pencil brought back the shine and (more importantly) the electrical conductivity.

That last photo also shows the Gaugemaster double-controller set under the upper level. I wired one control to the inner track and the other to the outer track, and so we (just) had trains running by half-term!

Friday 21 November 2014

Installing the baseboard

With the baseboards made it was time to assemble them together. This is not a portable layout, so they were clamped together then big screws used to fix them. I guess it could come apart in the future, though I won't be worrying about splitting track or wiring at baseboard joins as that would significantly complicate things. The front and rear profiles were cut from two pieces of ply, and screwed in place spanning the board joins, hopefully making the whole thing rigid.

The next trick is to pivot the board to the wall. I made up a simple frame for each rear corner: a batten screwed to the wall with a weight-bearing leg spaced away from the wall about a foot. It is this leg that the layout is bolted to with 10 mm bolts and locking nuts. The front corners simply have a leg attached also with a single bolt, so they fold down the side of the layout as it goes vertical.


The layout down, the wall-battens can be seen against the wall but they don't carry the weight of the layout. The double-deck front part of the layout adds to the strength. Underneath the layout the step/box I made recently can be seen, allowing children to operate the layout and see what they are doing, as the lower track is about 3' from the ground.


A close-up of one of the hinged bolts, which is set about 10" into the layout. The leg is in the foreground, the wall batten can be seen behind.


I forgot to take a picture of the layout stored upright, and now I'm not allowed to put it away (!), but as stowed the board is allowed to go slightly past the vertical so it gently leans on the wall. A pair of risers on the side of the layout, topped with a piece of felt to prevent marking, rest against the wall. The main weight of the layout goes down the rear legs, but enough weight is over-centre pushing against the wall to mean it isn't going to fall down.


Nonetheless, just to make sure, a couple of catches are fitted to the wall battens. This simply pivot onto a protruding screw head at the side of the layout, and mean it cannot be pulled down.


I left a cut-out under the rear of the front station board, where the station will be at a high level, and fitted a shelf. My old Gaugemaster "D" controller, which my Dad bought me for my train-set when I was a kid, fits nicely into the gap. It is secured with some wood strips all round and above, and a couple of large washers. When the layout is stowed upright this is pointing down, so the washers are pretty vital!

Monday 10 November 2014

Trainset Mk 2

A few years ago I built a train set for my son, which folded to go under his bed. We moved house last year and in the summer I redecorated his new bedroom, and we got him a new bed - which didn't allow for the storage of the layout. In any case he was growing out of the simple train set, and it had some limitations including an over-tight curve on the inner track, so I had promised him a bigger layout in his new room.

We'd arranged the room so one wall was mostly free, and I figured the best approach would be a board that folded up against the wall. I'd suggested this for my Nephew and the concept (as built by my sister-in-law) seems to work well. I worked out the space available was about 7' 6" long by 4' 6" wide, leaving space to access bed and wardrobes even when the layout was down - which should allow it to stay up overnight. It's also a reasonable size for a layout I thought, so I doodled a few plans which he looked at, thought about, then he gave me his brief:
  • A double track oval for running trains - and including his sister or friends
  • A high-level track, ideally with bridge
  • A big station with lots of platforms
  • Goods sidings
  • A second station
  • A turntable and engine shed
Phew, a demanding customer! Now the space doesn't seem so big. A few more sketches later I had an idea, so tome for a full-size plan to check. Lining paper was laid out and boxes of track dug out the garage:


It's ambitious but seems to work, so I got a couple of 8' x 4' sheets of 9mm Ply. I'd worked out the main board sizes I needed so I could get the timber merchants to cut it, which also meant I could get them in the car! The layout is made of 4 boards: 2 of 4' 7" by 2", one 3' 6" by 21" and one 3' 6" by 14", and all include some aspect of double-levels. Mostly cross-framing is using 2" x 1" timber but ply was used on the more complex sections, with smaller timber for screwed joints. Ply fascias on the outside are considered part of the framing, and the extra depth adds strength, while the double-deck section should add rigidity along the length of the board too.


This took me quite a while, which is when I realised I'd never built a layout this large or complex before! Anyway here are the four boards laid out together, the rising line and upper section are clear. The front and rear fascias have yet to be fitted, as they will be cut in two sections and bridge the gaps between the three boards, adding rigidity. Note that the front has developed a slightly curved frontage to push the middle board out, easing the curve on the rising line and maximising the access hole in the middle.


Monday 3 November 2014

A hook and a step

Ahead of the Uckfield show I had a couple of jobs to do for Awngate. The fiddle yard had developed a slight sag, now it attaches to the layout by slotting it's extended frame into holes in the layout frame.


This was fine when the fiddle yard was a simple plank for holding a couple of cassettes, but the extension to add shelves to the back of the plank have added a significant weight. Perhaps the timber has shrunk or worn, but the result is a distinct downward slope.

My solution was one of those hooks usually used for holding gates open. With the loop on the layout the hook is engaged to create a diagonal brace.


My 7-year old son was keen to help out at the show, and I certainly didn't want to discourage, but the height of the layout (about 43" to track level) made it tricky for him to see well enough to position the trains. I did consider lowering the layout but it's enclosed presentation would make it difficult for other operators and most viewers, so a step was needed, and one big enough to stand on comfortably and move around.


I had in the garage some melamine faced 1/2" chipboard shelves surplus to requirements. A 12" wide 30" long shelf forms the top, another shelf cut in half lengthways made the sides, and some 6" wide shelf offcuts were used for the ends. I assembled them rather like flat-packed furniture with some left over wooden dowels set into holes locating the sides to the top, and "choc-bloc" screw connectors holding it together. This means no screws showing to the outside, though I can't say it is a terribly neat job!


The finished step in use at Uckfield - and it certainly worked, both for my son and other visiting children. It's plenty strong enough, though not exactly lightweight! When packed in the car it is inverted and used to store the stock box and other bits and bobs. At home it will have another use, though more on that another time...

Monday 27 October 2014

EXPO Narrow Gauge 2014

So once again EXPO-NG proved to be a highlight of the year for any narrow gauge enthusiast, with a superb range of quality layouts and lots of specialist trade.

This year I was helping the Sussex Downs group with the 009 society stand, which entails a little demonstrating and a good deal of chat (I got half-way through a wagon kit, which is about right!), I got the feeling there were a lot of visitors new to 009 modelling. Most had joined the society but had the usual questions about what to buy, what couplings to use, and so on; I think this is evidence that recent new products, promised releases, and publicity about 009, are increasing interest in narrow gauge modelling.

We managed a good turn-out to man the stand so there was plenty of time to mooch round too, and meet lots of familiar faces. I spent a little money too, mostly in the society sales room (though by the time I got in there in the afternoon it was starting to look quite bare!), but you're probably interested in the layouts. This being 2014 there was an emphasis on O14 layouts (geddit?), which was great for me as it is one of my favourite scales.


I'd been following the build of Abbey End by David Malton on the NGRM forum; it's a model of the end of the Abbey Light Railway in Leeds, a passenger line which sadly closed a couple of years ago that David used to work on. The layout is simple but brilliantly executed, capturing the peaceful woodland brook-side setting and with models of the actual locos and stock. David has presented the layout attractively and professionally too, it deserves to do well on the exhibition circuit.


David had commented he had concerns about the reliability of his loco fleet, this being his first exhibition, so I offered back-up power in the shape of my Hudson Hunslet from Thakeham. I'd fitted some Bemo couplings in place of my Microtrains, using the same pocket and screw, which allowed it to work with the Peco couplings David uses. As it happens his loco stud performed fine, but it was nice to see David using the Hudson too.


Simon Hargraves' South Brierly Sewage Works is an old layout by contrast, one of the first O14 layouts on the exhibition circuit, and based on a prototype which was featured in the Roy C Link handbook. It's got a lot in common with Thakeham in size and operation, and was also built as a competition entry! No surprise then it's my kind of layout.


Rhyd by David John is a different kind of O14 layout, and clearly captures the spirit of the Welsh Slate railway in the Ffestiniog area. A brilliantly modelled scene and top quality stock too, and since the owner lives waaay up Scotland it's unlikely to make many shows in the South, so it was good to see it.


John Clutterbuck is a bit of a pioneer and evangelist for O14 and the 'Review has often featured details of the construction of his long-term layout project, the Pentewan Light Railway. John has vowed this is the only outing for the layout so it was a rare privilege indeed to see it (well, the part of it shown) in the flesh. I love the way the railway winds through the bleak Cornish moorland, giving a real sense of distance, while the modelling is to the highest standard possible.


Not all the layouts were O14, but several were unlikely to be seen again. Another superb layout that caught my eye was Regionale Tramweg Moulburg in HOe by Jan van Mourik, from the Netherlands. It packed a lot in - town, harbour, two stations, goods yards, engine sheds... but was full of character and detail.


Edge, the latest 009 model by fellow blogger Chris Ford, on it's one and only exhibition before passing to it's new owner. Chris built the layout to illustrate an up-coming book but it is to his usual high standard, perhaps the new owner will exhibit it?


Finally this was the last outing for Pagham Harbour, the well-known 009 layout by Richard Glover. It's featured in the 009 news many times though it's 3 incarnations over the last 20-odd years, and it's peaceful character has been widely admired. Indeed it won two awards at EXPO-NG! Like Edge it has now been sold, so perhaps it's time is not yet over.

Well I've run out of space but do explore further, my rather large photo collection from the show can be found here.

Thursday 23 October 2014

Awngate at Uckfield


Last weekend I took Awngate to the Uckfield show. It's the first 2-day show this layout has ever attended, and other than the small show in Patcham, all previous shows have been narrow-gauge specialist affairs, so it was interesting to see how it was received. It was certainly a busy show and there was lots of interest, and a few nice comments, so pretty good really.

I have always enjoyed the Uckfield show as a visitor, it does seem to attract high-quality layouts many of which are rarely seen, at least in this corner of the country, and also some good trade stands. This year layout highlights included Portskerra (EM) by Tim Ticknell, a Highland Railway terminus with harbour modelled on a frosty winter's day.


Arigna Town is a 7mm scale, 36.75mm gauge (!) model of the Irish broad-gauge by Dave Holman. Superbly done, and remember pretty much everything has been scratch-built!


Wenfordbridge Goods Depot is a 2mm scale model of the Bodmin and Wadebridge Railway. A nice model by any standards but the USP was the working crane and road vehicles! this would be some achievement in a larger scale, but this small... wow!


There were lots more top quality layouts too, so do take a look at my full photo collection.

Although I find 2-day shows a bit of a chore, this was a really well organised and good event to be an exhibitor at. The lunches were good too! Thanks to Simon Wilson, Phil Savage, Chris Ford, and my son Joshua who all helped with operating Awngate.

Saturday 18 October 2014

Thakeham in print!

The latest issue of Narrow Gauge and Industrial Railway Modelling Review landed on my door-mat today. It's a special extra-large 100th edition, so it is even more of a privilege to find my article about my Thakeham Tiles layout included!


I'm very pleased with they way it has come out, my photos seem to have come up good, but Bob has done a great job of presenting the article over 10 pages.

What's more the rest of the issue is top-notch, with superb modelling by well-reputed names. Illustrious company indeed!

I'm showing Awngate at the Uckfield show this weekend, today went well but do say hi if you're there tomorrow, and I'll post some pictures later.

Saturday 4 October 2014

Recent Acquisitions

My birthday was last month and I got a couple of new toys...


More motive power for "Thakeham" and "Landswood Park", though first I need to source a chassis for 14mm gauge.


"WDLR Album" from Roy Link was published just in time! It's a superb publication, as the title suggests it is packed with photos that are reproduced to a very high standard. The text is interesting too, much is from contemporary articles, and there are a number of high-quality drawings too. Definitely recommended.


Finally - I've changed my car. Now with an exhibition commitment in a couple of weeks I could be concerned about fitting the layout in ... but looking at the size of the boot, I don't think I've any cause for concern!

Saturday 27 September 2014

Details and Sillyness at Worthing

I spent today helping with the Sussex Downs 009 group layout Everleight at the Worthing show. Looking around the other layouts, many I'd seen before, but I did notice some nice well observed details. For example the kids racing go-karts on this US outline HO layout.


The modern image N-gauge layout "Smithdown Road" has some convincing present day details, including a motorway junction, and these minor roadworks - complete with barriers, skip, and portaloo,


The OO layout "Earls Court" has some of the best modelled shop interiors I've ever seen.


The section of the club layout we brought included Upsands Quay and the quarry. This layout was built over many years and sections are nearly as old as me, which did show with some niggles in the morning despite testing over the last three club-nights. It's not the easiest layout to operate either, however the scenery and detailing are excellent, and it did seem popular with the public.


The show definately seemed busy, until around 4 when the numbers dropped off significantly. By 4:30 things were starting to get silly, when John Reeve decided to test run his 3D printed South African train (the coaches as yet unpainted). Here it is entering the tunnel at Gryndene Halt - however before reaching Upsands the chimney stuck on a low point, and on reversing out, the cab caught on the tunnel mouth. Eventually we had to lift the hillside to extract the loco!


After sending longer than normal trains down the line to see what happened, the last train from Upsands ended up triple-headed with 9 coaches...


Thursday 18 September 2014

A delight in Sittingbourne

The Sittingbourne and Kemsley is a railway I'd been keen to visit for a long time, so we took the opportunity on the way back from our weekend in Kent. It doesn't start very promising, the car pack is stuck between a fast food restaurant and a retail park, and the station is approached under a dilapidated viaduct and round the back of a car wash. To add to the "atmosphere" there was an overflowing sewer!


The station itself is "basic", with overgrown sidings full of rusting wagons, the platform is made from very old sleepers, and the ticket office is a garden shed. Not quite the "atmosphere" some preserved lines try to create, though it is true to the industrial origins of the line so is perhaps more genuine! At least it looks like the "main" line is receiving maintenance, albeit with ballast sourced from a fish-tank...


Things improve when the train arrives though. The Kerr-Stuart loco "Leader" is beautifully kept, as are the coaches made from converted wagons.


The route sets off over the famous concrete viaduct, and though somewhat industrial surroundings, then moves into a more rural area before ending at Kemsley Down.


There's no public access here as it is still inside the grounds of the paper mill which the line was built to serve, but there are engine sheds and workshops full of interesting things - most of the locos are original to the line, though a few small diesels have been added. It looks like a lot is being achieved, and other than some heavy overhauls everything appeared in good shape.


The atmosphere is nice and relaxed here, with simple rope barriers to separate public from machinery, but otherwise there is a lot of freedom to look around. A small gift shop, cafe and picnic area mean it would be worth hanging around and waiting for the next train, but we didn't have time.


So a short but enjoyable visit to a line full of character, even if it doesn't fit the mould!


You can see the full set of photos from both lines here.