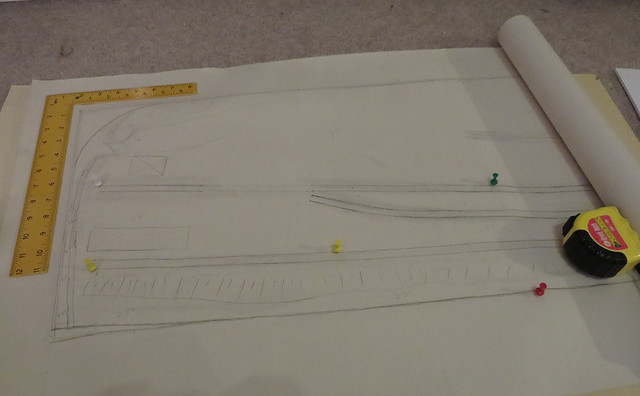
The first task was to mark out the "deck" including transferring the track plan from the paper plan, which was done with the highly technical method of using pins...
Now I forgot to photograph the construction phase, but it was pretty similar to that of building the board for Thakeham. Here I doubled the thickness of the foam-board under the track, not because I think it needed the strength, but to increase twist resistance and to enable cuts (e.g. drainage ditches) to be added to the top surface later. Bracing was cut and glued to the underside at about 9" intervals, interlocking where longitudinal and cross bracing met, like an egg-box. Some diagonal bracing was added too.
A complication was the river along the front, which is set about 1" lower than the track bed, polystyrene sheet was glued in the gap to firmly join the two layers and will be cut to form the river-bank in due course. There's also a stream under the tracks, which has yet to be fully cut out but the base is ready underneath. The front will have a thin ply fascia, though this has yet to be cut and fitted, and there will be "wings" at each end which will help stiffen the end boards.

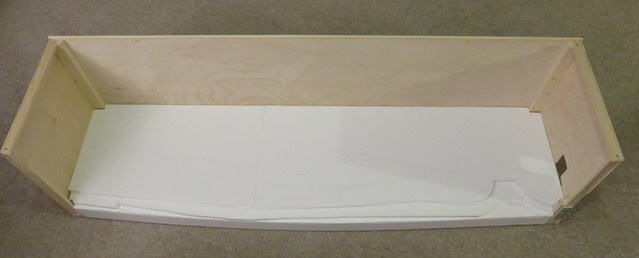
Underneath the bracing can be seen. Due to the length of the board I was concerned about flex or twisting, so I decided to box in the rear part of the frame to make a "torsion-resistant" beam. There's little track over this part, and if I need access to wires etc I can cut access holes. Once the board was glued into the ply outer shell (with PVA) it turned out to be surprisingly stiff. The strip-wood runners along the base are more to protect the foam and bear the weight onto the supports, than to add strength.
The resulting board seems pretty strong, there's no bending and no end-to-end twist unless significant force is used. There's a little flex in the back-scene, which is unlikely to be an issue but I plan a couple of diagonal braces. It's certainly easy to move about on my own despite it's length, at around 4 kg I think. Hopefully I'll get it finished over Easter, and maybe even buy some track...
2 comments:
Hi Michael,
I'm not sure what's happening on the post below but the pencil drawings seem unsteady and Flickering meaning the post about your new planned layout is very hard to read. I'm trying to read this on an iPad . Not sure if it's the same on say other lap tops but this is the second time I've tried to read the post over the last 2 days. Thanks Dave P ( Lynton Blogspot)
Oh, thanks. I'm not sure either, I've tried re-posting but the same weird things happen. I've posted it at a larger size, which seems OK on my PC apart from not fitting the page well... but maybe the post is easier to read now?
It's fine in Flikr, so try clicking on it which should open it up in Flikr. If Google hadn't dropped Picasawebs and tried to turn photos into Bookface this wouldn't be a problem!
Post a Comment