Monday, 19 April 2021

Bases and surfacing

The yard at Hexworthy will be used as a "permanent way" (track) maintenance yard, and will have a grounded shipping container. These are often placed on timbers, so I made up some from plasticard, along with a rudimentary ramp up to the doors, and stuck them down before surfacing the yard.


I also added bases for a phone box - which I thought would add interest and look plausible placed by the road entrance - and the heating oil tank. These were simply made from a little DAS clay. 


At the back of the station building I added a pavement from a layer of thick card, cut to the shape of the building by drawing around it. I was going to just run the tarmac up to the back of the building but this seems neater as it means the building doesn't have to be fixed down (yet), it is a tight fit in, and allows easier access to the narrow space behind. It is made simply to represent concrete, mainly as it won't really be seen so no point in putting in a lot of effort!


All the roadways, platform and yard areas are textured with fine sand. I use play sand as sold for children's play pits, having kept a couple of jars when my kids grew out of theirs, though a large bag is very cheap. It is fine enough to be a good representation of gravel or tarmac. First I put down an even layer of PVA glue, which is slightly diluted (about 3:1 with water), and no need for washing up liquid here. 


I use an old tea strainer which helps scatter the sand evenly and stops any oversize particles. Sand is added a little at a time by tapping a teaspoon onto the strainer. This gives an even finish, but I have found it best to let it dry fully and vacuum off excess before checking, and not be tempted to add more glue/sand as this gives an uneven finish. If necessary a second application can be made later, although this is rarely needed. 


I've used the sand for the yard at the front, the platform surfaces away from the paved area, and the road/yard at the rear. Although they look the same now, they will be given different finishes in painting. 


Sunday, 11 April 2021

Ballasting Hexworthy

Before ballasting I needed to glue down the platform - thus far it has not been in fixed, and was in two pieces, which was convenient for working on. However, the fixing of the slabs had caused a slight curvature to the 3mm foam-core platform pieces, so I needed to be sure it would lie flat. Gentle working between the fingers got the pieces flat before they were stuck in place with PVA. Clearances were double-checked with some larger locos to ensure the position was correct, and the larder raided for some weights to ensure it stayed fully flat while the glue set.


Ballasting isn't most people's favourite job, in fact it is rather tedious, but worth taking a little time as it covers a significant part of most layouts. I use fine granite ballast, I got a big bag many years ago and I'm still working my way through it. 

The area to be most careful is around the moving parts of the points, my approach here is to carefully apply neat PVA around the tie bar area positioning it with a screwdriver tip or something, making sure it is well clear of the tie bar, then add stones. This is left to dry before ballasting around it, the idea is the carefully positioned stones form a protective "dam" around the tie bar area.


Since the baseboard is foam-core board it was easy to cut a drainage ditch between the platform and loop roads. Because of the steep sides I applied neat PVA and stones first here too. 


The process is well established. I apply the ballast from a tea spoon, tapping it to carefully dispense it where needed, I spread it with a finger and a cheap, stiff, flat brush. Tapping the spoon on the rails helps the stones settle and shakes some off the sleepers, but there is still a need to brush off any stones that remain on the sleepers or up against the rail sides. Next is a vital step - the ballast is wetted with a fine mist of water/IPA mixture, water with washing up liquid works too but the IPA seems to work better. This allows the water to soak into the ballast without disturbing it. 


Finally the glue is added, PVA glue diluted about 50:50 with the drop of washing up liquid to reduce the surface tension. I use a plastic dropper and gently drip the glue into the ballast, which shouldn't disturb it and thanks to the prior soaking with water/IPA it is drawn right into the ballast. The tricky bit is seeing which bits have been done, as all the ballast looks wet!


So a slow process I tend to do in small areas at a time, an hour or so in one go is enough. Fortunately this is a small layout, but even so it took four or five sessions. As this will represent a preserved line the ballast needed to be fairly neat, which I've achieved. 


Wednesday, 24 March 2021

Boulders

 A little while back, on the tip-off of a friend, I bought a Woodland Scenics boulders rock mould. It's a flexible rubber mould for casting boulders in plaster. Of course Woodland Scenics recommend their own casting plaster, but I still have some Linka compound left in a large tub - it must be close to 30 years old, but it still works! I expect dental plaster or similar would work too. 


I mixed up a batch without measuring - mainly because I don't know what the mixture should be - and added some acrylic paint to tint it so possible chips do not show white. When the mixture was creamy I filled the mould, which had first been misted with a fine spray of water and washing up liquid.


Amazingly I'd mixed just enough to fill the mould! I bet I couldn't do that again. After an hour or so I eased the mouldings out of the mould.


They do look like boulder rocks with a nice texture. There's a little variety in size and shape but not a lot. It is amazing how much lighter they dried compared to the colour of the mix. 

The idea is to line the river bank, though I'm not quite sure how to use them. Lined up like this looks too regular, I think a few irregularly spaced with some smaller rocks in between is what is needed. I could try casting another batch partially filling the mould? 

I also need small rocks and stones, I've seen others use cat litter but I don't have a cat...

Tuesday, 16 March 2021

Loctern Quay in 009 News

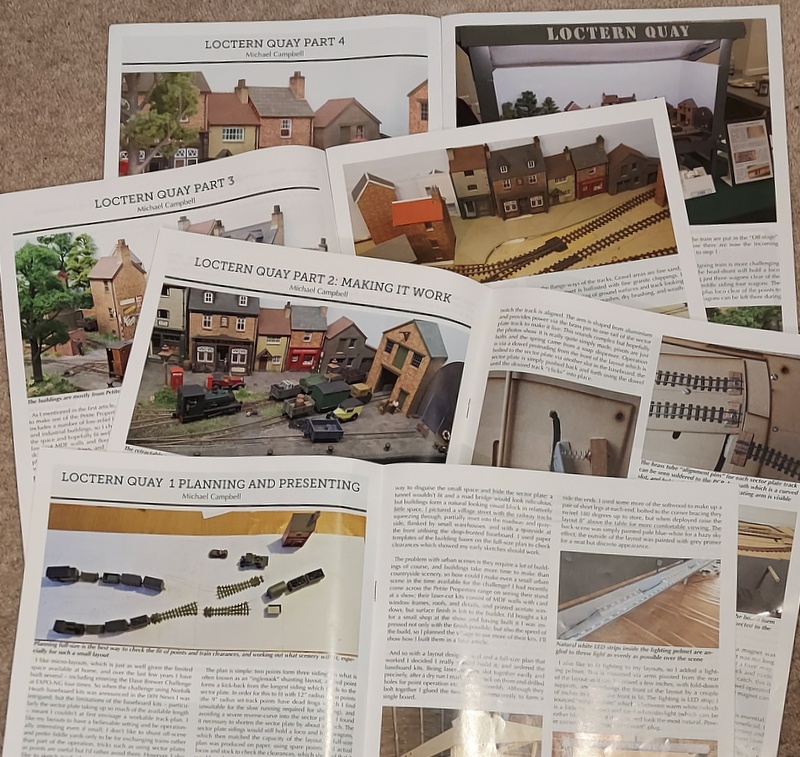
The March issue of the 009 News carried the last article in a 4-part series about Loctern Quay, which even made the cover on the January edition.


The four articles covered the design of the layout including its presentation and lighting; the trackwork, sector plate, and electrics; the buildings and scenery; and finally the stock and operation. Not bad for such a small layout, but it has been nice to cover these topics in detail, and see lots of photos published too. Since this layout was born out of a 009 News challenge it is the appropriate place to tell its story. 


The 009 News is the magazine and newsletter of the 009 Society, if you are interested in 009 and not a member why not join? I have found membership beneficial and rewarding over many years. For the last few years the 009 News has been edited by my friend Chris Ford, but the April issue will be his last as he passes on the proverbial blue pencil to a new editor. Thanks for all the great work Chris!

Tuesday, 9 March 2021

Book: Britain's Railways in the Second World War

Britain's Railways in the Second World War by Michael Foley is a new book from Pen & Sword. Obviously I've an interest in railways, and as an important part of Britain's recent history I take an interest in the World Wars too, so was intrigued by this book. 


It is what it says on the cover, the story of how the railways of Britain reacted, coped, and were used during the war, from evacuating children to feeding the essential manufacturing to moving troops and armour, all while struggling with reduced staff and limited resources. The story is told chronologically, from the start of war through Dunkirk and the Blitz to the support of D-day and beyond, although these events are the background and have an impact on the railways this isn't a military story. There are many human stories, and much about the organisation and running of the railways. 

The text does sometimes jump from one topic to another, and there are some instances of a topic being repeated from another perspective, maybe this is due to the chronological approach but in some places careful editing and rephrasing could have made the text flow better. Strangely, the GWR was referred to as GWS several times throughout the book (so not an isolated typo), even using GWR and GWS in the same paragraph, this and a couple of other minor errors suggest proofing could have been more rigorous.  Overall though, the text is engaging and interesting to read, and avoids complex and technical language making it easy to follow. 


The book is illustrated with photographs, many of them from the period and some with a direct connection to the text, although for a few the relevance is tenuous and probably better subjects could have been chosen. Reproduction is not great, being printed on the standard paper, and all in black and white although some originals would have been colour. Perhaps they would have been better grouped into photographic paper sections, which would allow better definition and possibly colour, although for those linked to the text this would have been less effective. In any case, this book is a story and historical picture, not a photo album, so the use of the photographs is appropriate in adding interest rather than being key. 

There is also a glossary, although it seemed rather short, readers who are not railway enthusiasts or without some familiarity of British railways might have appreciated a more comprehensive glossary.  A nice touch is the short chapter detailing where some locos, stock, and memorials from the time can be found, and noting that preserved railways can give a feel for what wartime railways may have been like. 


I found this an enjoyable book that feels more like a story than a history book to read. It tells of an important aspect of the wartime struggle and what life was like for the railway companies and their workforce. For those with even a passing interest in railways or in the impact of the second world war this is a book worth reading. 

Sunday, 7 March 2021

Ground frames and point rodding (Part 2)

 After a visit to the paint shop, the lever frames and point rodding have been added to the layout.


Black and blue levers (for points and facing point locks), with aluminium dry-brushed with gunmetal for the handles. The chequer plate has traces of gunmetal too where many boots wear away the paint. The colours are perhaps a little dark, but may look more at home when the ballasting covers the black base, and I can add a little weathering powder to the timbers then too. 


From above the rods are clear emerging from under the lever frame, painted grey-brown with a dry brushing of gunmetal. The cranks are black with a touch of rusty brown. The facing point lock can be seen positioned just behand the tie bar, being careful not to obstruct the movement of the tie bar or the blades. 


The other rods run along to the farthest point with cranks in a similar arrangement. The rodding support stools are crude, but will be embedded in ballast and should be a fair representation from normal viewing distances!


At the other end of the station the small lever frame has had similar treatment. I may put a guard rail around this to prevent vehicles in the yard from damaging the lever frame or cranks. 


The lever frames cover the points on the running line which need facing point locks, the one from the loop to the front siding doesn't need a lock so I have used a Peco lever. These look quite effective although the planked base is rarely seen in reality. I have set it on strips of plastic to look like extended sleepers. 

Saturday, 6 March 2021

Ground frames and point rodding (Part 1)

Signal boxes are all very well for standard gauge railways, but let's face it only the larger and better equipped narrow gauge railways had the need (and cash) for such luxuries. Many lines managed with levers next to each point, although for those carrying passengers the regulations on facing point locks means ground frames were often use. I'm modelling Hexworthy in preservation so of course facing point locks would be needed, though as a terminus of a single line signals would not be necessary - movements being controlled by the single line token. So while some preserved lines have gained signal boxes in later years, I thought Hexworthy could manage with a couple of ground frames - the single line token equipment would probably be installed in the station building. The two points on entry to the station would need facing point locks, the loco release point probably does too since it is against the platform and a departing train could have coaches over it.


A Wills kit makes up a delightful pair of ground frames (with parts left for a couple more). The small one has levers for a point and its point lock, the larger the same for two points. The problem is, now they will look odd without some representation of the rodding and cranks that would connect them too the points. Wills do a nice kit for the rodding, but I only need a few inches...


The little frame is right next to the point it serves, although at right-angles so as not to obstruct the yard. I made up some planking to "hide" the crank and rod to the point next to it, and protect it from feet, but the rod for the point lock comes out to a crank. The rod was made from 0.5mm brass rod - I know it was often square, but the GWR used round and Hexworthy is in GWR territory, anyway plastic strip was too weak and flexible. The crank is an L-shaped piece of plastic with slices of microrod for bolts, stuck on a block of plastic. 


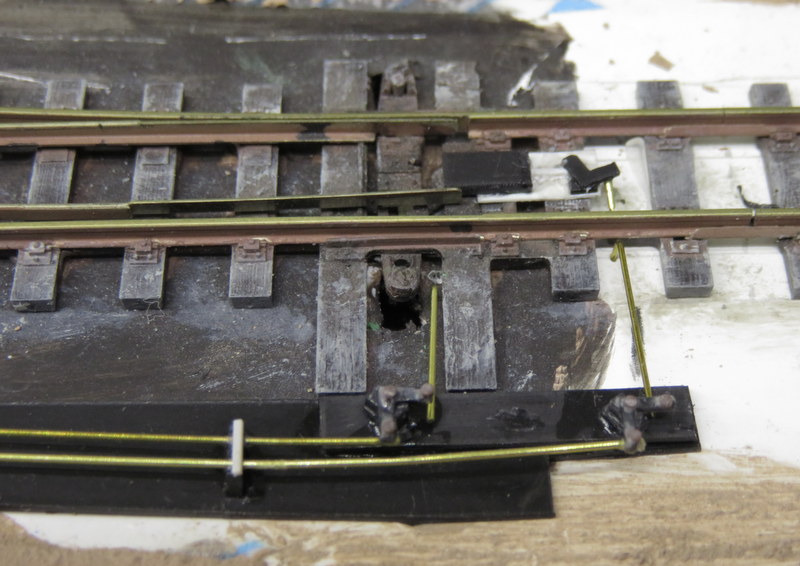
The larger frame controls two points. I made up the rodding on a sheet of 20" plastic, which will be buried by the ballast. The brass wire rodding is supported in stools made from 40" plastic pieces end-on, with notches cut in the top for the wire, and a strip of microstrip over the top - it doesn't bear close inspection, but I think gives a reasonable impression. 


The close-up shows a couple of cranks made from scrap plastic in the same way as before, as is the facing point lock - a block of 40" plastic for the lock mechanism, a "plate" of 10" plastic, and another crank. The rod to the point lock is actually in two parts, the nearer being an L-shape with the short leg punched vertically into the foamcore baseboard, the same is done for the tie-bar operating rod. The point is in reality operated by a point motor below the board, this rodding is entirely dummy.