
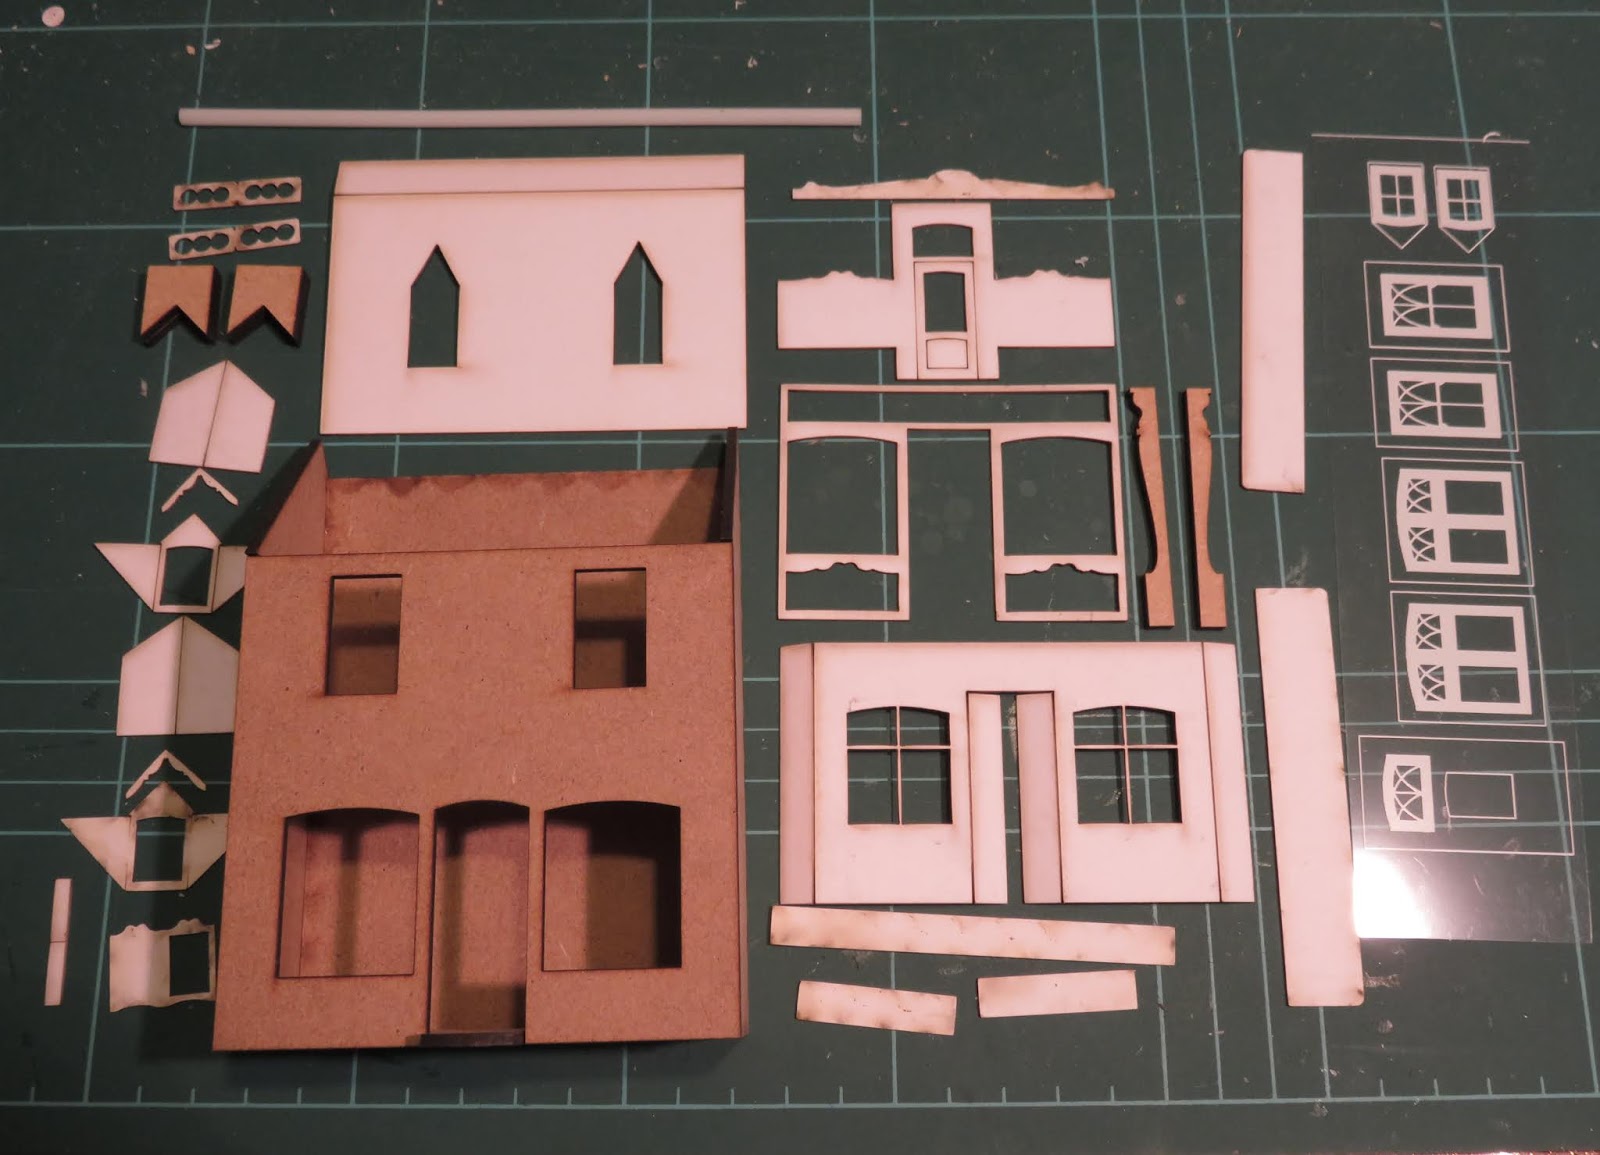
Here's the parts of one of the kits laid out - the walls (here already stuck together) and chimney from MDF, detail parts and roof from card, plus printed clear windows, and tube for the chimney pots.
It doesn't take long to stick the laser cut walls together to see how they look.

I decided to replace the card roof with one made from Wills plastic slate, which turned out to be pretty tricky because of the dormers. I used the card as a template, except that I reduce the overhangs, and make a cut-out for the chimneys which I stick to the top of the walls - rather than onto the roof as intended. The edges of the plastic are rebated to allow the barge boards to sit just under the slates. The card sides of the dormers were used, with a strip of microstrip filling the corner of the fold.
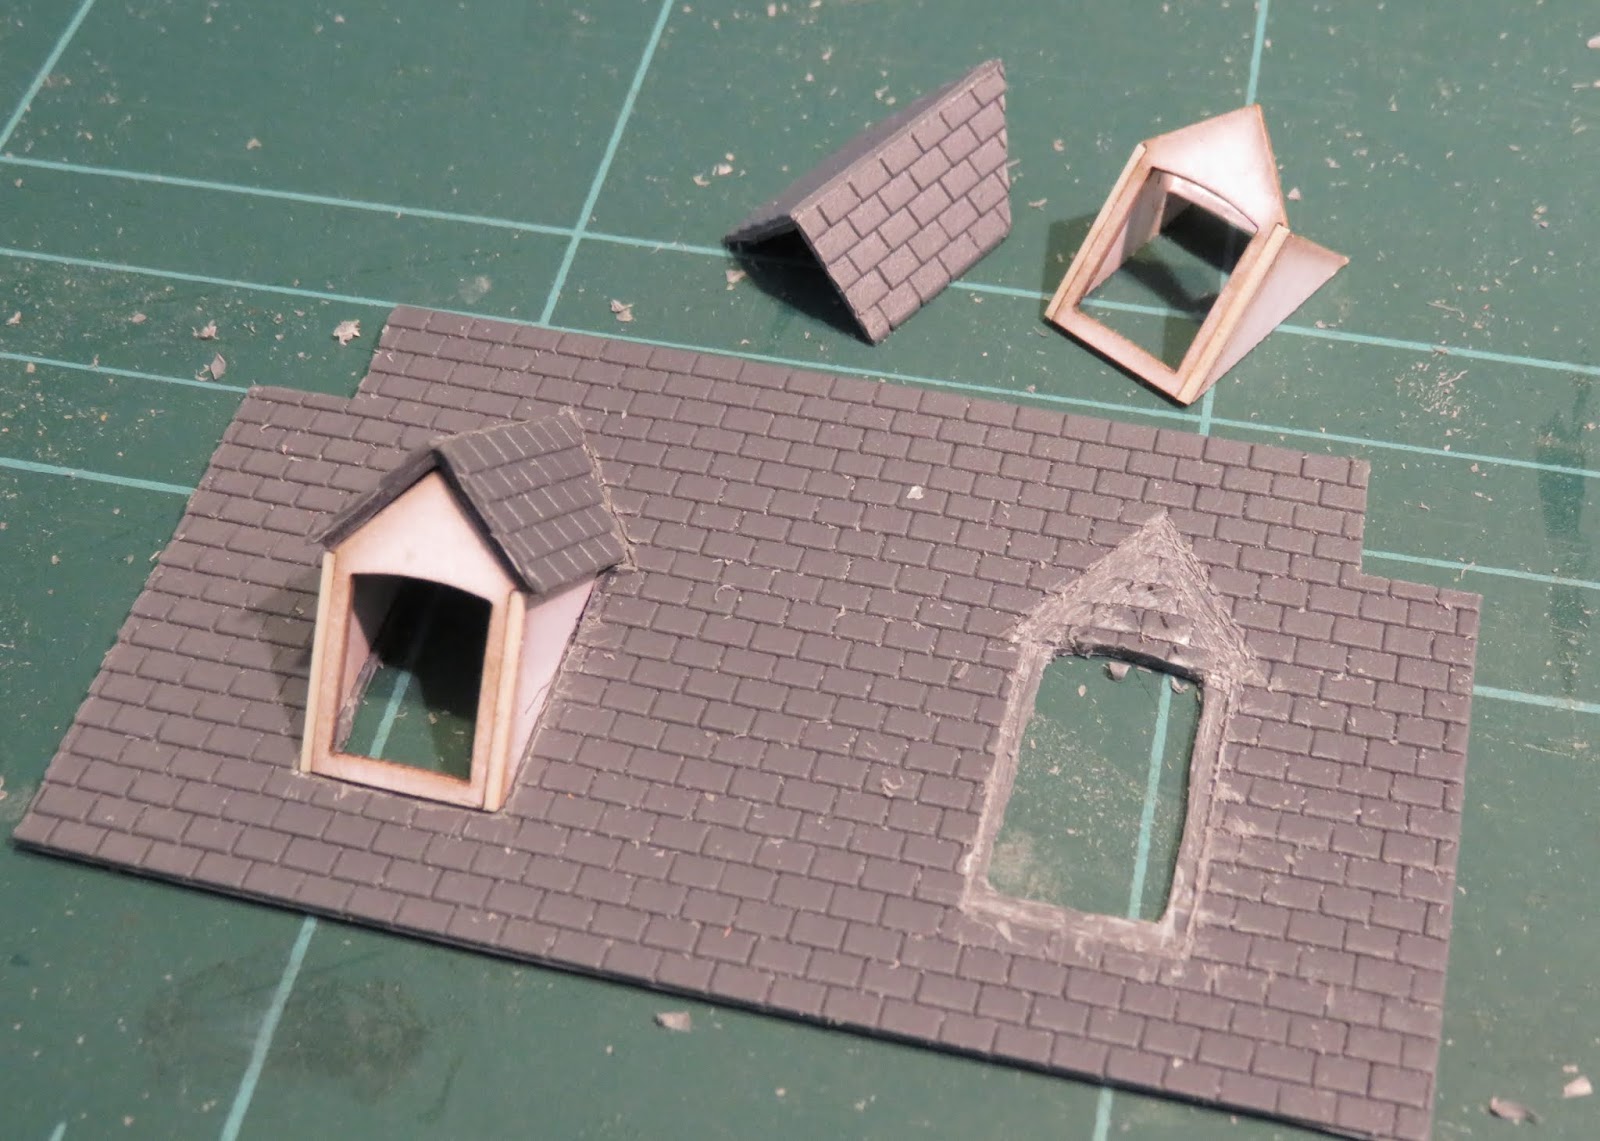
Surprisingly I got the new roof pieces to fit well. Ridge tiles use L-section plastruct notched every 4mm.

This one has walls covered in brickpaper, in this case from Scalescenes. Before covering I added a piece of 5mm foam-core board under the floor to allow the building to be set into the landscape later - I wish I'd thought of this for the earlier models. The shop front is assembled, but without framing and not yet attached as it and the other small details are to be painted separately.

No comments:
Post a Comment