Tuesday, 20 December 2016

Internal Combustion for the future generation!

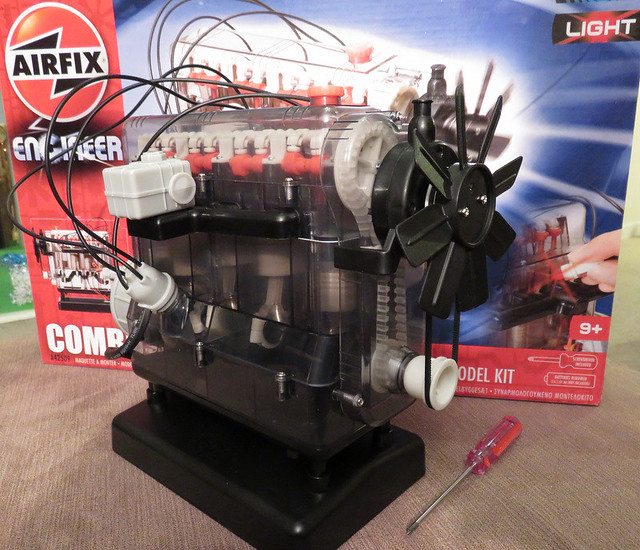
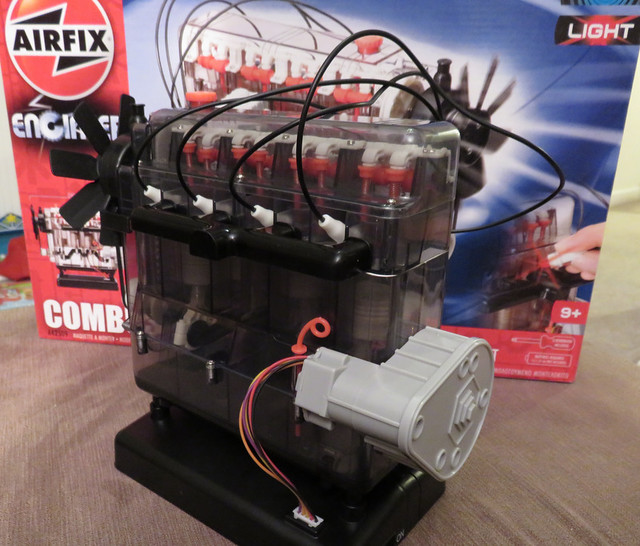
Last Christmas my Son was given an Airfix kit for an Internal Combustion Engine, and last weekend we finally got around to building it. It's a pretty big box, and like all Airfix kits, is full of plastic moulded parts - the smaller ones on sprues. We found a pair of side cutters ideal to remove them. Also included is a pack of screws and a screwdriver for assembly, no glue required for this kit! Most of the parts assemble and work in the same way as in a real engine, which is both educational and exciting, the engine block is clear while some parts are moulded in different colours so they can be seen operating.

IMG_2098

The engine stands on a base containing batteries and a speaker for the sound effects, while round the back there is a motor fitted as a starter/flywheel assembly to turn the crankshaft and make the bits go round. There are also "spark plugs" which flash at the point of ignition.
IMG_2097

Assembly took a good couple of hours which my Son seemed to enjoy, judging by his enthusiasm, and he was rather proud of the result. The instructions are straightforward and include a good explanation of what the parts represent, and how the real engine works, while for the most part the kit seemed very well designed and made, although the screws (which are self-tapping) were rather stiff to put in, and I had to help tighten them using a slightly larger screwdriver.

However, the spark plugs are not marked for which cylinder they should go in, meaning they could be assembled to flash at the wrong point in the cycle. This seems odd given the detail of the design of the kit elsewhere, for example the cams are marked for position and orientation and slide onto a D-section camshaft so they work correctly, while other parts had to be correctly aligned to slide onto their shafts, there is even a "timing tool" to ensure crank and cam shafts are correctly phased. Since engines are my business I looked to see when the front (No. 1) cylinder was at top-dead-centre firing and inserted the plug that flashed then, and seeing the model followed convention of 1-3-4-2 firing order, inserted the rest in turn to match.

Nonetheless, it's an impressive kit that's a must for all young aspiring engineers and petrol-heads. But you want to see it working, don't you?

Wednesday, 30 November 2016

Uckfield Show 2016

A little while back - well, 6 weeks ago - I went to the Uckfield Model Railway Exhibition. This, as I discovered a few years ago, is always an excellent show with good quality layouts and a range of useful traders.

IMG_1698

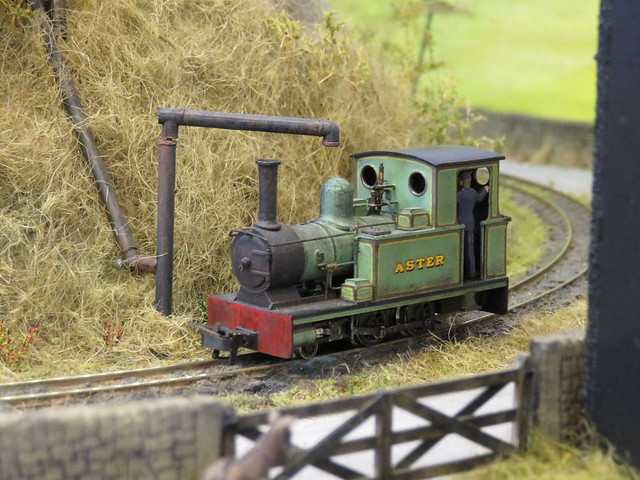
Star of the show for me was High Stamley (009) by Paul Windle. Paul is well known as a master builder of 009 locos (I have a few in my collection), but also builds superb layouts. This one may not have a lot in it, but is full of atmosphere - here the loco sits along side the road, the water crane swings out.

IMG_1650

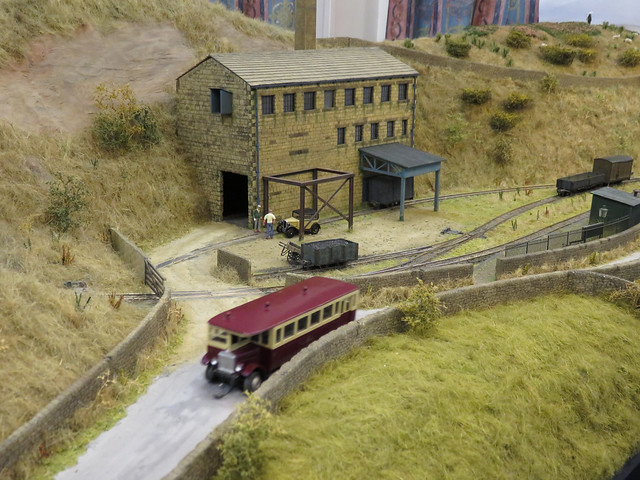
Even the road vehicles operate on High Stamley - that's an idea I'd like to use one day.

IMG_1681

Castlederg (0012) by Andy Cundick is a model of the station of the Castlederg and Victoria Bridge Tramway in Ireland. A fine example of prototype modelling, and another side of Narrow Gauge modelling.

IMG_1662

I do like Portwenn (O-16.5), now owned by Si King - and good to see it in safe hands.

IMG_1668

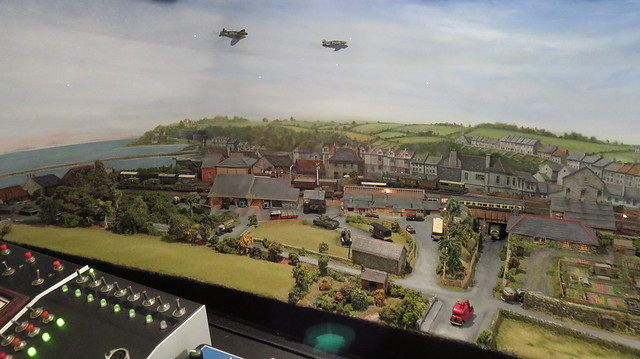
A stand-out layout was Brixham Bay (N) by Kevin & Judith Cartwright. To be honest the trains are a small part of the well presented layout, the buildings and backscene are superb and detailing - including the planes overhead - really sets the WWII scene. It even gets dark - with fibre-optic stars!

IMG_1687

Finally Wadebridge (2mm Finescale) by John Greenwood, although incomplete it looks great, and clearly will be of a consistently high standard despite the size.

That's just a selection - there are a few more photos to enjoy here. But I'm sure it gives a taste of the quality of the layouts.

Sunday, 6 November 2016

Dave Brewer Challenge - Tuning Fork Layouts

In my post about EXPO-NG last week I missed out a substantial section of the exhibition, the Dave Brewer Challenge layouts. Some years the challenge attracts a handful of entries, this was clearly a more popular year as there were 18 entries that made it to the show. The brief was a "tuning fork" layout - that is, a single point - with a size restriction of course, and yet there was a great variation in the layouts, and the range of imaginative settings. Some had finescale standards or obscure gauges, some had working features, some had stunning scenery, some characterful dereliction, some good presentation. Undoubtedly the standards were high, and judging must have been tough...

E_IMG_1743

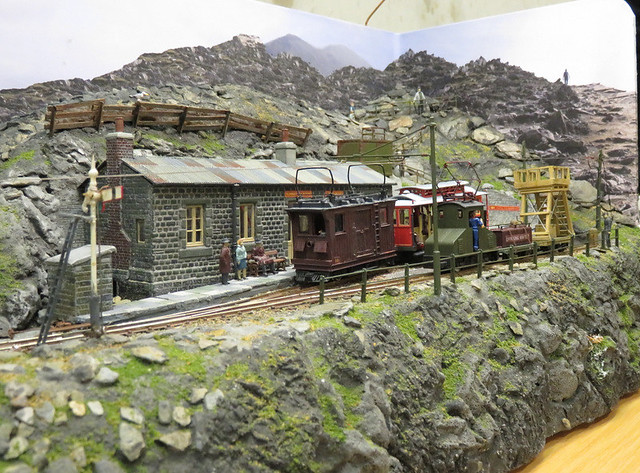
The winner was Creag Dhubh Summit in 009 by Ted Polet. As well as meeting the challenge, this serves as an extension to Ted's well-known Craigcorrie & Dunalistair layout based in Scotland, the layout represents the terminus of the branch to the summit of Creag Dhubh. You might detect that it is heavily inspired by the Snowdon and Isle of Man mountain railways, and the combination of a convincing premise and superb scenery make it a worthy winner.
E_IMG_1838

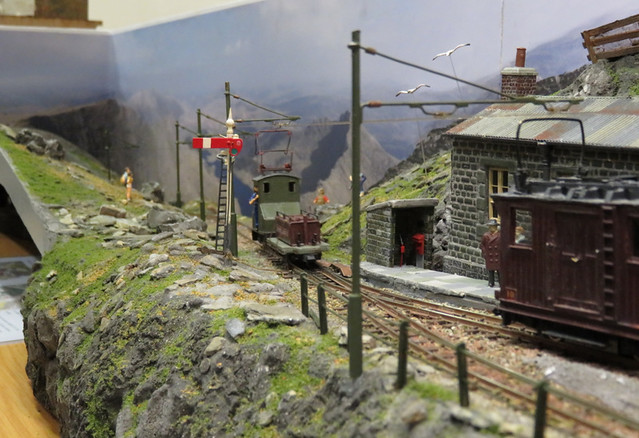
This shot shows Creag Dhubh Summit linked to the extension/link piece "the ridge" that links the challenge entry board to the rest of the layout; these two sections sit over a fiddle yard on Ted's home layout.

O_IMG_1731

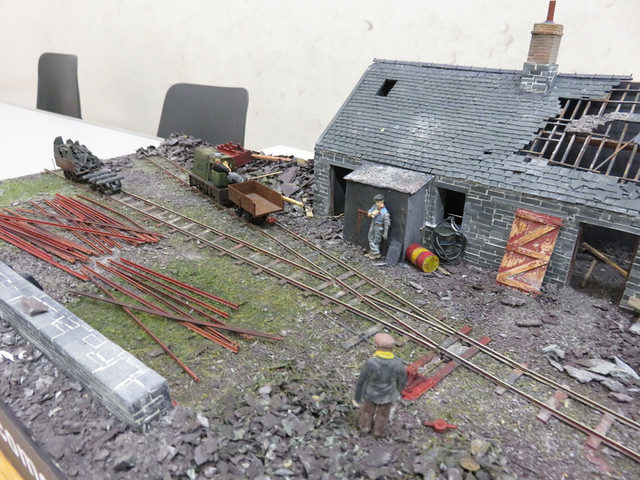
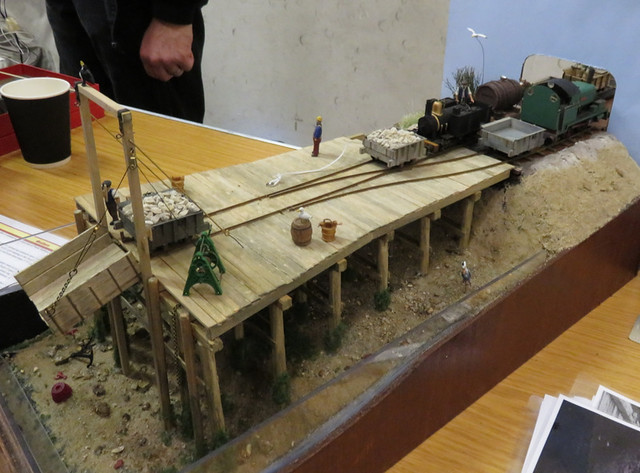
Runner-up was The Scrapman Cometh, an O14 model by Pete Wilson. Capturing the dereliction of the end of the working slate quarries in North Wales, it featured a working stub point for double-flanged wheels - clever, as well as characterful.

A_IMG_1738

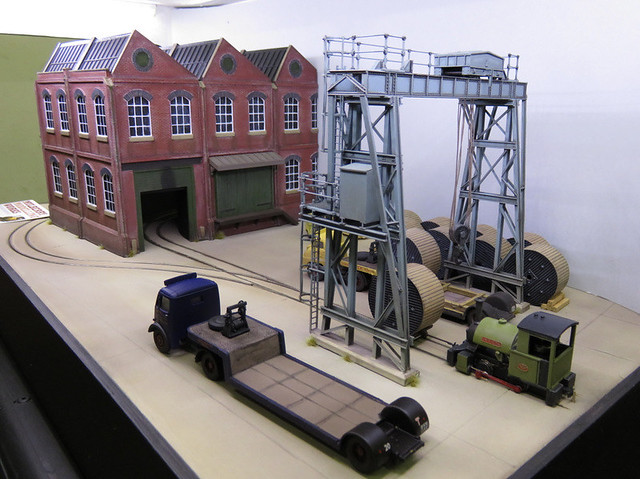
One of my favourites was Beta Cables, this model based on a real factory with a 3' 6" gauge line was modelled in 4mm scale, with 14mm gauge, by Stuart Brewer. So a technical challenge, with prototypically unusual locos and stock, well executed and smartly presented too.

K_IMG_1734

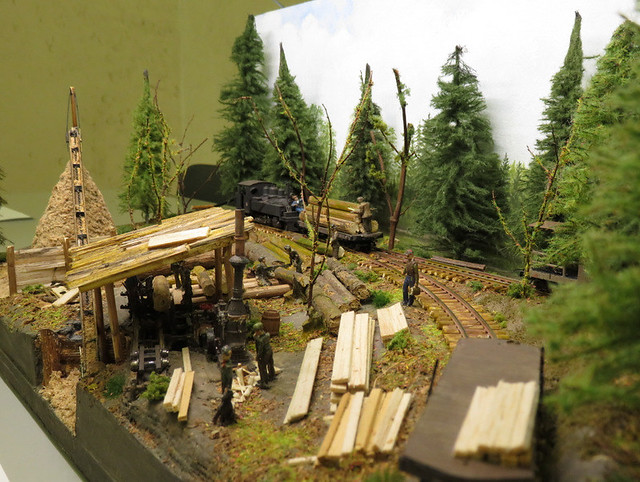
Lost River Logging Railroad in HOe by Peter Smith depicted a US logging scene, with a well detailed sawmill and even logging line track with round-log sleepers.

N_IMG_1793

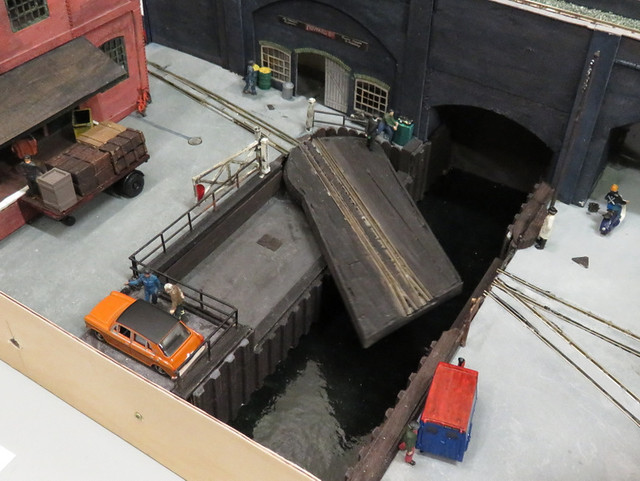
For more originality and technical difficulty, look at Rantners Wharf in 009 by Roy Jamson. It featured a working swing bridge with interlaced / gauntlet track through the elongated point.

I_IMG_1802

While Letter to Goathorn (in 7mm scale, 26.25mm gauge) by Peter Hollins had real water!

R_IMG_1728

Weston Zoyland in 009 by Toby Hollins-Jones was based on the preserved pumping station. I've never visited but the layout perfectly captured the scene from the photos I've seen. with suitable exhibits - even steam from the chimney of the stationary engine. An impressive model, and as I understand, built by a teenager.

I've not space here to show all 18 so I must stop there, but you can see them all here. I'm sure you'll agree that once again the EXPO challenge has successfully demonstrated the broad nature of narrow gauge, and a high standard of modelling. 

Sunday, 30 October 2016

EXPO NG 2016 - The Layouts

29_IMG_1858

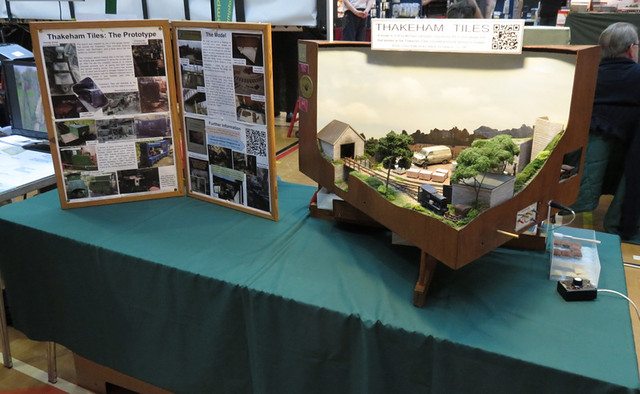
Another EXPO NG, and as usual, a great day. Thakeham ran without problems, which is always a relief, and received many nice comments. I'd been concerned my son wouldn't be up to helping out, as he'd been suffering a rotten cold, but fortunately he was sufficiently recovered to come, and again was a great help with operating the layout - which meant I got time to look around in breaks between operating. At least at EXPO operating never got too monotonous as there was often someone to talk to, so thanks to those readers who introduced themselves (which just proves there are readers too!).

The show had many great layouts - of which a few are shown below - but also some of the best trade support of any show, for narrow gauge interests. I did find time to pick up a few bits and bobs that will make their way into future posts I'm sure!

23_IMG_1761

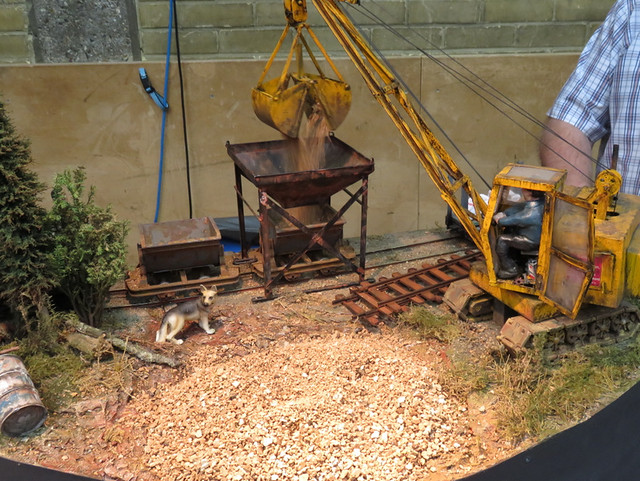
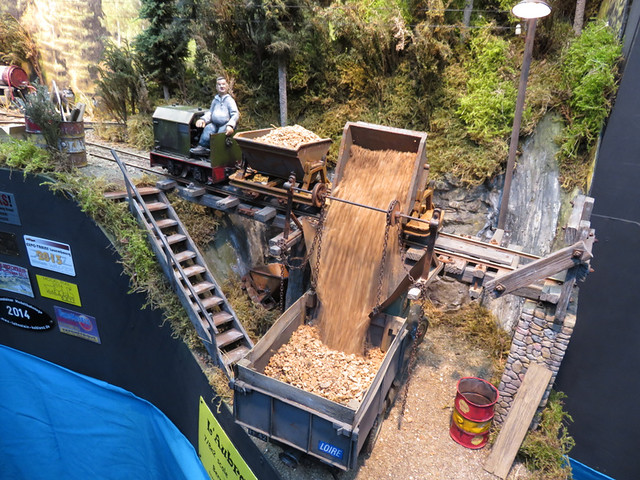
My son's favourite layout - and probably mine too - was L'Aubraie (7/8" scale, 45mm gauge) by Bernard Junk. It featured a working excavator to fill wagons, which were then tipped into a waiting lorry...

23_IMG_1762

However it was the incredible detail that made the layout stand out, and that was done with a level of humour...

23_IMG_1724

09_IMG_1721

The Corn Mill (009) by Henk Wust, Derk Huisman, and John & Jane Jacobs, had impressive scenery.

35_IMG_1753

Up The Line (O-16.5) by Kevin Hughes was a detailed and atmospheric depiction of the War Dept Light Railways of the Western Front in WW1.

48_IMG_1781

P'tit Train se la Haute Somme (009) by the Association des Modelistes d'Amiens Longueau is a model of the line of that name in North-East France. Impressively presented, it was like a series of paintings, but the trains moved.

50a_IMG_1823

Grindley Brook Wharf (009) by Tim Ellis is already a favourite of mine, and deserving winner of the Reinier Hendriksen trophy for best freelance layout.

I could go on, but I'll overload this post. So do browse the 70 photos I've put in an album for more quality narrow-gauge inspiration! As for the Dave Brewer Challenge, well that was almost an exhibition in itself, so I'll come back to the entries in another post!

Friday, 28 October 2016

Thakeham Hunslet and preparing Thakeham for the return to EXPO

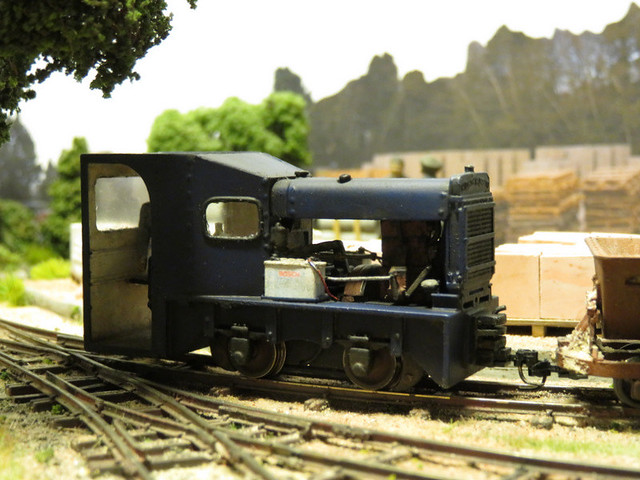
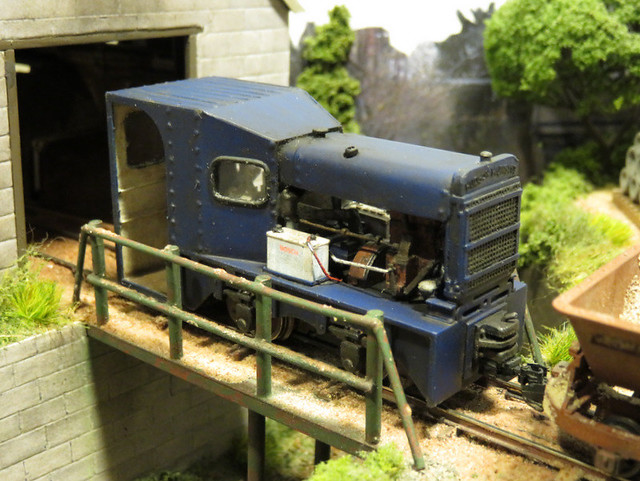
So last night, after some burning of midnight oil over the last 3 weeks, I completed the Hudson Hunslet.

IMG_1717

The last week has been painting and weathering - which I'll come back to in another post. The blue came out a little darker than I expected, but looks good, and I'm happy the loco is recognisable as the unique Thakeham example!

IMG_1713

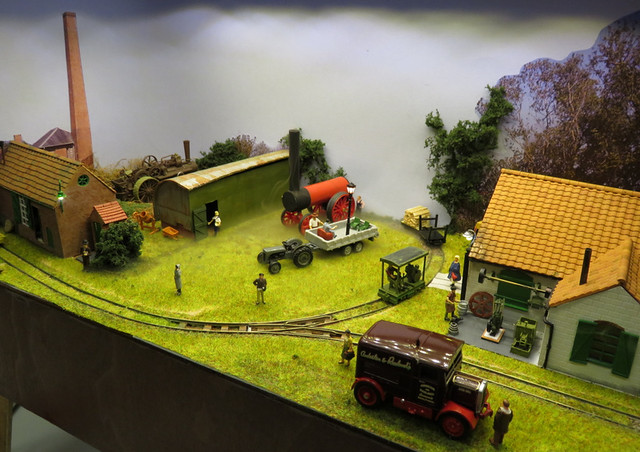
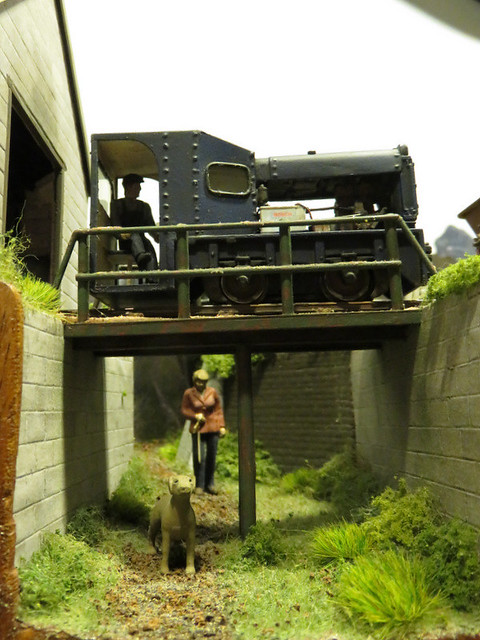
The layout was of course completed years ago, but I have still made some minor changes. For example the old man walking his dog didn't really seem to look at home, and in dark clothes was easy to miss. I've since found this plastic figure, which I've painted up in brighter colours and equipped with a dog lead (brown paper!), I think she looks much more natural.

IMG_1711

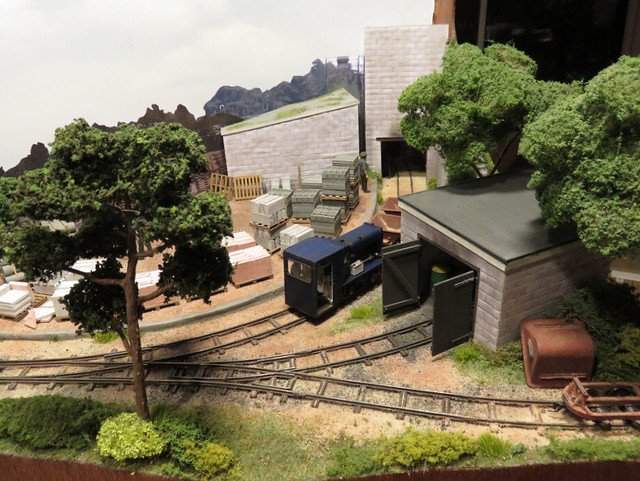
I also wasn't really happy with the the tree at the front of the layout - a home-made effort, the shape of the trunk wasn't right. For speed, and frankly because it looked better than any I've made, I bought one at the Uckfield show to take centre-stage. My tree was moved in front of the engine shed, where it seemed more at home, and the weedy trunk and branches less obvious. While at it I've improved a few bushes and added some grass tufts.

IMG_1715

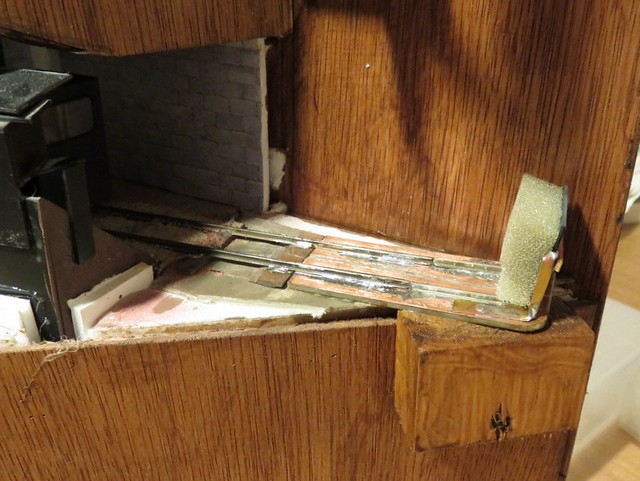
While building the loco I carried out some clearance tests - fortunately the cab missed the bridge handrails (not by much), and fitted the buildings. Some plastic was removed from the tipping mechanism, but the main issue was the long overhang of the cab meant the wagons stopped short of the tipping dock. So the track needed extending about an inch. The rails were unsoldered to slew them parallel to the "wing" of the layout, the last sleeper removed, and a piece of copper-clad inserted extending all the way to the end of the new additional length. I've soldered rails on too, though I'm not sure they are needed - it's the overhang that's the issue. A new and more substantial buffer stop was soldered up and a foam block protects the loco. The copper-clad track is self-supporting but I added a block of wood to protect it.

IMG_1714

I've even made a few extra sand "loads" for the wagons, and adjusted the collecting bin for them. So other than a few last-minute checks and packing up, I'm ready for EXPO-NG tomorrow. If you're there do say hello, you'll find me opposite Narrow Planet, just round to the left as you enter the hall.

Friday, 21 October 2016

Thakeham Hunslet - Adding The Details

After a few long evenings I've finished the Thakeham Hunslet ready for painting.

IMG_1708

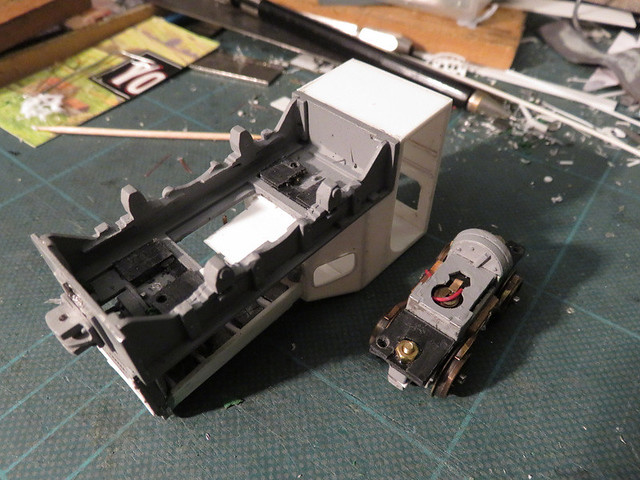
One problem I had was fixing the chassis. At first it was a tight fit where the motor fits through the footplate, but that was working loose and the bolts that held the chassis together were holding the footplate up, so it wasn't really held securely. I made up plastic ends to the chassis that are held on by the bolts as well as epoxy, these not only provide a platform for the body but have "wings" that allow holes for securing screws. Under the footplate more plastic was added to rest on them, and allowed a couple of self-tapping screws to take hold. Result, it may be crude but the chassis is secure!

IMG_1703

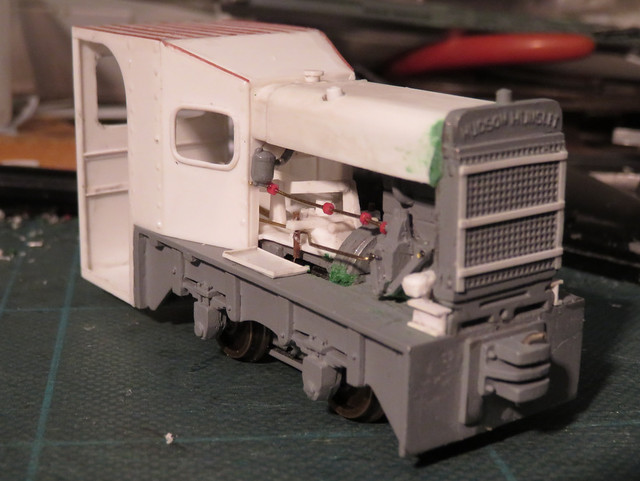
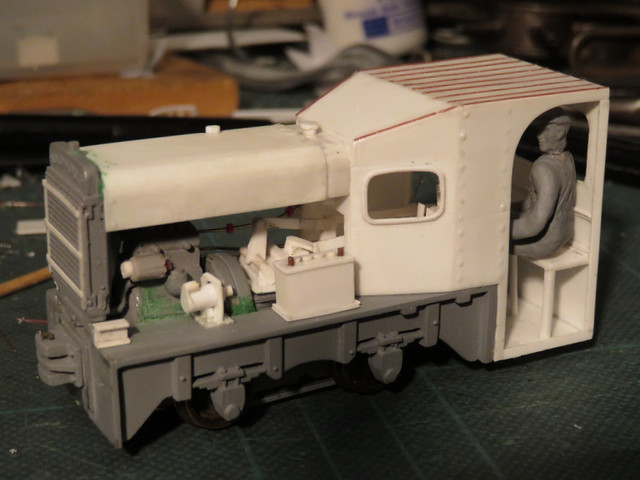
Up top, I've got rather carried away with the detailing. Having such good reference photos it was hard not to, and with such an open bonnet area the detail can be seen, so bits of plastic, microstrip, wire, etc. were used to represent the visible parts. The castings for the radiator, engine, clutch, fuel filter, and coupling block have been used from the kit, but the bonnet had to be made to fit.

IMG_1706

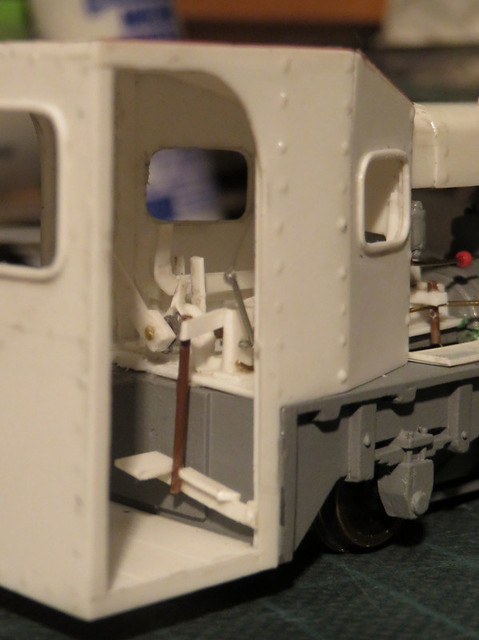
I even reproduced the levers and rods that form the modified cab controls. The kit does include the controls for the "standard" loco as built, but the modified Thakeham loco controls were easier to make from plastic and wire. So the driver has hand throttle, clutch foot pedal, two levers to select gears and a ratchet lever for the hand brake.

IMG_1707

Engine bay details added include the starter, alternator, and batteries, though the latter are separate for ease of painting. I've added some rivets from glue, though they may be a bit over-size. They aren't too obvious though, like those on the prototype.

Last week I was discussing the model with Chris Ford, and whether I could find a suitable driver. The next day he passed me some figures. As he'd predicted, the plastic figure was somewhat of a midget, but this whitemetal chap looks just right - though being so far from the wheelbase I was worried about weight distribution. In fact the engine, radiator, coupling and other castings make the front so heavy (OK the bonnet is stuffed with lead too) that the addition of the driver, even so far back, nicely puts the centre of gravity between the wheels. He's got a pin up is posterior though, to make sure he doesn't slip off the seat!

Wednesday, 12 October 2016

Thakeham Hunslet Progress

Earlier in the year I mentioned starting on a model of one of the Thakeham Hudson Hunslets, using the Nonnesminstre kit as a basis. I'd prepared a motor bogie, and assembled the frames and footplate. In July I managed to take measurements of the prototype thanks to the helpful folks at Amberley.

Then, out of the blue, I was asked if I could take Thakeham Tiles to EXPO-NG as another layout had pulled out. Since Thakeham was built for the EXPO Dave Brewer challenge three years ago I'm delighted that the organisers think it worthy of showing again, in it's own right, as it were. However it struck me that if I was going to build a Thakeham loco to run on the layout, now is the time!

IMG_1644

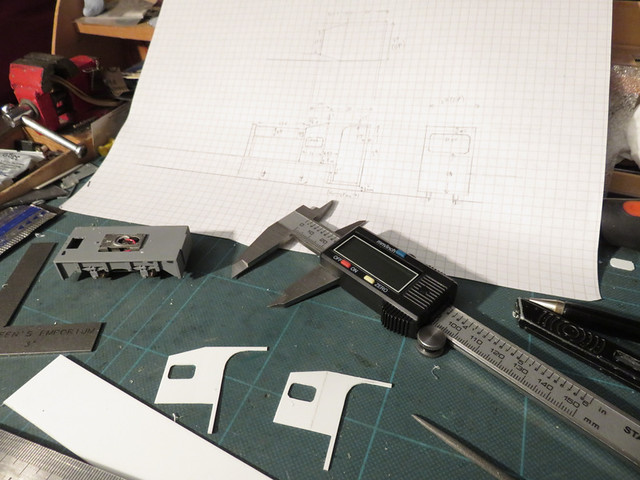
So the dimensions were translated to a scale drawing, albeit at 1:40 scale to match the kit (slightly over scale for 1:43) and a couple of tweeks to match the kit frames. Then it was time to start cutting plasicard to see if I could get the cab looking right. I find calipers invaluable for marking up plastic; as well as setting and transferring measurements, they can score a faint mark which with pencil rubbed in, becomes the cutting guide.

IMG_1646

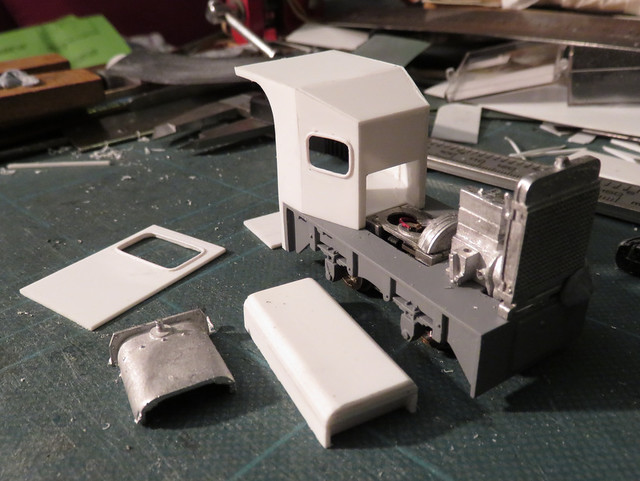
The cab sides are 20 thou plastic with the roof, floor, front, and rear from 40 thou. The windows were a challenge, the beading is formed from micostrip, which is then shaped with a fine blade and emery paper to give a rounded appearance. It's a little over-scale but they are a distinctive feature so needed to be present. Glazing has been cut to fit, and put away for later. Getting the tapered front to the cab to fit together was tricky too.

IMG_1648

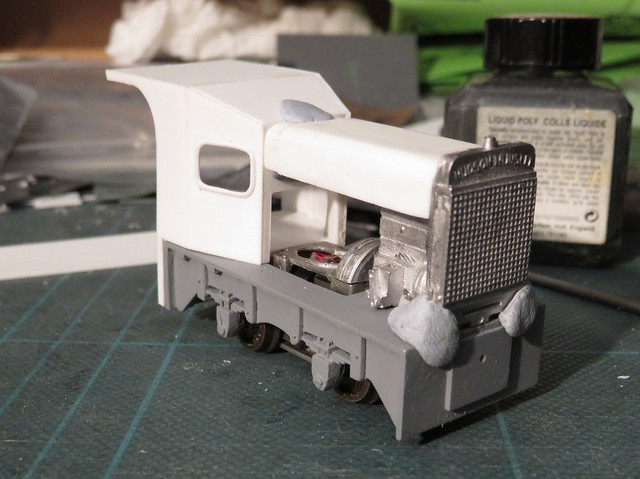
The next challenge is the bonnet. The prototype has an extended bonnet from the original loco, so the kit component wouldn't work. An inverted tray was made from 40 thou plastic, with a triple layer top for shaping, and internal bracing. Once the curve looked right, a sheet of 10 thou plastic was fitted over, warm water helping the shaping. As with the prototype this finishes short of the cab, sitting on the fuel tank.

IMG_1647

So the outline shape comes together, so far it looks OK but there are a lot of details to add. Nothing is assembled yet.

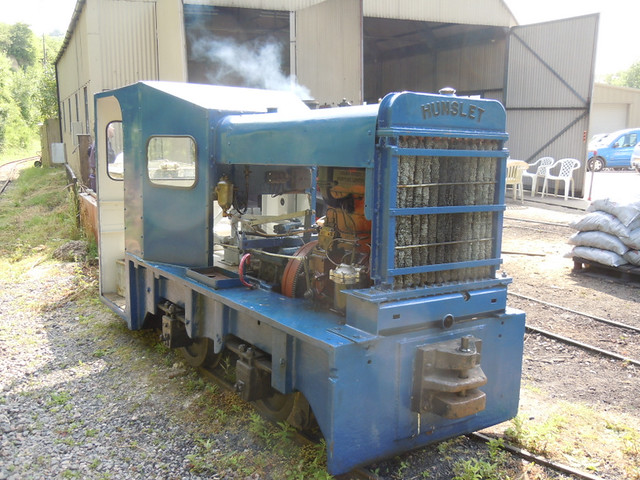
As a reminder, here's the prototype. You can see how open the internals are, with just some linkages and cables filling the space behind the engine, which adds to the challenge of a convincing model!

DSCN5655