Monday 18 September 2017

Rail painting

While thinking about buildings and backscenes, I thought I'd use a sunny afternoon to get a simpler job done - rail painting.

2017-09-17 16.08.14

So the garden became my studio... at least until a very black cloud appeared!

2017-09-17 16.09.19

I mixed up some enamel paint to a reddish brown, based on some photos of track at Amberley.

IMG_3867

It makes a surprisingly big difference to the look of the track, though the rail looks rather heavy at this angle. Lots more to do, the sleepers could do with being a little lighter and after ballasting, a thin wash will be used to tone things down.

So, back to thinking about the buildings...

IMG_3871

I've got three types of embossed plastic stonework: Wills (left), Slaters random (middle) and coursed stone (right). The question is which is most appropriate for Dartmoor. As a comparison there's a close-up of the bridge below.

IMG_3520

The other option is scribing DAS or similar, which I'd rather avoid!

Sunday 10 September 2017

Mock-up Station Buildings

After a few doodles, I spent some time this afternoon with some of Kellog's best quality cardboard and a pair of scissors, creating a mock-up for Hexworthy's station building. It may be the only significant building on the layout so it has to look right, and it has to fit the constrained and odd shape site.

IMG_3861

As the end of the line the station building looks relatively large for a narrow gauge line, I imagine it would need living accommodation for the station master (who was probably also booking and goods clerk, and possibly signal man too). It's not grand though, and I've used dormer windows to keep the height moderate and give a Dartmoor style. The line near the bottom marks the approximate platform height.

IMG_3862

At one end is a small goods shed, in the preservation era setting this will become the cafe with a glass french door in place of the wooden sliding one, hence the siding stopping well short. I'm also planning to add a canopy to the front of the station building.

IMG_3863

From above it fits the site quite well, though I wonder if it is a little long. I may see if I can shorten it about 10%.

IMG_3864

This view shows most of the layout with the building sitting in place - quite comfortably I think.

Thursday 7 September 2017

Happy 10th Birthday!


IMG_3843

It's ten whole years since I started this blog.

It was a bit of an impulse, as I realised how easy it was (I already had a Google account). I thought that as well as documenting my modelling projects it might help encourage me to make regular progress with them, and I think it has - although like most people I guess my progress ebbs and flows according to enthusiasm, energy, and other commitments. I'll admit to wandering off-topic occasionally, but I've managed to keep posts reasonably regular.

I started with a post about Southon Yard, my shoebox layout, and then Pen-Y-Bryn Quarry. Both these 009 layouts were built as EXPO challenge entries, and I have since built two more challenge layouts - taking the opportunity to dabble in O14, which I'd been hoping to do since my teens. I've really enjoyed these small, detailed layouts, learned a lot from building them and the stock to run on them, and it's surprised me how many people have said how much they liked them, indeed two of them were challenge winners. Thakeham was also my first layout based on (rather than just inspired by) a real place, albeit not terribly accurately!

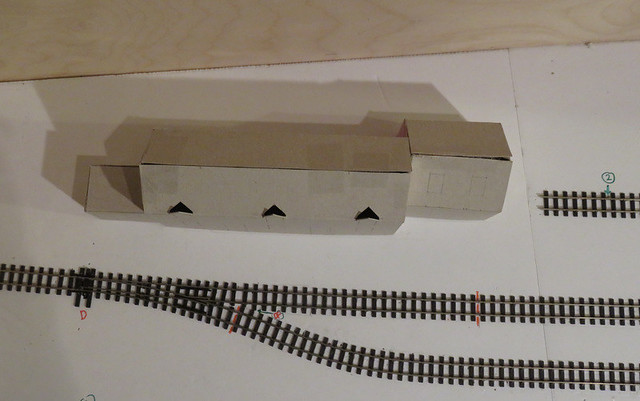
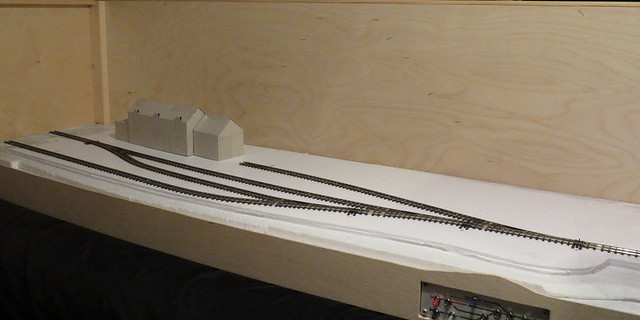
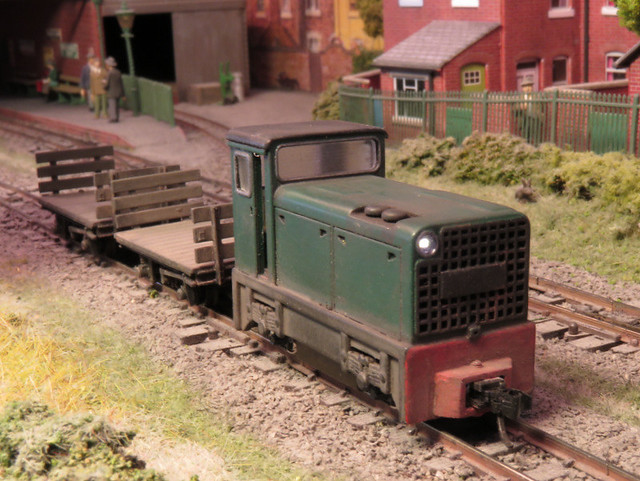
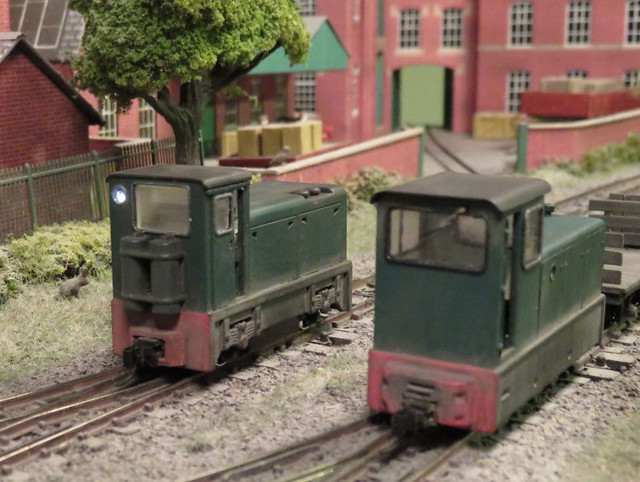
However the thread running through this blog for the last decade is Awngate, the 009 shelf layout I was planning when I kicked off the blog. It's met the brief of being an interesting but compact and presentable home layout which can be (and has been) exhibited, and only now am I working on a replacement. As a spin off I've learned lots about fiddle yards (!), couplings, achieving good running, exhibiting, and built some interesting locos and stock.

How long this will last I don't know, my fotopic site disappeared while Google changed Picasawebs into the far less useful Google Photos, necessitating a switch to Flikr. But Blogger seems to be hanging on for now, I'm still enjoying the ride, and there should be lots to post about with a new layout brewing. A big thanks to all of you that read this, and especially the helpful or encouraging comments (on or off the blog). I hope you continue to find it interesting!

Tuesday 5 September 2017

Shiny and not-so-shiny at the Bluebell Railway

Last weekend we had a family day out on the Bluebell Railway. This is our closest big preserved steam railway, so one we visit fairly often, but it's always nice to ride behind a steam engine.

IMG_3789

Our train was pulled by this immaculate BR class 5.

IMG_3783

This delightful pre-grouping loco was being prepared outside the engine sheds. Replace the plastic buckets for metal, and the aluminium ladder for a wooden one, and this scene could be 100+ years ago.

IMG_3818

No this isn't some kind of tribal dance, or strange version of tennis, but the exchange of single-line tokens between signalman and loco crew.

IMG_3822

The SE&CR "P" class locos have a light-railway charm about them that is rare for main line company locos.

IMG_3825

Taken from a moving train and slightly out of focus, this picture of a Sentinel is interesting, and not just because I have a similar Hornby model somewhere. Comparison with the railway website picture shows how much it has faded, and it's a good example of weathering on a workhorse locomotive - even on a preserved line. The brake dust, rain streaks, and generally used appearance (without being in any way neglected) is what I was aiming for with my diesels in the last post.


Friday 1 September 2017

A Duo of Diesels

I've finally (after about 8 months) finished the pair of 3D printed, Kato chassis powered, ex military diesels: the CWR produced Hunslet left) and the Narrow-Planet Baguley Drewry (right). Both are relatively straightforward but tasks like fitting couplings, painting, glazing, and weathering have been completed in occasional modelling sessions.

IMG_3759

Fitting the couplings to the Baguley was easy enough, with a slot cut into the buffer block for the Microtrains draft block and plenty left for the screw. There's plenty of space inside for some lead which helps tame the sprightly Kato chassis. Glazing was a little fiddly but templates in the instructions helped with cutting out, the brass etched frames were painted separately and fitted afterwards to hide any join - however I couldn't help getting spots of superglue on the paint, which had to be hidden by a little "dirt".

IMG_3756

The Hunslet had no space for the couplings even after I cut a square hole in the buffer beam due to the chassis fitting flush inside, so I made up a mounting block using plasticard stuck to the face of the bufferbeam. Such blocks were common on NG locos and it holds and disguises the coupler draft box, providing something solid for the screw too. 3D printed glazing was provided, it's a little milky with some faint layering visible (and sanding it would make it worse!) but I used it anyway - it's convenient and looks OK. Here you can see I've also finished painting and weathering a couple of RNAD wagons too.

IMG_3769

The Hunslet's party trick is the working headlights. The headlight openings were glazed with a drop of Micro Krystal Klear, and the micro SMLED's stuck behind them. The PCB was pushed into the bonnet so the contacts touch the Kato chassis when fitted. The lights work really well, the circuit suggested by my friend Harry does the job of keeping the LED's lit at a constant brightness and reasonably flicker-free, and I think I've got the brightness about right. The circuit meant less space for lead, but I still squeezed a little in around it and it runs fine.

IMG_3765

Both locos have been weathered using a little dry-brushing, a dirty wash, and some powders (which may get toned down a little), the idea is to capture locos working in preservation service on maintenance trains - generally clean bodies but with some track and exhaust dirt. They could both do with a driver (and the Baguley could use a representation of an interior) but otherwise they are ready for service. Despite my reservations about 3D printing, I am very pleased with the end results.