Michael Campbell's blog about his model railways. Building model railway layouts in 009 (OO9) scale
Thursday, 2 April 2026
WD Hunslet remotoring
Friday, 8 September 2023
Blanche
For my birthday recently my wife got me a very nice present...
The cab interior is detailed too, and if you look closely you can see a glow in the firebox, this provides a flickering light in the cab as the loco moves. There are also etched plates in the box to be be fitted. As with recent Bachmann models the running is every bit as good as the looks too, smooth and controllable down to a crawl, and being a little heavier than recent Bachmann offerings it should be quite capable.
While I have pictured the loco on Loctern Quay, it's a little large (long overhangs) for Loctern and of course has the wrong couplings, I've found it difficult to fit Microtrains couplings to Bachmann locos. It will earn it's keep on Hexworthy in due course where it's fine lining will suit preservation era passenger trains. No doubt it will get some subtle weathering nonetheless, along with a crew of course.
Monday, 13 November 2017
WD Hunslet finally complete

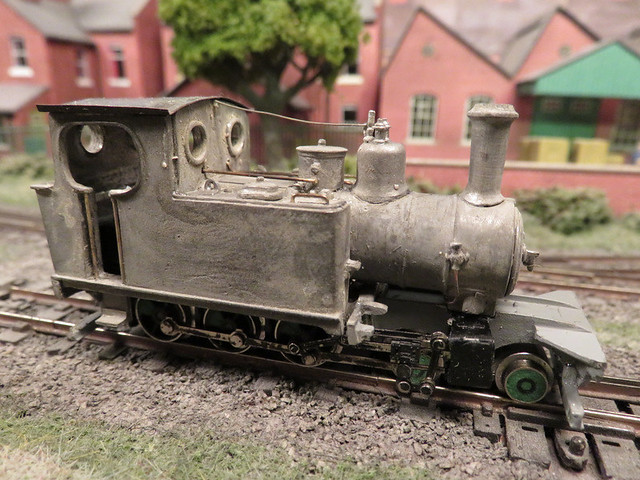
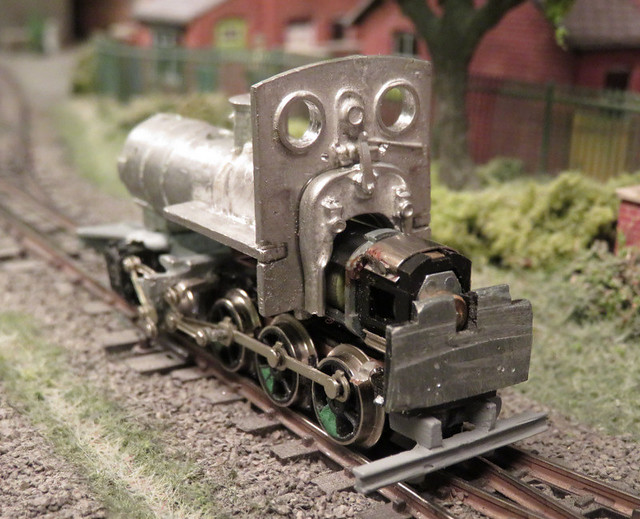
The body went together with little problem, and proved to be well detailed. I replaced the cab roof with one bent up from thin brass, and added handrails, pipes, and actuating rods from wire. At this stage the body had been blackened in preparation for an etch primer - the blackening doesn't do much to the white-metal, but I think it helps the paint stick. The problem was at this stage it still didn't run smoothly.
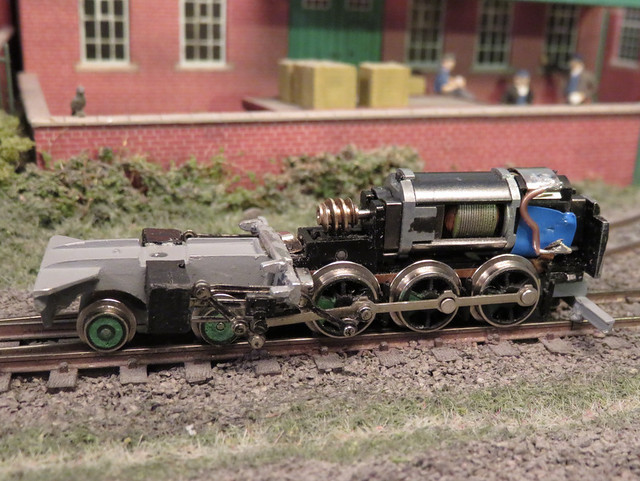
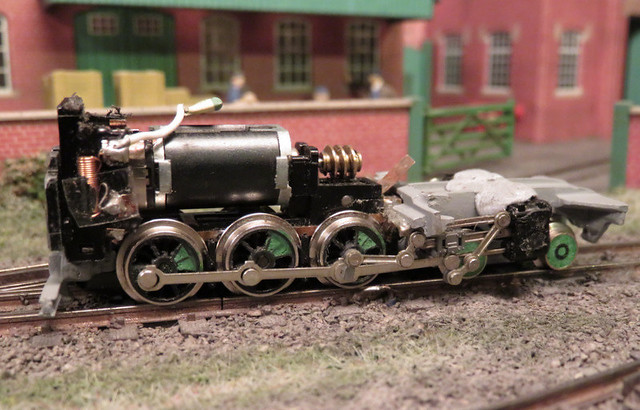
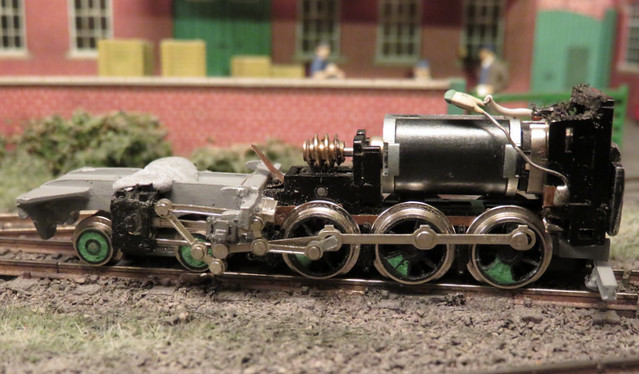
Apart from the broken part, the challenges with the chassis were:
- The motor on my chassis lay horizontal, the body needed it to be vertical. It wasn't difficult to change but clearly not all Minitrix chassis are the same
- Once apart, the wheels and gears are a devil to get back together, with the pick-ups too
- The driving wheels are not all the same size!
- Then the crank pins will be out of sync, so the rods will bind. I think I took 4 or 5 attempts to get the chassis back together and the rods to go round
- Much adjustment and fettling was needed to make sure the bits of valve gear don't foul
- The cylinders are a long way forward, probably a mm or so too far, so the valve linkage binds from being over-stretched. Again much fine adjustment, and bending the piston supports back ever so slightly
Finally I've got it complete, and running smoothly without jolts and binds. OK, the Minitrix mechanism is very noisy, but that is normal! But I cannot recommend the kit to the inexperienced.

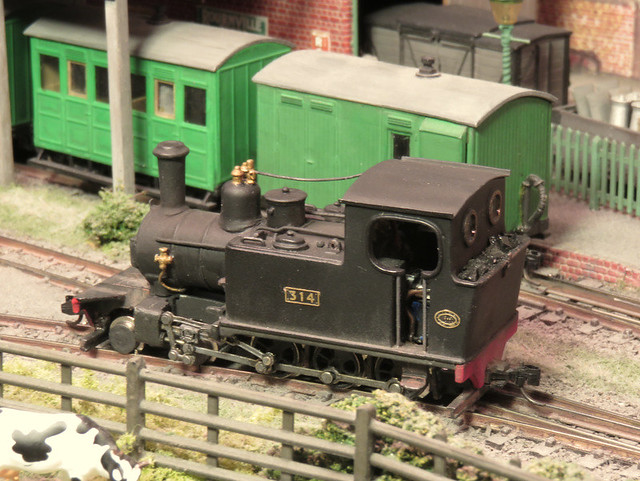
This view shows the wheels nicely, the trick of carving back alternate spokes and using filler for the balance weights is really convincing - removing one of the big problems with N-gauge chassis of too many too fine spokes. The pony "disk" wheels should probably have more of a profile but it's better than spokes.

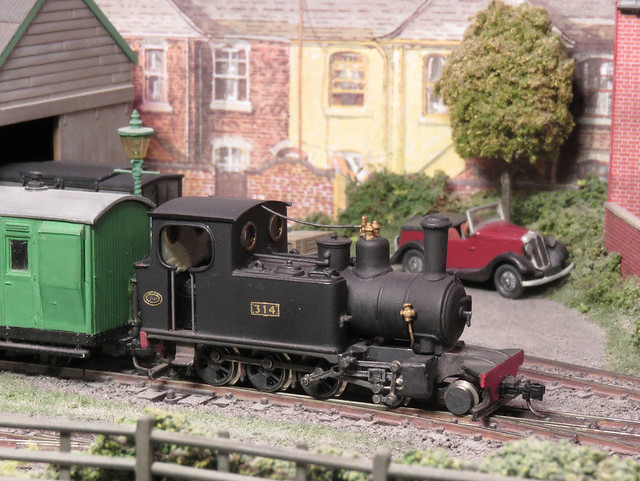
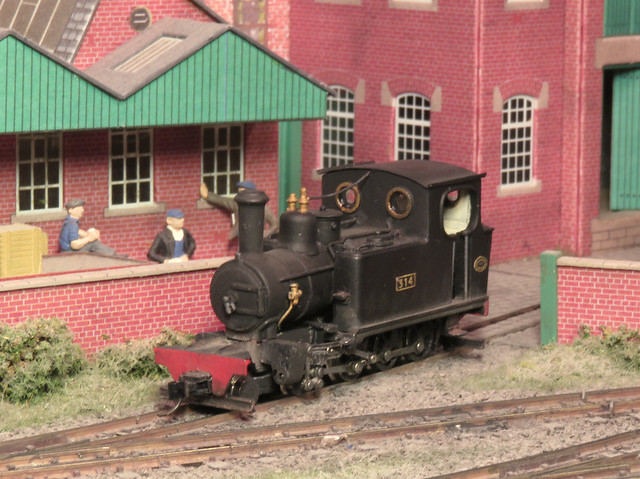
After priming, filling, rubbing down, and more priming, a can of Halfords black enamel did the body, with the smoke-box and roof brushed with a slightly more matt black with a hint of grey. Buffer-beams are two coats of red over a coat of white to make them bright, plus brass on the brass bits and gunmetal on the grab handles. A dirty wash was applied to the chassis, footplate, bottom of the boiler, tank tops, with some dry-brushed soot on top and rust in a few discreet places. After a spray of Testor's Dullcote a dusting with weathering powders for soot, ash, and track dirt in the appropriate places finished the job, just leaving glazing (Micro Krystal-Klear), plates and coal to be fixed

The result is a fine looking, hard worked but reasonably well kept loco, and should look at home shunting goods at Awngate or hauling passengers to Hexworthy. It's been a challenge but I'm glad I persevered, and thanks to all those who helped along the way.
Friday, 1 September 2017
A Duo of Diesels

Fitting the couplings to the Baguley was easy enough, with a slot cut into the buffer block for the Microtrains draft block and plenty left for the screw. There's plenty of space inside for some lead which helps tame the sprightly Kato chassis. Glazing was a little fiddly but templates in the instructions helped with cutting out, the brass etched frames were painted separately and fitted afterwards to hide any join - however I couldn't help getting spots of superglue on the paint, which had to be hidden by a little "dirt".

The Hunslet had no space for the couplings even after I cut a square hole in the buffer beam due to the chassis fitting flush inside, so I made up a mounting block using plasticard stuck to the face of the bufferbeam. Such blocks were common on NG locos and it holds and disguises the coupler draft box, providing something solid for the screw too. 3D printed glazing was provided, it's a little milky with some faint layering visible (and sanding it would make it worse!) but I used it anyway - it's convenient and looks OK. Here you can see I've also finished painting and weathering a couple of RNAD wagons too.

The Hunslet's party trick is the working headlights. The headlight openings were glazed with a drop of Micro Krystal Klear, and the micro SMLED's stuck behind them. The PCB was pushed into the bonnet so the contacts touch the Kato chassis when fitted. The lights work really well, the circuit suggested by my friend Harry does the job of keeping the LED's lit at a constant brightness and reasonably flicker-free, and I think I've got the brightness about right. The circuit meant less space for lead, but I still squeezed a little in around it and it runs fine.

Both locos have been weathered using a little dry-brushing, a dirty wash, and some powders (which may get toned down a little), the idea is to capture locos working in preservation service on maintenance trains - generally clean bodies but with some track and exhaust dirt. They could both do with a driver (and the Baguley could use a representation of an interior) but otherwise they are ready for service. Despite my reservations about 3D printing, I am very pleased with the end results.
Tuesday, 31 January 2017
Disaster Recovery
- The centre driving wheels were fractionally smaller than the others. This works fine, except that I'd managed to swap them to be the front set during the rebuild - leading to the loco rocking and poor pick-up problems
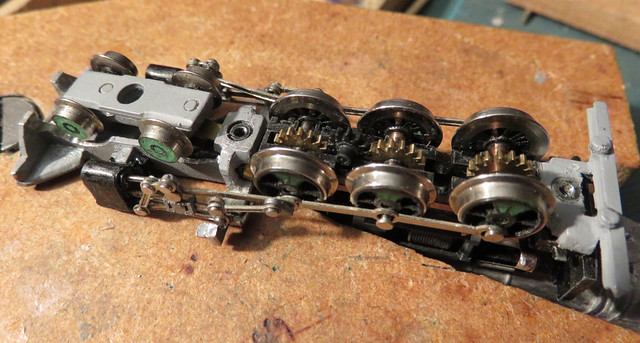
- The axles are linked by idler gears, with a little slack. However the wheels are linked with coupling rods, with a little slack. This makes it extremely difficult to assemble the chassis with the wheels quartered and the idler gears in place - and if one wheel is one tooth out, it may look OK but will bind
This left me stuck and somewhat down about the project. After all it would be a pretty difficult spare part to get, and really meant a complete set of valve gear was needed, so the project was shelved. However. a week or so back I was given another chassis by Martin Collins at a Sussex Downs group meeting. It was sans pony trucks, and he said it didn't run well (though he may have been trying to make me feel better about cannibalising it), but it did have complete valve gear, so I set about the transplant.
The first challenge was reassembling the chassis after removing the wheels to get the broken crank pin out. After the previous attempts, this time I knew I had to get the wheels and gears in mesh so the crank-pins aligned before fitting the coupling-rods. Sounds easy, but there's enough slop in the gears to make it not quite clear when they are aligned, while moving one axle meant one of the other axles or idler gears popping out - still, it only took a couple of hours this time.
I noticed a couple of differences with the replacement chassis, apart from the motor being mounted vertically. The return crank/pin was made from the same stuff as the rest of the valve gear, possibly steel, and not cast from mazak or cheese or something. Also the eccentric rod that attached to the return crank was, at it's other end, slotted to move back and forth on a pin, rather than being jointed to a representation of the rocking die link. That saves a piece and a riveted joint, while the machined crank pin was probably more robust, so I guess this is a later "improved" (cheaper and stronger) version of the chassis.
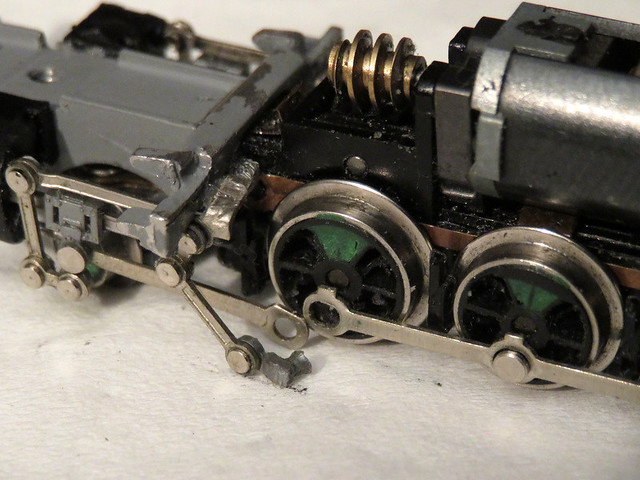
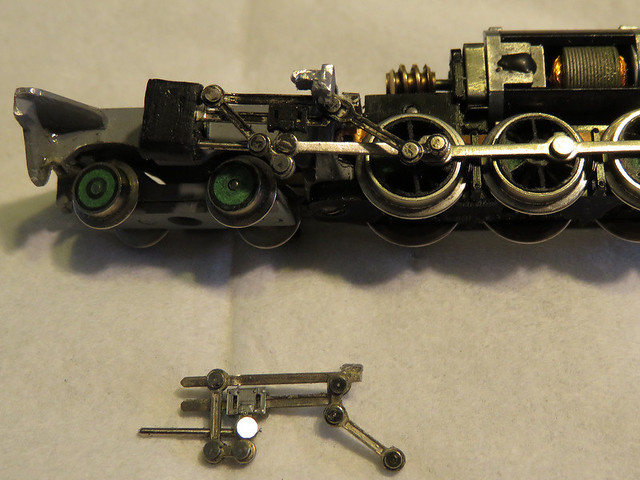
Here we have the new valve gear fitted, with the old gear below - note the extra link top right. But I still had binding, so much adjustment was carried out with the motor disconnected from the gears, rolling the chassis to detect any issues, and after some time I identified several causes:
- The slotted end of the eccentric rod could hit the crosshead if the piston was at the rear of its travel while the return crank was at its closest point of rotation. This meant setting the position of the return crank so the eccentric rod was further back, and tweaking the angle of the end of the slide bar so they didn't hit..
- The slotted end of the eccentric rod could hit the whitemetal cast outrigger that supports the valve gear at the upward end of it's movement. Careful filing of the casting was required, it now being rather thin at that location, along with care in positioning the valve gear assembly.
- If the slide rods are too far forward the slotted eccentric rod came to the end of it's travel and jammed, too far back and as well as that the wiggly bit (technical term) hanging from the crosshead pulled taut and jammed
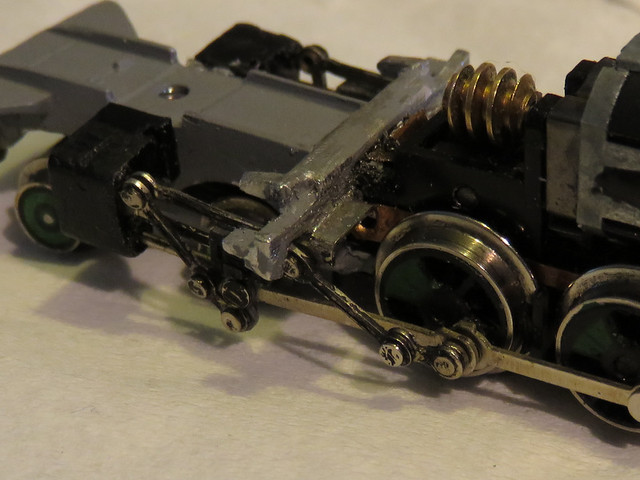
Close-up you can see how the bracket at the end of the slide bars sits on a ledge at the back of the cast cross-member, with the filed out slot for the slotted eccentric rod. Compare to the photo at the top of the page with the "original" valve gear.
Finally I have an assembled chassis that appears to work without binding. It could do with some lubrication and extra weight seems to help the pick-ups,and of course the motor grinds away in the Minitrix way, but I'm hopeful I'm back on track...
Monday, 26 September 2016
WD Hunslet - Valve Gear
So far I have successfully dismantled the chassis and cut the block to shape, moved the connecting rod from the middle to front wheelset, attached the bogie and front frame, and started re-assembly. The cylinders move forward, and this leaves the con-rod and valve gear at a bit of a stretch, while the tab on top of the slide rods glues under an outrigger.

Except here's the problem. The mechanism binds, and I'm certain it's because where the crank pins are furthest from the cylinders the valve gear is pulled tight, and just won't go any further. I suppose I could shift the cylinders back a mm or so, but I don't think that's right. Also the plated metal valve gear means the tab on top of the slide bars doesn't want to stick to the whitemetal outrigger, even superglue gives way. Plus the bottom of the valve gear is frighteningly close to the track.

So on the other side I've modified the outrigger, trimming the back of it so that the shiny tab sits on top of the rear "shelf". It will still need gluing but it is held more securely. This will be hidden by the side tanks too, so big blobs of epoxy might be in order. The result is the slide rods are lifted at least 1mm relaxing tension on the valve gear at full travel, and giving more ground clearance too. I've also rotated the cylinder slightly closer to the horizontal to line up with the slide bars - I think they look closer to the prototype pictures, plus that moves the face of the cylinder back a fraction.
So far so good, I'll do the same to the right side and see if it rolls freely. But I've already spotted another question...

The cab front and back-head has a slot for the motor, except the motor is too wide to fit. Unless, as shown, the motor is rotated 90 degrees to the vertical - where with a little filing it should fit. However the instructions don't mention this, and as the rear plastic support would need removing, and new connections making to the pick-ups as well as a means of stopping the motor spinning, I'm sure it would be if that were intended. Given the motor will be inside the cab either way I see little advantage, so I'll probably be grinding away a lot of whitemetal!
I will finish by mentioning the wheels, as N-gauge wheels don't look good on a 009 model. As well as filling the front wheels to make prototypical disc wheels, I've added balance weights to the drivers from filler. But there were still way to many spokes, and cutting some away would be very difficult without damage. I decided to cut back alternate spokes - they are still there, but recessed so they are less visible, The remaining spokes will be highlighted when painting hopefully giving the impression of a 6-spoke wheel (the prototype had 7, but close enough) rather than 12...
Sunday, 4 September 2016
Another Month...

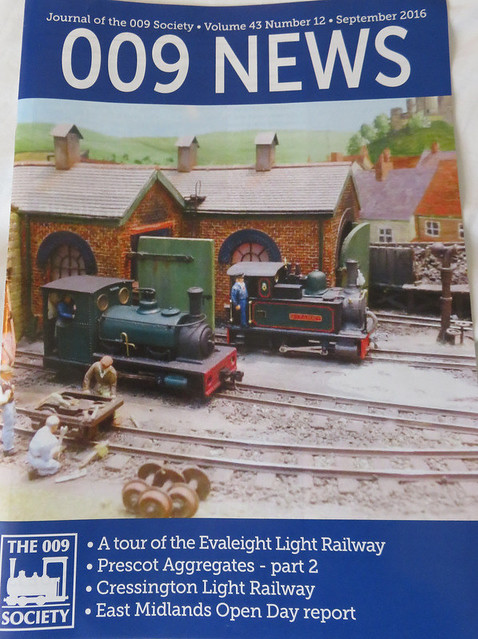
The article though is by Martin Collins about the Sussex Downs group layout, the Upsand Downs and Everleight Light Railway. The photo was taken at EXPONG by Mich Thornton, where I'd placed my then recently completed Hunslet in front of the engine sheds (most of the club locos were in use with the entire layout in action). It couldn't haul any trains due to different couplings, but added a bit of interest. The loco on the right is one of Martin's Varikits, and like the Hunslet sits on the Minitrains F&C outside-framed chassis.
Sunday, 27 September 2015
Finishing a pair of locos
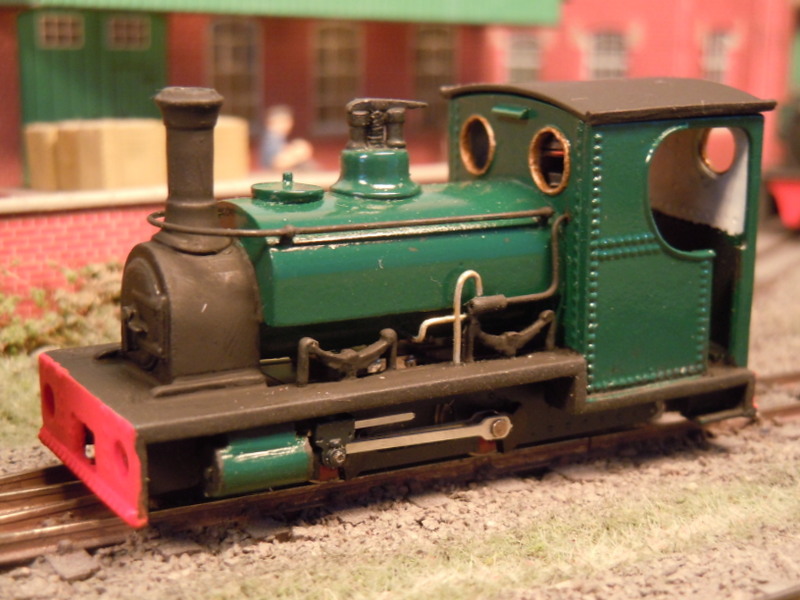
The Hunslet has been given a working "oily rag" look. This involves washes of acrylic paint over the loco - it seems not to stick to the shiny finish but working it in, and wiping off with a kitchen towel or cotton but eventually gives the right finish. Some subtle use of weathering powder is followed by a coat of Testors Dullcote - after all of which the over-shiny paint finish has just a dull sheen, and the loco has so much more character.
With a crew fitted the motor and flywheel are well hidden, the roof has been attached and couplings fitted. She runs well too I'm pleased to say.
With the Atkinson Walker I've gone for an even dirtier look, for a loco that is less cared for (despite being newer), or that has perhaps been recently acquired from a closed line. The same techniques were used, this time with the acrylic wash being brushed downwards in a rain-streaked fashion. This view shows the rudimentary interior: a representation of the cylinders and a some levers, along with a (leg-less) driver.
The exhibition is the Croydon Model Railway Society show next weekend - if you get there do say hi! I've got some more testing of couplings and stock preparation to do this week, and I'm hoping the new fiddle yard performs well.
Monday, 29 June 2015
Two Green Engines
The Hunslet uses Halfords Racing Green enamel aerosol, as used on some of my O14 i/c locos. It has perhaps a shade too much blue in it, but does look rather smart. The shiny finish will be toned down and lightly weathered shortly.
The Atkinson Walker uses Heathcote Ford Meadow Green. When weathered it should give a slightly faded appearance. I've not yet fitted the cab doors or interior "details", and I've noticed the wheels could do with toning down too.
Unfortunately painting black enamel over the acrylic aerosol has reacted, causing crazing. I've only seen this with with cellulose paint before, but I guess I could strip it off and re-paint with acrylic. It's only happened on the roof though, so right now I'm thinking of leaving it alone - it adds a nice texture, and with a little weathering it might look good.
Friday, 12 June 2015
Putting paint on the Hunslet
After a small amount of filling gaps and removing excess glue the body was cleaned and polished with a fibreglass pencil. However it doesn't look it in this photo as I then gave it a wipe over with a blackening solution. It doesn't blacken whitemetal, but it does dull it so perhaps paint will stick better.
Then it's out to the garage for priming, along with the Atkinson Walker Steam Tractor which has also been waiting for warmer weather! Halfords grey etch primer does the metal bodies, in about 4 thin coats from different directions. Standard primer was used for plastic parts too. This was followed by the main body colour - Halfords Racing Green for the Hunslet; a rather glossy finish but I'll deal with that later.
As seen here it has also received the first coat of black, though 48 hours later that doesn't seem to be properly dry so perhaps the paint has gone off? In addition the buffer beams have had a priming coat of white as red doesn't cover well. You can also see I've been scraping the paint off the injectors this side (the masking tape is to protect the paint behind), and that on the other side has been fitted.
Meanwhile, in between painting, the workbench has moved to other projects!
Thursday, 30 April 2015
Slow progress resumes
The last few evenings have seen the modelling bench dusted off and slow progress has resumed on the Hunslet. After a suggestion on the NGRM forum I have taken the files to the safety valves, which hopefully look a little finer now, though I suspect they are slightly over-scale I doubt it will be apparent if I paint them black as the prototype. I've also made a cab roof from plastic to reduce weight behind the wheels, the loco is heavy enough already especially at the back. It's two sheets of 20" plastic curved with boiling water while taped to a mug, only the top layer overlaps the sides giving a thin edge, and some microstrip adds the rain strips.
The other major step was filing down the cylinders of the US-outline Minitrains chassis to remove the end flanges. I'd wondered about adding a thin wrapper to beef them up but they are already wider than the footplate, and if I file the outside they won't be round as the prototype ones are (well I've done it a little, so they are slightly oval already!). However I did manage to raise them by cutting off the top of the valve chest and packing under the saddle that holds them to the front of the chassis. They might still be a bit thin - not sure on that yet - and are slightly behind where they should be relative to the smokebox, but even in a side-on view they don't look too bad, and raising them up has really helped.
Just a reminder of the prototype. I have some pipework and handrails to add, shame I don't have any white-metal sandboxes like that as they would help weight distribution!
The cab roof and re-profiled cylinders are clearer in this shot, as is my attempt at a lower slide-bar from a piece of etch fret. It would really look good if I could get it to fit, but I fear this attempt may have failed!
As you might be able to see in this shot it is simply a piece of U-shaped etch that forms a (cosmetic) lower slide bar and the motion bracket, then folds back to the frames for support. Sadly this piece of etch didn't have enough space in the "U" for the con-rod to waggle.
It's good to be back at the workbench and I'd like to see good progress with this loco, but I won't promise it will be fast...!
Monday, 23 March 2015
Hunslet Body Building
When we last left the story I was making up a bracket to mount the chassis to. Here it is firmly glued into the front of the footplate, with the buffer beam fitted. Of course I've had to make a square hole for the Microtrains coupling, the plasic just visible is the mounting point, though it is tight for space. You can also see the footplate has been filled inwards slightly with a strip of plastic, and new holes made to fit the springs in line with the wheels, and further inboard.
The front part of the body has been packed with lead sheet - the smokebox and front part of the saddle tank, forward of the rear wheels. The rear part hasn't as I'm trying to balance the loco rather than just make it heavy! However I have continued the boiler shape in plastic (this would be where the motor fitted with the originally designed for Ibertren chassis).
Up top the main components have been assembled, and the springs, safety valves and chimney fitted. The tank filler, sawn off early in the build, has been refitted to the front of the tank on a layer of epoxy to fit it to the curve. The buffer beams and footplate were fitted with a 45 degree chamfer, this not only looks better than sitting below the footplate as intended, but allow a more appropriate ride height. They still sit rather close to the track!
So some detailing to go: filling holes. handrails, pipework, cylinder covers, cab steps, and of course a cab roof. I'm inclined to ditch the cast one and make one from brass or plastic to save weight at the rear. The loco already weighs about 95g (most similar size 009 locos are around 60g), and of that over 60g is on the rear wheels. It does run very well and shows no sign of wheelies (unlike the undressed chassis!), but nonetheless it really doesn't need any weight at the rear.
Saturday, 21 February 2015
Outside Framed Hunslet
However undeterred I got a new kit for the "Cackler / Jerry M" Hunslet (by Five79) and set about adapting it to fit the chassis! The dummy run trial below shows the smokebox set further back to line up with the cylinders (well nearly), and the saddle-tank scored with a line 4mm from the rear where it will be shortened. I'd already carefully removed the filler cap from the casting, which can hopefully be re-used, and the other round plate on top of the tank (purpose unknown!) was filed smooth. The footplate has the hole for the motor opened out towards the rear a little.
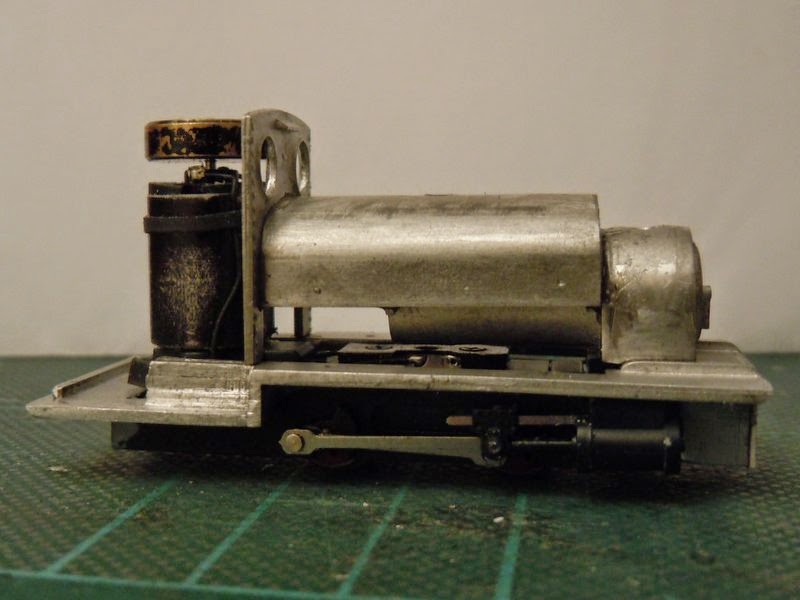
The chassis has some modifications. The plastic "footplate" around the motor is cut away along with a section of the rear frames, allowing the kit's footplate to sit on it, and some plastic "pegs" glued just below the motor that protrude just above the kit's footplate to hold it down. At the front of the chassis the extended keeper plate is cut short and a 2mm hole drilled for a fixing screw. On top the plastic plate/clip has it's vertical "wings" removed to clear the boiler.
The whitemetal footplate has been shortened by about 3mm, including the dummy frames below, and both the front of the footplate and the bufferbeam filed to a 45 degree chamfer to fit the buffer beam better (that's been done at the rear too). A mounting plate for the chassis has been bent up from brass, with a 2mm hole drilled and a brass nut soldered on. This will be glued into the front of the footplate/frames casting.
The boiler, smokebox, and cab front are glued together so time for a trial run on the footplate and chassis. The cylinders are still a little too far to the rear but I hope to disguise this further, otherwise all looks promising so far.