Showing posts with label Ground Contours. Show all posts

Sunday, 23 September 2018

Building the landscape

Finally we got to the most exciting bit, from Joshua's point of view, scenery. This is the point where bare boards and track quickly start to gain some realism.

IMG_5233

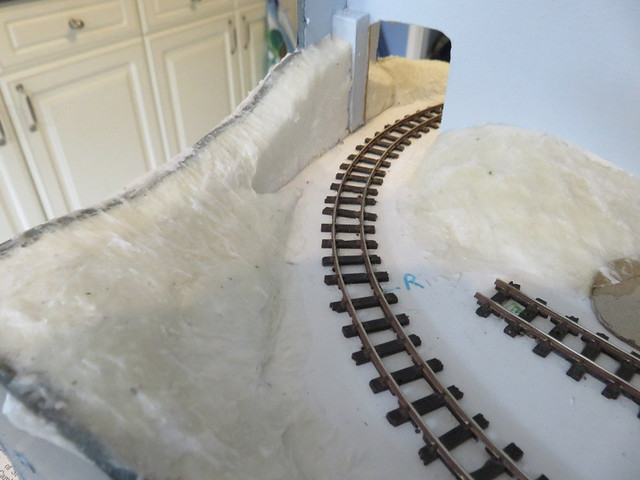
The basic landscape was formed from expanded polystyrene, carved with a craft knife or a broken hacksaw blade. There's nothing dramatic, just some gentle banks, cut to match the profile we'd already cut the fascias to. This was covered with kitchen towel pieces stuck down with dilute PVA glue - a new method for me as I've used newspaper and plaster filler before. This has dried to a very tough "skin" so seems to have worked well.

IMG_5232

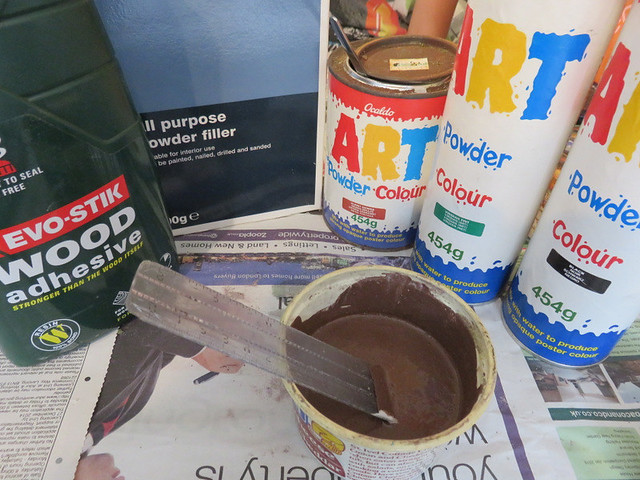
To give a final smooth but slightly textured surface and some colour to the scenery I made up my scenery mix. Ingredients are plaster filler, powder paint (to give a brown colour), water, PVA glue, and some sand. The resulting rough slurry can be "painted" over the ground in a thick layer, and oozed into any gaps.

IMG_5263

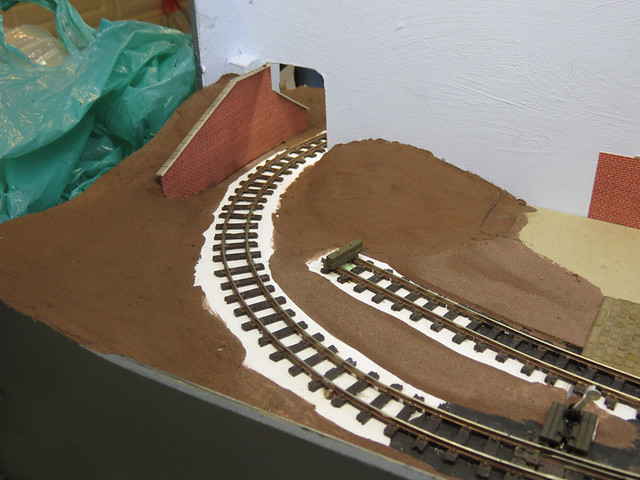
So now we have soil covered hillsides. Ballasting is next, but first a couple of details. The simple "buffer stop" above was made from a couple of pieces of balsa cut to a sleeper size, and fixed with a couple of wires for "bolts".

IMG_5264

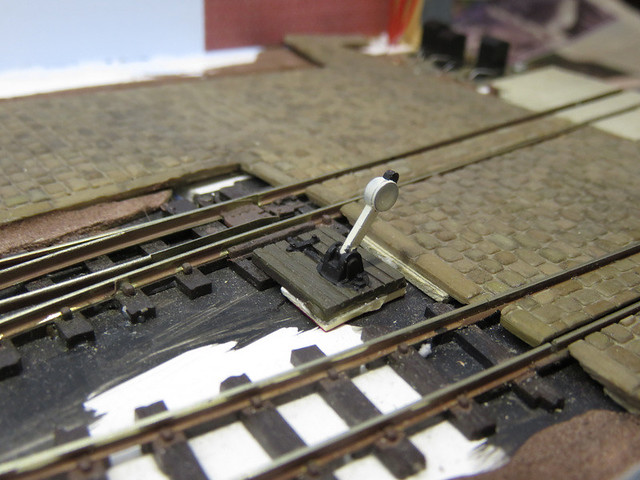
A par of Peco 009 point levers were painted up and stuck down next to the points. A little card packing brings them above sleeper height, the "pip" on the end of the tie bar is cut off so it slides under the lever base-plate.

Sunday, 14 September 2008

Let there be light!

I've just had a week off from work, and although having a small toddler to look after and some family days out (I continued his education with a trip to the Bluebell Line) I have managed to find some time to work on the layout, and make progress on several fronts.

The most obvious is the lighting. This consists of two 30W tungsten strip-lights inide the pelmet, as shown in the photo. The ply wasn't thick enough to screw in to, so I stuck them in place with a hot-glue gun. The tin foil (pre-crinkled to diffuse the light) reflects the light and prevents the wood getting too hot. I left the lights on for several hours and the ply was just warm to the touch. They are wired to an in-line connector so the mains lead can be removed, then to one 3-amp fused plug.

The lighting may be simple, but is very effective as the picture below shows. Tungsten light gives the impression of a bright, sunny day, but that matches the blue sky! Othe progress that can be seen is that the ground contours have been built-up, at the back using card to raise the houses and yard areas, and with expanded polystyrene at the front of the layout. I also carved drainage ditches into the cork beside the track. Although essentially a flat area, the subtle changes in level are important to avoid the flat-board look!

On Saturday I went to the Worthing MRC show in Lancing. You can see some pictures here: http://picasaweb.google.co.uk/campbellsonline/2008_09_Lancing#
There were some good layouts, some average and a few looked unfinished. Trade support was the usual Hornby and toy cars etc., no Squires this year, but I did manage to pick up some odds and ends - chimney pots for the station, some second-hand books, and another Townscene backscene. This has some house and shop-fronts that will enable the backscene to come together, so that is my next job.

Posted by Picasa