Showing posts with label 009 Society Challenge. Show all posts

Tuesday, 16 March 2021

Loctern Quay in 009 News

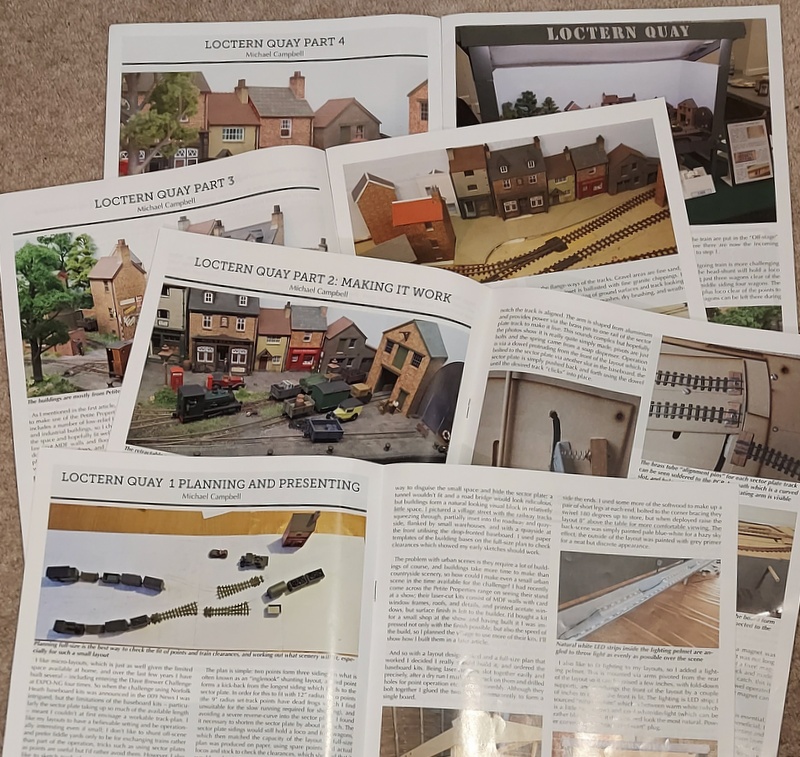
The March issue of the 009 News carried the last article in a 4-part series about Loctern Quay, which even made the cover on the January edition.


The four articles covered the design of the layout including its presentation and lighting; the trackwork, sector plate, and electrics; the buildings and scenery; and finally the stock and operation. Not bad for such a small layout, but it has been nice to cover these topics in detail, and see lots of photos published too. Since this layout was born out of a 009 News challenge it is the appropriate place to tell its story. 


The 009 News is the magazine and newsletter of the 009 Society, if you are interested in 009 and not a member why not join? I have found membership beneficial and rewarding over many years. For the last few years the 009 News has been edited by my friend Chris Ford, but the April issue will be his last as he passes on the proverbial blue pencil to a new editor. Thanks for all the great work Chris!

Thursday, 7 May 2020

Loctern Quay is a winner!

Just got the latest 009 News...


Loctern Quay is the winner of the 009 Society competition!

Thursday, 12 March 2020

Loctern Quay stock and operation

Once I had completed Loctern Quay and taken photos for submission to the competition, I had a little over a week to prepare for its first exhibition. Now I have plenty of locos, Loctern needs three for full operation but I didn't have a problem finding enough to cover with a few spares...


It is nice that Loctern Quay is quite a different theme to Hexworthy, and locos that may not look at home in a preserved setting can find a home here, such as tramway (skirted) locos. As a shunting layout good slow running is important, particularly for the shunting loco - three of these locos use Minitrains chassis which give very good running.


Most of my wagons are grey, similar looking, and other than some different loads, not easily distinguished. To make shunting more interesting I wanted to increase the variety of wagons, so built up these four kits I had in stock. The two on the left are 009 society kits, nice and small. The L&B van is a Parkside kit (an old one from a friends un-built pile) in passenger stock green since it has vacuum pipes. The lovely little gunpowder van from Narrow Planet is tiny, but as yet I haven't figured out how to fit couplings...


The rest of the fleet are existing wagons, selecting a range of wagon styles, and adding variety with distinctive loads. Some are resin castings from Anyscale Models, some items from the bits box, and a couple of tarpaulins thanks to a creme egg. I spent some time checking and adjusting couplings to make sure they work reliably, and other than a couple of troublesome trucks they did at the show.


The last job was to create a way to make operation interesting. I took a photo of each wagon, and printed out a simple card for each of them which was then laminated. There are cards for 18 different wagons which allows some spares, in operation 12 are on the layout, of course if a wagon is swapped out the card must be swapped too. The display board is simply made from foam-core board making them easier to see and follow, like those things you get in Scrabble. At each end there is a pocket to store cards for wagons in the fiddle yard (off stage) or to be left in the yard, while the cards for the train to make up are displayed in the centre.

So operation goes as follows:
  1. A train is pushed into the rear siding from the sector plate, the loco decoupled and parked between the buildings
  2. The cards for the wagons in the train are shuffled with those in the "Yard" pocket. Four cards are drawn and placed on the display board "to dispatch" in a random order
  3. The shunting loco in the head-shunt is used to make up the new train in place of the old, which is made more challenging by the constraints of the siding and head-shunt lengths, and because all the wagons do not fit in the front two sidings. Indeed if too many wagons enter a siding the uncoupling magnet makes them tricky to get out!
  4. When complete, the shunter withdraws and the train engine couples up and takes the train back to the fiddle yard
  5. The cards for the wagons in the departing train are swapped for those in the "Off-stage" pocket, and the procedure repeats from step 1...
Initially we had just 3 wagons left in the yard but in practice we found 4 wagons in the yard as well as 4 in each train worked best, adding that little extra challenge. At home if a train does not need to go to the sector plate a train of 5 wagons can be "dealt", for more of a challenge, but this means the uncoupling magnet for the train loco is under the first wagon.


So after a busy but productive few days here's the layout on display at the show. The fold-out legs and lighting were easy to set up and worked well. As well as the wagon card display there's a short description of the layout on the right. The operator sits to the left front of the layout which allows easy operation and interaction with viewers, indeed the wagon cards encouraged interaction - viewers were invited to pick cards at the appropriate time, and having done so I found they lingered longer to see the train made up.

Tuesday, 3 March 2020

Lock, stock and barrel

Loctern Quay is now finished! In fact it was finished a few days before the deadline for the 009 Society competition, thanks to a big push over the last few weeks. Anyway, with my entry now in, here are some pictures of the final result.


As displayed with short legs and lighting, I got a name for the fascia from Vinyl Lettering Online, which finishes it off nicely. The paint, lighting, and name are all as we did with Slugworth & Co.


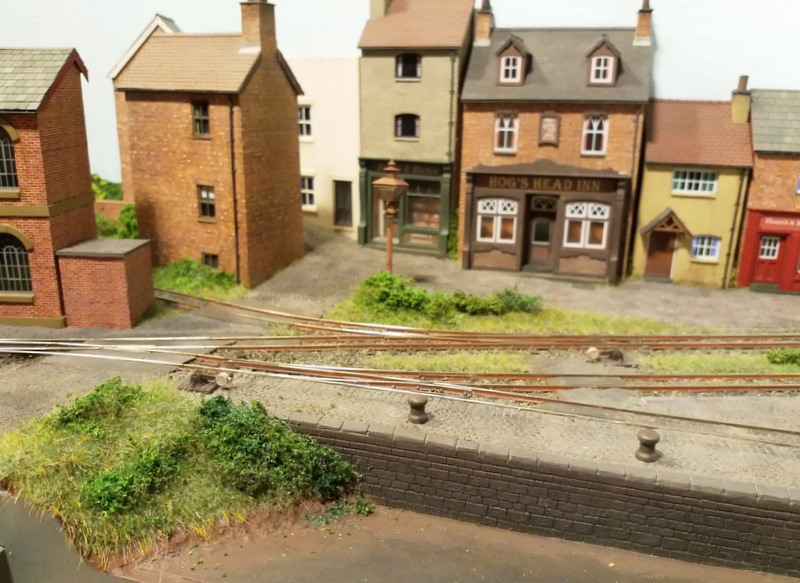
A general view across the yard, with the final details and a few people in place. I found some old Tiny Signs packs, and got carried away with the enamel adverts - which suggest the building in the centre is a newsagent and tobacconist, although we can't see the front.


The other end of the yard, a pleasing composition I think. I've aimed for signs of life but not too busy, as befits a backwater.


The other end of the layout. Perhaps it could use a tree right at the end, it's a bit abrupt right now, but it would have to be a carefully selected/made tree to fit.


One of my favourite views, even without trains!

The first exhibition for the layout is this Saturday, held by the Wealden Railway Group in Lancing, West Sussex. It's always a good friendly show, so do come along if you can

The past week or so I have been busy with wagons, checking couplings, etc., so i hope I will be ready. More on that soon.

Wednesday, 26 February 2020

Hiding a fiddle yard in plain sight

What's this? A minimalist micro layout? A photo-plank?


It is of course the sector plate fiddle yard for Loctern Quay. Because of the scenic arrangement it would not be completely hidden, and bringing the backscene in front of it wouldn't work well on such a small layout, so I thought I would disguise the presence of the fiddle yard - that is, hide it in plain sight.


From above the sector plate is seen, though the scenic dressing ensures it does not stand out, while the brick wall disguises the hard edge of the sector plate and the void beyond it. The embankment and trees ensure there is no empty space and draw the eye away from what would be a bare corner. This does of course mean that access to the fiddle yard is tricky, but operation doesn't require access to the trains, and the sector plate is moved by the dowel protruding from the front of the layout.


From the front, even an unusually close and high viewing position, the subterfuge works quite effectively. With the sector plate pushed back to access the front track a train can just about be seen on the rear track, but that's OK, perhaps there's a siding behind the warehouse?


The wall moved! Perhaps there was a land-slip? With the rear track lined up there is a small area of bare board just about visible. However, painted brown (with a bit of graphite to help smooth movement) and with the wall hiding much of it I don't think it is obvious.


From the other end of the layout the buildings, water tower, and tree do much to hide the transition to fiddle yard. What can be seen of the sector plate does not stand out thanks to the ballast and grass, while the embankment and trees behind fill what would otherwise be an empty void.

Saturday, 22 February 2020

The river

The clue is in the name - Loctern Quay has a quayside, and that means water - I've chosen a river. I've not modelled water since I was in my teens and back then sloshing some gloss varnish about was the accepted method - to be fair it looked OK for mountain streams, but had a tendency to soak up the banks. These days there are many different products available to model water, so I did some reading up on what might be best for my flat, dirty, deep(ish) river.


I settled on simply using acrylic gloss medium - in this case "Modge Podge" - having seen some youtube videos that showed it gave the sort of result I was after without looking too difficult (or time consuming, or expensive). I used an offcut of foam-core as a test piece, and found:

  • It is thick and sticky - it won't run off the edge of the board so no need to "seal" the area, nor wick up the banks. 
  • But it also won't settle smooth, it will show brush strokes (so use a fine brush) and is hard to lay flat and smooth (see the left end of the test piece - I wonder if diluting it would help it settle more smooth?)
  • Ripples are really easy to make by dabbling with a brush - but the size of the ripples depended on the size of the brush
  • It could be applied quite thick - a good couple of millimetres - and sets clear within 24 hours, further coats can be added to thicken it. I didn't try pouring it.
  • It was easy to do and looked very effective!


The base of the river is simply the MDF board, which I painted to look like deep river water. My first attempt was too green, so a tried a muddy brown. That looked too like mud, so went to a dark almost black with a hint of greeny brown, but blended this into the muddy brown towards the bank and quayside as though the water was getting deeper. Happy with that result, I worked out where to place the sunken barge and wildlife.


Next to apply the Modge Podge, thickly with a largish brush then dabbed into ripples with a smaller brush, working it carefully up to the banks. This is just before the barge and birds were placed into the wet Modge Podge. The foil you see at the bottom was arched over the "water" while it was drying to prevent anything landing on it.


I am very happy with the finish, I think it looks just like I was hoping it would and wasn't as difficult as I had feared. The light glares off it a bit in this picture, but it definitely looks "wet"! I've only used one coat and I don't think it needs another, but I guess I could add a thin coat if it ever lost it's shine.


Wednesday, 12 February 2020

Growing trees

Moving up (literally) from the grass and undergrowth comes the trees. I had in stock a pack of Woodland Scenics tree "armatures", which could be considered as flat-pack trees as the plastic moulding is completely flat.


The idea is they are twisted and bent into a three-dimensional tree. I found dunking them in hot water for a minute or so made that a little easier, and it was helpful to hold the trunk below where I was bending with a pair of pliers, but the concept works well.


The result is surprisingly effective. The best technique is twisting the trunk working up the tree, which spreads the branches in all directions, but as some trees were to be against the backscene they needed the branches bending towards the front or sides, away from the back. With a little thought the branches can fill the 3-D shape in a balanced way.

I then painted the plastic as it looked a bit, shiny plastic. I used a dark brown enamel wash dry-brushed with a mid-grey, and although at a distance it doesn't look that different it does take away that plastic look.


I used commercial foliage products - Woodland Scenics on two of the trees, and Heiki on the other. This is cut into small irregular chunks and teased out - particularly pulling the top and bottom of the flat material out to form more 3-dimensional shapes. I stuck the now fluffy foliage to the branches using matt medium ("Modge Podge" matt) rather than PVA, which dries invisible.


The trunks have a small peg protruding from the base, the idea being they can plug into a moulded "root" base to stick on a flat board. Of course I want to plant them into the ground, but the short peg wasn't enough to secure them, so I drilled a 1mm hole into the end of the peg and super-glued in a length of wire (straightened paperclip).


Here's the two at the back of the layout, with a nice open feel to them, and a good shape and size. On the left I've used a couple of the trees my son made for a school project using twigs and rubberised horsehair stuck on with hot glue. The best ones were used for Slugworth & Co., but these were revitalised with extra flock and planted in the corner, which they fill quite nicely. Just visible on the far right is a commercial tree I found in stock - it's a bit of a "lollipop" but fills a gap and isn't very visible!


The other tree sits front and centre, creating a view block - not least to hide the fiddle yard exit, as seen here - and to make the middle of the layout feel less empty. However, whether it is too much in the way remains to be seen! It could make operating tricky by blocking the view of the uncoupling magnets, so for now it is pushed into the hole but not glued.

Tuesday, 11 February 2020

Growing grass

In the last update you might have noticed the ground had gained a layer of green, more progress has since been made.


The base layer is normal scatter flock, sprinkled over dilute PVA glue using two or three shades of green, which prevents bare patches being seen through the static grass. Some ground-foam type "foliage" flock is used too, to increase texture.


Next up is the "static" grass, and this is my first time using my new Peco applicator - this proved more effective, and looks a lot safer, than the cheap tea-strainer-meets-fly-swat I was using before. I also used Peco "basing glue" instead of PVA - it stays tacky longer than PVA, and is a better consistency than dilute PVA. Again the grass is mixed from two or three shades of green, plus some yellow-brown, including long (6mm) fibres of straw colour.


Now it didn't all turn out looking this good - this was one of the later areas to be done and maybe I'd got better at it! I found it best to apply the long straw fibres first, not too dense, and then a mixture of shorter greens together, and here it has worked very well.


I've also added some bushes and undergrowth using a variety of materials, including rubberised horsehair, foam products, and even lichen. However, the best results were with a fibrous material, teased out, sprayed liberally with cheap hairspray, and with scatter or ground foam (or both) sprinkled on. It's quick, easy, and as you can see here, surprisingly effective.

Thursday, 6 February 2020

Ballast and gravel

Last time I said the next step is the ballasting. First I fixed the point levers in place. The ballast is fine granite - no idea of the source as I've had a big bag for years! This is placed with a brush to fit between but not on the sleepers - tapping the rail sometimes helps shake the granite off the sleepers. I then mist it with a fine water spray, then drop dilute PVA (with a drop of washing up liquid in) over it using a dropper. This soaks into the granite without disturbing it. Care is taken around points - I place neat PVA exactly where I need it around moving parts and sprinkle the ballast on, for more control and to keep glue and ballast away from bits that move.


Even on a small layout it is, I admit, a tedious job, but very necessary and the layout looks better for it. I then used some fine sand (taken from the kids play pit sand years ago) to make gravel areas, sprinkled onto diluted PVA, then sprayed with the fine water mist to help it bed down to the glue.


The sand forms the roadway and pathway areas, that may be gravel or (in the setting of this layout) ash. Of course it needs painting...


A mid ash-grey seemed to suit. Now things are looking much better.


The ballast is then given a wash of well-thinned brown enamel to weather and tone it down, the effect is quite subtle, further coats could give dirtier track but this seemed enough for sidings. The sleepers had been dry-brushed with grey before ballasting, and of course the rails given a dirty rusty brown colour, resulting in a pleasing track effect. Note the use of the sand "gravel" path has disguised the uncoupling magnets, now they are assumed to provide a crossing for the shunter to access the point lever.


Further weathering of a darker brown-black was applied where locos might stand, including on the rail sides. It all helps make things look less uniform.

You might also notice a first cover of green scatter as a base for static grass, and in this shot, a fence has appeared at the front secured with wire "posts". This acts as a safety barrier in case of derailments and careless fingers, being right at the front of the layout.

Sunday, 2 February 2020

Building up

This week the buildings finally got stuck down - well, most of them. A few spots of PVA holds them securely, but hopefully means they could be prised up if ever necessary. Most of the buildings slot into recesses next to the street.


At the back, where the street turns into the sky, I found an off-cut of backscene that fills the gap, giving the idea of further buildings. It's not the most realistic, but it isn't in direct view, and looks better than plain sky.


The exit to the fiddle yard goes between buildings, which has to be tight to hide the fiddle yard beyond. To help disguise it further I'm planning a water tower, but as can be seen there's little space between the tracks here - and clearances are rather tight! Here two of my widest locos are used to check. This view also shows the crossing timbers have been stuck down, and the track sleepers dry-brushed with a pale grey.


You might have noticed some gas lamps have appeared. These are working lamps, though I've not yet had time to connect them up - the wires are taped up beneath the board. They had extensions to set them higher, which might be more appropriate for street lamps, but I felt they dominated the scene too much so went for the lower height.


Meanwhile, the paint shop has been preparing some of the details - bollards, point levers, and a horse trough (not sure if I'll use that yet), plus of course the sunken barge. I wanted it to look really rusty, but that it might once have been painted black. So I gave it a rusty finish of several shades of red-brown daubed on together, and liberally coated with weathering powders while tacky. Afterwards a dark grey-black was almost-dry brushed/stippled over the top, as though little paint remained over the rust. I think it works...

The current task is ballasting, and gravel surfaces, more on that soon. Next will be greenery, water, and details. Just 4 weeks to go so things are rather intense, but they are coming together.

Sunday, 26 January 2020

Adding colour to the ground

With the deadline for the 009 Society challenge layout just a few weeks away the pressure is on to get some scenery created, the last week or so has been quite productive despite the lack of posts.


The polystyrene land-forms have been covered with kitchen roll torn up and stuck in place with plenty of dilute PVA glue - this creates a strong shell.


The buildings have been trial fitted again, requiring some trimming of the edges of the clay to get a good snug fit, and their "levels" checked adjusting with card under the foundations to get thresholds at a sensible height to the street. Holes were drilled along the quay for the bollards, and I couldn't resist checking the fit of the sunken barge - now in primer - and an "old" boiler resin casting I'm thinking of using as a water tower. I've also primed and sprayed black the Langley etch of drains and manhole covers, and cut recesses into the clay where they are to be sited.


Along the terrace walls and steps have been made, though as yet no capping stones or railings, and the "pizza base" foam embossed with pathway paving. You can also see a fence trial-fitted along the front.


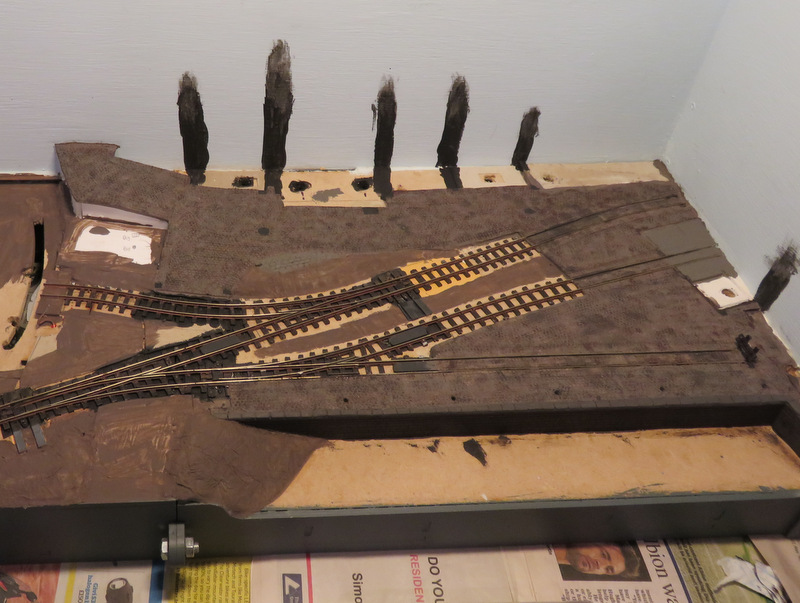
The next big job is to paint the cobbles, getting this right is important to the whole look of the area. I found some craft acrylic and started with a mid brown-grey colour, worked into all the cracks.


Next I added variations to the base colour - darker, more grey, and even a little redder - stippled onto the surface with a small sponge. This was quite effective, but looked a little blotchy, and perhaps too brown. In case you are wondering, the black "stripes" up the sky are to form shadows between the buildings, and the holes under them are in case I ever want to fit lighting. The quayside wall has had a coat of darker brown, and the capping stones a dark grey.


Once that was all dry I reverted to enamels. Two shades of grey were applied dabbing on with a piece of kitchen roll, aiming to give the tops of the cobbles a greyish finish.


Finally I finished with a very thinned brown wash allowing it to flow into all the crevices, and dabbing any excess off the surface - though it is too thin to cover the surfaces, only adding colour where it collects in the crevices. The quayside got a dark greenish-black wash too.


I'm happy that the result is quite close to what I was aiming for, these pictures of Tatton Park farm (which inspired my Landswood Park Farm layout) were useful reference.


Now, back to the landscape...


...which has had a coat of brown filler. I mix powdered interior filler with various colours of powder paint before adding water to a thick paste, this is applied with spreader or cheap brush to cover the kitchen roll and polystyrene.

Next up, a number of details need painting and fitting, along with the buildings, in preparation for ballasting and greenery.