Showing posts with label Minitrains. Show all posts

Monday, 17 July 2023

Reviving a Minitrains Porter

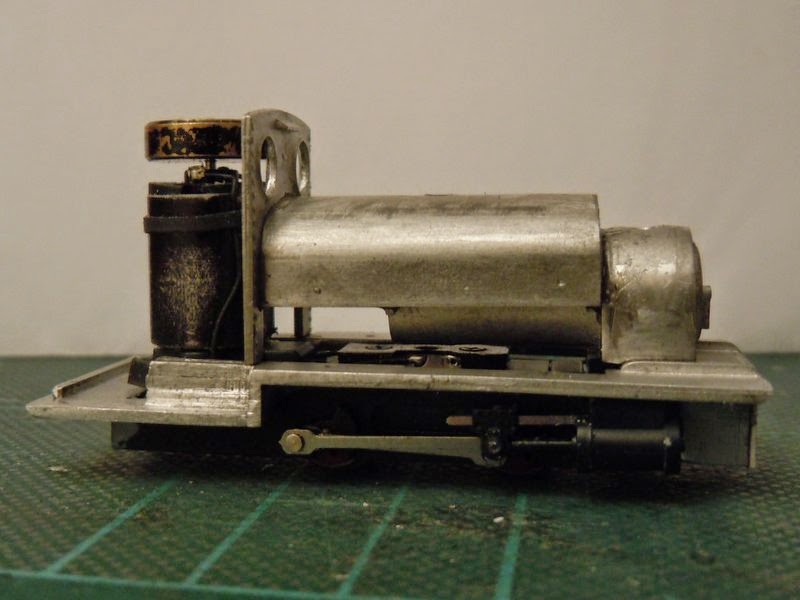
Some time ago I started a Narrow Planet kit for a little Bagnall tank using a Minitrains Porter 0-6-0 chassis. The Porter body had to be removed, which involved cutting part of it away from around the motor as I recall, but after having done so the chassis didn't run smoothly. I then noticed the motor looked wonky, and on closer inspection I found one of the retaining screws had a stripped thread and didn't tighten. After some frustration I put the kit away to think about what I could do about it.

Having made some progress with the Kerr Stuart Haig chassis I figured I'd pull this kit out to see if I could revive the chassis too. The first discovery was that the two screws that hold the top plate of the chassis down are the same M1.4 thread as those that hold the motor, although very slightly shorter and countersink head. However, one could be carefully screwed into the motor in place of the stripped screw, the motor thread is damaged too but not so bad that the new screw couldn't bite. This is made far more difficult by wheels being in the way preventing a screwdriver being lined up straight. The old screw went into the top plate of the chassis where it is not under strain. 


The motor still looked wonky, and the chassis still ran badly, jerking and clunking. With the screws backed off slightly the worm slipped. I tried adding packing (10 thou plastic) under the front of the motor tilt it back slightly, but then it wouldn't run at all. I then rotated the motor 180 degrees, which seemed to result in less of a lean - I've no idea why. The chassis was still jerky and clunky. 

With the motor removed it span freely under power - but the chassis didn't roll smoothly, with a definite clunk once per revolution. Gently, the rear crank-pins were prised out to free the con-rods, but the clunk remained. Finally I had to accept I would have to do what one should never do with these chassis... open it up!


Tiny screws, tiny gears, even tinier washers. Scary. Anyway, on close inspection I discovered one of the gears (on the middle axle) has a damaged tooth. These teeth are tiny so it is very hard to see, but just visible in the picture below - look for the unequal gap between teeth. 

I have no idea how this can have happened, but the real question is how to fix it. I can't fix the gear, but I could swap the axles so the damaged gear is at the front, and remove the idler gear, leaving the just rear and middle axles powered. Of course, getting the two axles in place with the idler gear and their crank pins aligned was rather tricky, but I suppose the same challenge with 3 axles and 2 idlers is even harder. Fortunately it all went back together in the end, and the chassis ran smoothly as a 2-4-0. Encouraged, I then re-attached the coupling rods and connecting rods, first omitting the middle axle crank pins to drive the front axle from the rear, the middle axle appeared to rotate with it's crank pin holes in line so I added the middle pins too. Somewhere along the way one of the tiny washers from behind the coupling rods pinged off the tweezers into space, but it seems to manage just fine. 

Yes, amazingly after all that work, the chassis actually works, and appears to run as smoothly and sweetly as you'd expect a Minitrains to, despite it now lacking an idler gear and relying on the coupling rods to drive the front axle. 


You see from the video the body is placed on. Before giving up on the chassis I'd spend some time smoothing the visible parts of the 3D print and given it a coat of primer. I added another coat, but found the lightweight body blew away from the spray can! It needs weight anyway to balance the chassis and aid pick-up and traction, so I added some lead. The "Swiss rolls" are slid into the boiler, and the flat pieces into the small side tanks, wiped with a little contact adhesive to hold them in place. As you see from the video this is enough to aid good running. 

Chassis problems fixed, I can now continue the build of this dinky little loco. 

Tuesday, 8 February 2022

Exhibition prep: Loco crews, glazing, and couplings

Loctern Quay will (Covid permitting) be at the Festival or British Railway Modelling in Doncaster next weekend (12th & 13th February). The last week or so I have been checking everything over, test-running the locos and stock, dusting the layout, and any odd jobs that get put off. 

One such job was the couplings on Toby, my Paul Windle built tram loco, which have never been reliable at uncoupling because the iron tails touched the cow-catchers limiting their throw. Recently I'd picked up a new pack of Microtrains couplings in a sale, but could only get the 1016 type rather than the 1015's I usually get, the only difference is that they are a little longer in the shank.


The difference is clear in this really close up photo (the lines are 10mm apart). It struck me that this extra length could be useful for Toby, so I swapped the existing 1015-type couplings for a pair of 1016's. 


As can be seen the tails are well clear of the cow-catchers, and don't make contact under their full movement. While tackling odd jobs Toby has also had a couple of other upgrades: I've finally glazed the side and end windows (the doors are unglazed), and fitted a crew, both helping remove the empty look.


I crewed three locos actually. A tip from Phil Parker is to superglue them to a coffee stirrer during painting. On the left the two for Toby are Preiser HO figures from their truck drivers and passengers set, stuck to 40 thou plastic bases to give them extra height and provide a means to stick them in, the chap front-left has had his arm repositioned. The other two on the back row are also Preiser, this pack seems to include a lot of arm waving so Mr Teapot has also had an arm rotated at the elbow. The front right and centre are from the ever useful Dapol range, slightly modified, both have lost an arm and half a leg...


Fitted to these Minitrains locos the smaller Preiser figures are useful for the Decauville, while the taller Dapol figures are needed for the slightly exaggerated cab of the Bagnall but needed trimming to snuggle up to the motor, and one needed his coat thinning to fit the narrow opening. Spots of superglue on the feet hold them in place, and in both locos the presence of the crew distracts from the cab being full of motor, as well as avoiding the ghost-loco look. 

Another odd job - the Decauville also needed glazing in the spectacle glasses. I decided to try my new Humbrol Clearfix, the clear glue is drawn around the opening with a cocktail stick until it covers the hole. The result works well and is much thinner and less bottle-like than the Micro Krystal Klear used on the Bagnall, but seems to have left a slightly foggy patch in the centre. 

Friday, 31 July 2020

Decauville

Another month has gone by and despite the current semi-lock-down I've not managed any modelling to report. Normally this time of year would feature a visit to the Amberley railway gala, but that of course was cancelled along with every other railway gala and exhibition. What's more, although some preserved railways have been able to open with some kind of service it is unlikely I'll be visiting many this year. So I have prescribed myself some (mail order) retail therapy...


It's a Minitrains Decauville "Progress" 0-6-0 tank, which I rather like the look of, but missed the first batch. I chose the red as I think it suited this loco best, and although it may be a little on the small side (I guess it is HO, but Minitrains can be variable in scale) I think it looks quite at home on Loctern Quay. I expect it will be seen hauling passengers to Hexworthy in due course too.


Like all Minitrains locos it runs smoothly, albeit with the motor and flywheel visible in the cab from some angles. I will have to get a (short) loco crew to distract from it. However, my biggest challenge will be fitting Microtrains couplings with their large draft box, and no space behind the buffer beams. 

The above photos were taken on my phone, and look somewhat bright - the red loco looks quite orange. By contrast the photo below was taken on a "proper" camera and I think is closer to true colour, here you can also see the working headlight. 


Sunday, 12 April 2020

Resurrection

Easter is about Resurrection and new life, so here is a story of bringing new life to old locos. A few weeks back a friend having a clear-out gave me a box containing a couple of non-working Minitrains Baldwins, and a pile of bits, suggesting I might be able to make a working model from the parts. In the box were two spare chassis (one broken), three spare motors (only one with a gear), a cut-about body, and other parts.


An initial test confirmed neither loco moved, though both buzzed. On dismantling the first loco I found the motor didn't turn freely, I'm not sure why, but I fitted one of the spares that seemed to work. The wheels and contacts were cleaned, gears cleaned and lightly lubricated along with the axles, and then it was reassembled. It ran, but very slowly. Replacing the motor bushes didn't help, so I chose another motor. Now it ran well - a little noisily, but reasonably slowly and well controlled, not bad for an ancient mechanism. That said the 5-pole motor and decent gearing should provide good slow running. Even the headlight worked.


With one loco working I turned to the second. On dismantling it I found the chassis cracked through at the front axle, I think the plastic footplate was holding it together. I used one of the spare chassis to rebuild it, but crank-pins fell out and the wheels appeared to be out of quarter too. Quartering wheels isn't my strong point, and I've struggled with coupling rods and geared drive being out of sync before, but after some fiddling about I got it assembled so it seemed to turn freely enough. With the motor back in it ran, it's a bit more rough than the first loco and seems to stick occasionally - I'm not sure whether it is a pick-up issue or some binding, perhaps the quartering isn't quite right, but it may be OK on a continuous run.


And to show how they work:


Apologies for the dodgy camera-work, I'm no good at holding the camera, driving the train, and switching the points all at the same time! The better running loco goes second by the way.

So a pair of Minitrains Baldwins brought back from the dead. They don't really look at home on Loctern Quay, they are more likely to join my Son's growing fleet serving Slugworth, he's keen to repaint one.

Thursday, 18 October 2018

Three little engines

A quick update on some dirty locos...

IMG_5806

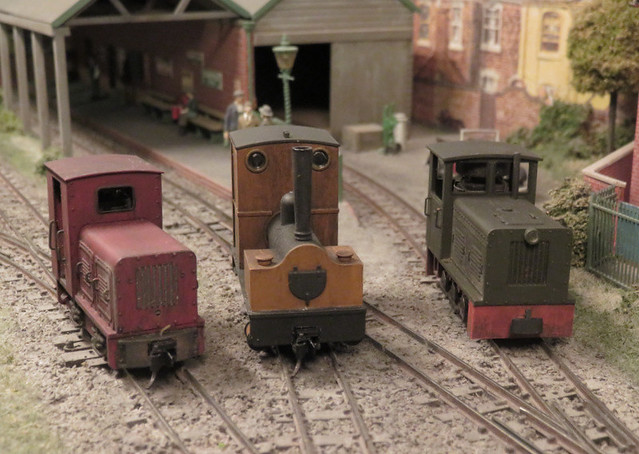
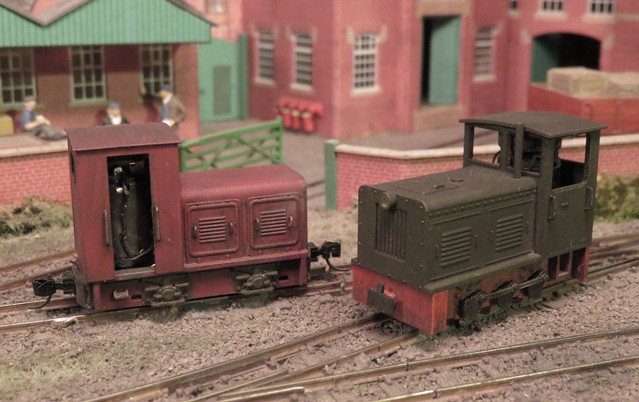
The NS2 has been sitting around for nearly a year since the last update when it was ready for painting. As you can see I did decide on red, using Humbrol enamels mixed to a shade I liked and applied with my airbrush. Then both this and the green NS2F - an unmodified Minitrains loco - got a dose of my usual weathering, consisting of a dirty well thinned enamel wash, followed by weathering powders. Both still need glazing and a crew, or perhaps tarpaulin sides for the NS2.

IMG_5807

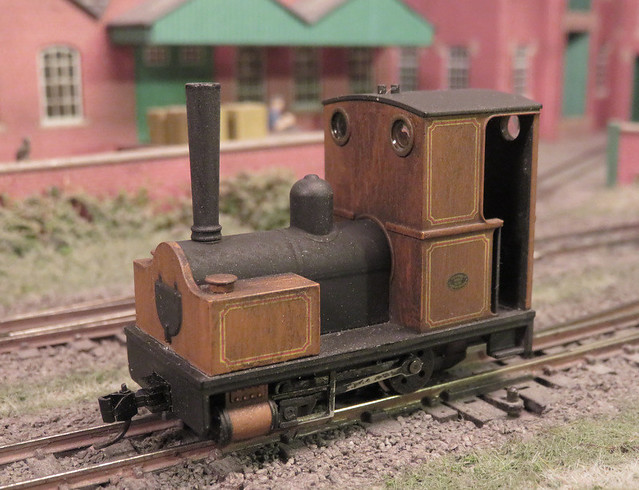
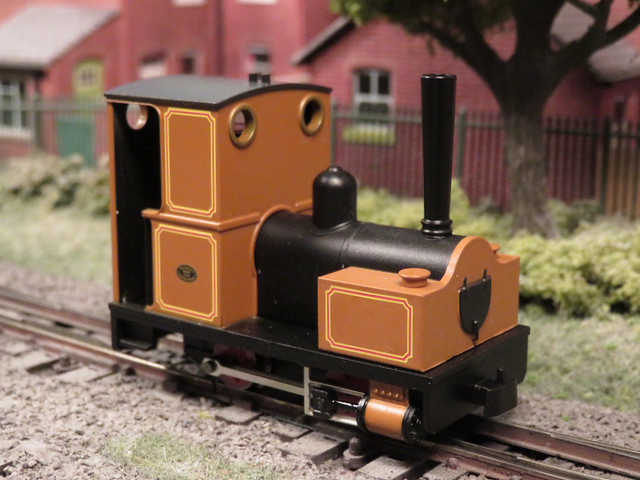
I'd also had the Minitrains Bagnall in a box for some time. This required a change of couplings, and something doing to tone down it's shiny, plasticky finish. However I liked the colour as being a bit different, and the lining is nicely done, so I settled on a simple weathering exercise. I've probably over-done it a little, but it suits an industrial setting and it certainly looks a lot less toy-like now. There's plenty of potential for detailing this loco, and I may add some pipework or toolboxes - as much as anything to try to disguise the slab sides under the boiler - but for now I think it just needs a crew.

IMG_5809

So three more locos ready to enter service, all run sweetly thanks to the Minitrains chassis, but they are unlikely to fit Awngate (except perhaps the Bagnall). However, they will fit in well on Slugworth, so I think my Son will be borrowing them...

Wednesday, 4 January 2017

Three little engines

Modelling may have been a bit thin on the ground lately, but Christmas has brought an interesting bunch of new projects!

IMG_2143

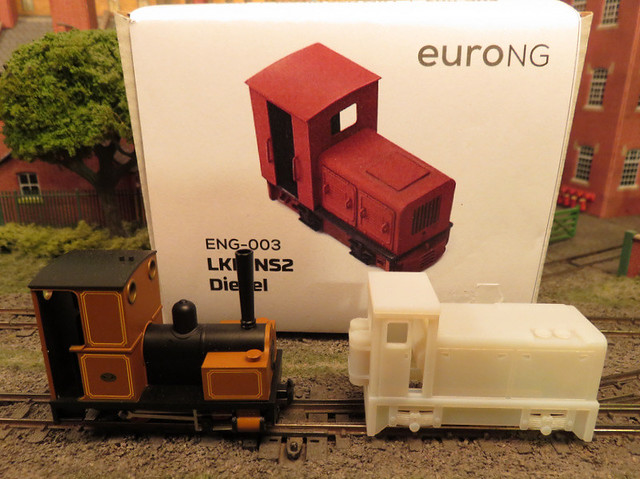
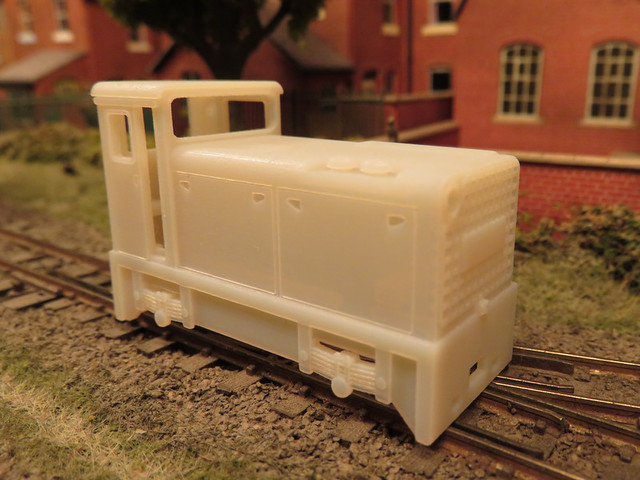
At the back there's a EuroNG kit for an NS2 Diesel, I rode behind one of these on Holiday this year and it's a nice little loco. I already have the Minitrains chassis for it, so it will be a good runner too.

IMG_2145

Another Diesel, and like the NS2 it's a 3D print. It's a CWR model of a Hunslet as used by Royal Navy Armament Depots, a number of which have made it into preservation. This uses the Kato 4-wheel chassis, which I also received for Christmas - so this could be a quick project.

IMG_2111

Star of the show is this Minitrains Bagnall IST (inverted saddle tank). The release of this model was a bit of a surprise to me, but it has it's origins at the 009 Society convention three years ago, where there was a Minitrains-sponsored competition to build a model on a Minitrains chassis. There was a rumour that the winning model would become a production model - and indeed here we have a model of the winning model, which was built by Charlie Insley. That means it has the same compromises that Charlie made to fit the Minitrains chassis, and like many Minitrains model it isn't an accurate model of a particular prototype, but it is an attractive loco that runs very sweetly. I liked Charlie's model, and so I had to have my own! Also, I wonder if it is the first mass-produced ready-to-run 009 model?

Other railway-related presents were a few books, including one on the Corringham Light Railway, and one on industrial locos, plus a set of rust paints for weathering. So plenty of inspiration and projects for the new year.

Happy New Year to you all!

Thursday, 30 April 2015

Slow progress resumes

For many reasons I've made little or no progress over the last few weeks (including various family events and having to re-install windows on our computer). One distraction was my daughter's birthday, which did necessitate a couple of "modelling" projects with my wife:


The last few evenings have seen the modelling bench dusted off and slow progress has resumed on the Hunslet. After a suggestion on the NGRM forum I have taken the files to the safety valves, which hopefully look a little finer now, though I suspect they are slightly over-scale I doubt it will be apparent if I paint them black as the prototype. I've also made a cab roof from plastic to reduce weight behind the wheels, the loco is heavy enough already especially at the back. It's two sheets of 20" plastic curved with boiling water while taped to a mug, only the top layer overlaps the sides giving a thin edge, and some microstrip adds the rain strips.


The other major step was filing down the cylinders of the US-outline Minitrains chassis to remove the end flanges. I'd wondered about adding a thin wrapper to beef them up but they are already wider than the footplate, and if I file the outside they won't be round as the prototype ones are (well I've done it a little, so they are slightly oval already!). However I did manage to raise them by cutting off the top of the valve chest and packing under the saddle that holds them to the front of the chassis. They might still be a bit thin - not sure on that yet - and are slightly behind where they should be relative to the smokebox, but even in a side-on view they don't look too bad, and raising them up has really helped.


Just a reminder of the prototype. I have some pipework and handrails to add, shame I don't have any white-metal sandboxes like that as they would help weight distribution!


The cab roof and re-profiled cylinders are clearer in this shot, as is my attempt at a lower slide-bar from a piece of etch fret. It would really look good if I could get it to fit, but I fear this attempt may have failed!


As you might be able to see in this shot it is simply a piece of U-shaped etch that forms a (cosmetic) lower slide bar and the motion bracket, then folds back to the frames for support. Sadly this piece of etch didn't have enough space in the "U" for the con-rod to waggle.

It's good to be back at the workbench and I'd like to see good progress with this loco, but I won't promise it will be fast...!

Saturday, 21 February 2015

Outside Framed Hunslet

A while ago I posted that I'd got hold of a Minitrains outside-framed chassis (from their Fiddletown & Copperopolis tender locomotive) and wondered whether it would be suitable for a Dinorwic large Hunslet. Unfortunately the distance from the motor to the cylinders is too short and would put the cylinders too far back from the smokebox.


However undeterred I got a new kit for the "Cackler / Jerry M" Hunslet (by Five79) and set about adapting it to fit the chassis! The dummy run trial below shows the smokebox set further back to line up with the cylinders (well nearly), and the saddle-tank scored with a line 4mm from the rear where it will be shortened. I'd already carefully removed the filler cap from the casting, which can hopefully be re-used, and the other round plate on top of the tank (purpose unknown!) was filed smooth. The footplate has the hole for the motor opened out towards the rear a little.


The chassis has some modifications. The plastic "footplate" around the motor is cut away along with a section of the rear frames, allowing the kit's footplate to sit on it, and some plastic "pegs" glued just below the motor that protrude just above the kit's footplate to hold it down. At the front of the chassis the extended keeper plate is cut short and a 2mm hole drilled for a fixing screw. On top the plastic plate/clip has it's vertical "wings" removed to clear the boiler.


The whitemetal footplate has been shortened by about 3mm, including the dummy frames below, and both the front of the footplate and the bufferbeam filed to a 45 degree chamfer to fit the buffer beam better (that's been done at the rear too). A mounting plate for the chassis has been bent up from brass, with a 2mm hole drilled and a brass nut soldered on. This will be glued into the front of the footplate/frames casting.


The boiler, smokebox, and cab front are glued together so time for a trial run on the footplate and chassis. The cylinders are still a little too far to the rear but I hope to disguise this further, otherwise all looks promising so far.