Saturday 29 September 2018

Worthing Exhibition

I visited the Worthing Model Railway Exhibition today. As usual it was a good show for a local club affair, a good number of layouts and some variety, although sadly no narrow gauge. There was a 009 layout listed in the show guide though, so perhaps they had to drop out. Nothing wrong with the quality of the layouts either, and mostly I've not seen them before. There was a good selection of trade too, well stocked for useful things like scenic details, tools and materials, and not just the usual box-shifters and second-hand (although that was covered too).

Rather than a detailed run down, here's a selection of shots that came out well, mostly focused on the scenic details and cohesive settings.

IMG_5741

IMG_5786

IMG_5784

IMG_5772

IMG_5769

IMG_5762

And this was most definitely recognisable as Shoreham Airport!

IMG_5760

Sunday 23 September 2018

Building the landscape

Finally we got to the most exciting bit, from Joshua's point of view, scenery. This is the point where bare boards and track quickly start to gain some realism.

IMG_5233

The basic landscape was formed from expanded polystyrene, carved with a craft knife or a broken hacksaw blade. There's nothing dramatic, just some gentle banks, cut to match the profile we'd already cut the fascias to. This was covered with kitchen towel pieces stuck down with dilute PVA glue - a new method for me as I've used newspaper and plaster filler before. This has dried to a very tough "skin" so seems to have worked well.

IMG_5232

To give a final smooth but slightly textured surface and some colour to the scenery I made up my scenery mix. Ingredients are plaster filler, powder paint (to give a brown colour), water, PVA glue, and some sand. The resulting rough slurry can be "painted" over the ground in a thick layer, and oozed into any gaps.

IMG_5263

So now we have soil covered hillsides. Ballasting is next, but first a couple of details. The simple "buffer stop" above was made from a couple of pieces of balsa cut to a sleeper size, and fixed with a couple of wires for "bolts".

IMG_5264

A par of Peco 009 point levers were painted up and stuck down next to the points. A little card packing brings them above sleeper height, the "pip" on the end of the tie bar is cut off so it slides under the lever base-plate.

Tuesday 18 September 2018

Illuminating Slugworth

In a small interlude from scenery, we fitted the layout with lighting. Back in April I revealed I'd experimented with 4000K "Natural White" LED strips, with a view to fitting them to Hexworthy. That's true, but I also had this little layout in mind, as Joshua was adamant it needed to have a lighting pelmet. So this is the kit we got:
  • Natural White 4000K SMD 5050 LED strip, 5m, 60 LED's per meter (link)
  • A 12V 2A Power Supply Adaptor, which should be good for about 2m of LED's (link)
IMG_4605

We cut enough strip to fill the length of the layout, and stuck it to a strip of wood under the lighting pelmet, as close to the front of the layout as possible. We also stuck foil to the inside of the fascia to reflect light back into the layout.

IMG_5057

The power adaptor came with a socket with screw terminals, so as you can see above we ran the wires back to that. I drilled a hole in the end of the layout big enough to push the socket through, and then stuck the back end in place with hot glue. Simple but neat, from the outside at least.

IMG_5060

The result is plenty of light, while the Natural White doesn't lean too much to the blue or yellow, giving a good daylight impression. We'd allowed for fitting an extra strip or part-strip if needed, but decided that wasn't necessary.

IMG_5061

The outside of the layout has also been painted. We used grey primer from Wilkinsons, and decided that the dark grey was a nice enough finish to leave it at that!

Thursday 13 September 2018

Cobbling the yard

The factory yard needed a cobbled surface, after discussing whether to use DAS clay Joshua decided on the Wills sheets, as I used on Awngate. Well I happened to have three sheets in stock (left over from Awngate no doubt) so they were cut to fit snugly around the buildings and track using paper templates. The thick Wills plastic was hard for an 11 year old to cut accurately, so I had to help a bit here.

IMG_5071

The close-up above shows how we painted individual cobbles in a variety of shades - I think we had 5 variations of colour. It takes a little while, but the results are worth it. A thin wash over the lot tones them together and fills the courses between them.

IMG_5070

A look underneath shows how the sheets are joined (with off-cuts). A strip of kerb edging has been attached front middle too. The odd shapes fit around the buildings, and pieces of thick card are used to pack the plastic up to just below the rail height. This means thinning the plastic along the edges of the track to clear the sleepers and chairs - another tedious job.

IMG_5069

Finally fitted in place the cobbles look the part and start to set the scene. The brick-paper on the backscene fills any gaps between buildings.

Friday 7 September 2018

Andrew Barclay

IMG_5593

A new arrival, a fine Andrew Barclay model from Hattons. I'm not really up to speed with recent RTR releases, but I am really impressed with the detailing of this model - I'm talking brake rods, sand pipes, brake shoes that look like they are touching the wheels, super fine handrails.

IMG_5597

And although rather tricky to photograph, the cab interior looks like you could get in and drive it (if you were 76 times smaller). Oh, and the buffers are actually sprung. It runs well too, although I've only tried it on my son's train-set. It could have been geared a little slower being an industrial shunter, but it ran smoothly down to low speeds.

IMG_5601

Now, I seem to have accidentally started a collection of industrial locos in OO. Oh dear...

Wednesday 5 September 2018

Building time

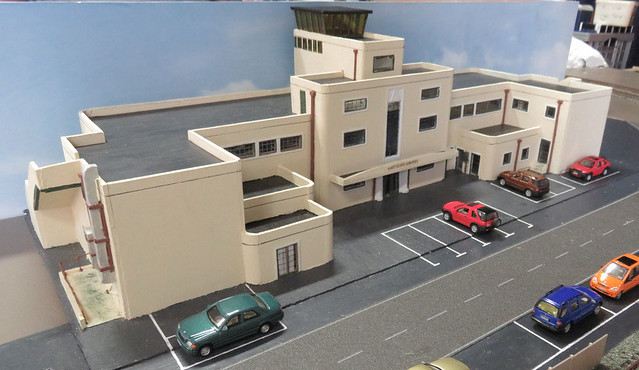
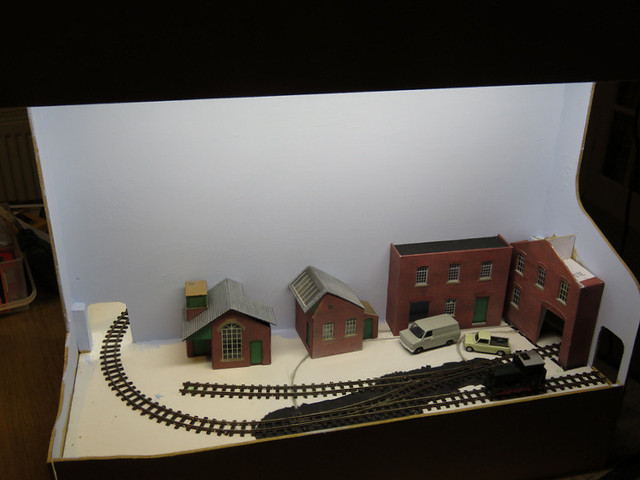
I'm a little behind with updates on Joshua's EXPO-NG entry, so here's a quick rundown on the buildings. He wanted a factory scene so I raided my cupboard of bits and found left-overs from the Metcalf card kits I used on Awngate, which produced these two buildings seen here unfinished. The bare card edges were touched up with paint, and interiors painted black.

IMG_5053

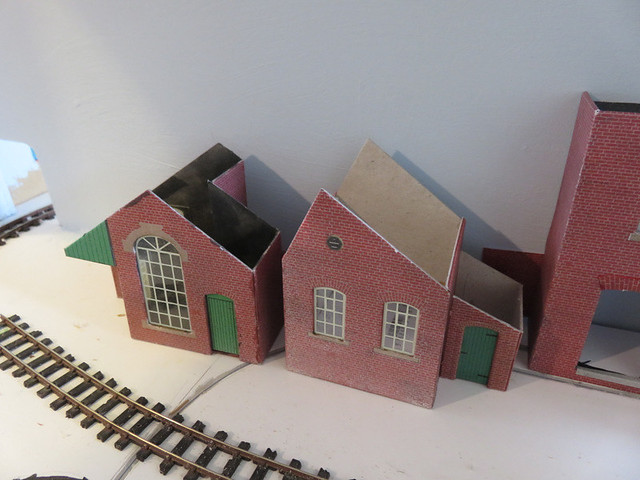
The kits also include sheets of matching brick-paper, and spare windows and doors, so with a little work we came up with a couple of larger buildings to match, which were built to fit the available space. The one on the left has a flat roof made with emery paper.

IMG_5052

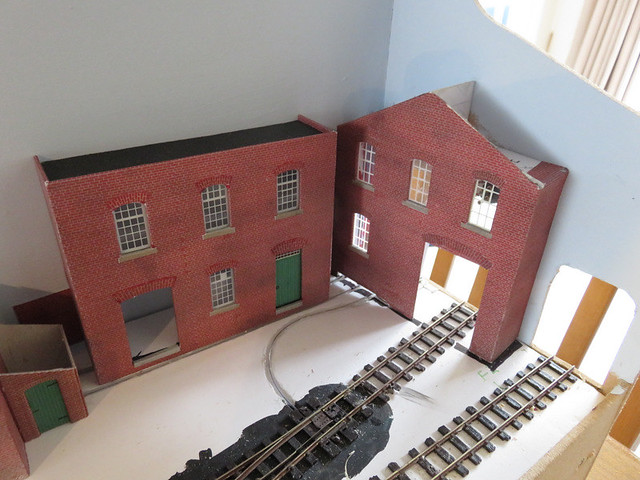
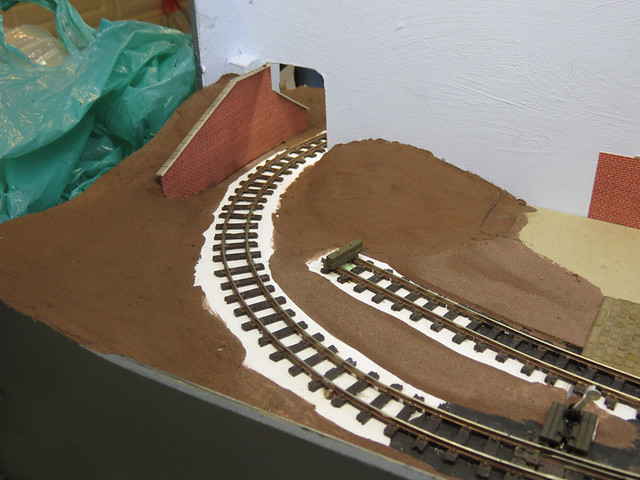
You can also see the back-scene has been painted with a sky colour, simple but quite effective.

IMG_5151

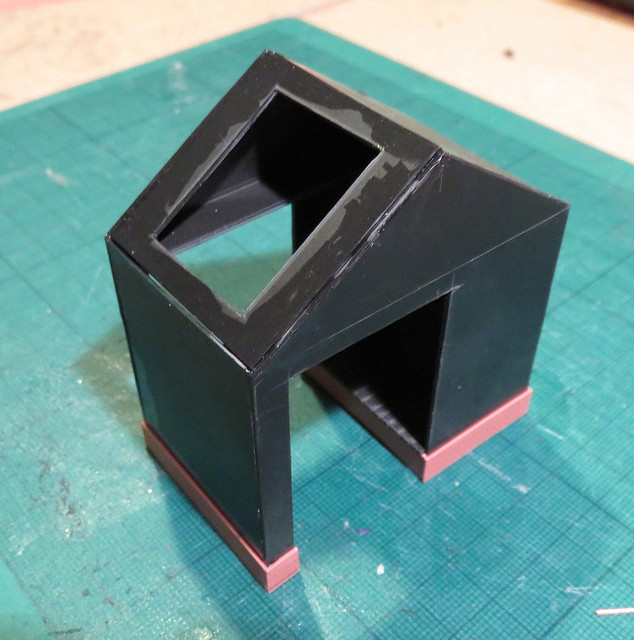
For the final building Joshua wanted a corrugated iron shed, which we made up from plasticard (black, to save painting inside). This was clad in Wills clear corrugated material, which not only allowed for the window panel (by masking during painting), but is nice and thin at the edges unlike the solid corrugated material. The brick plinth uses Slaters sheet.

IMG_5260

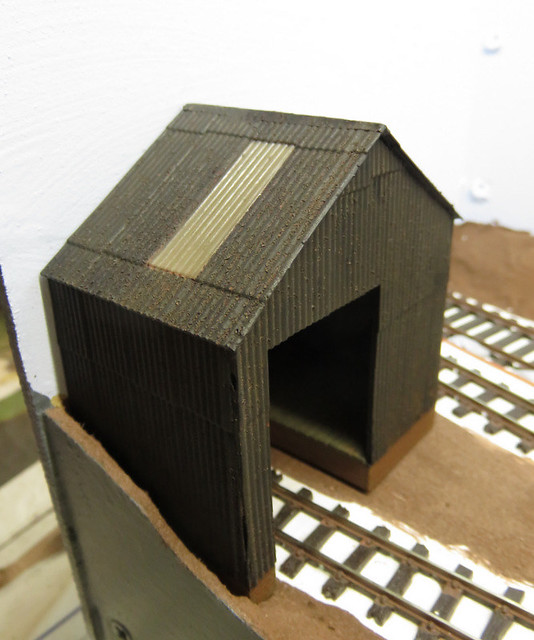
The building was primed with red primer, painted with some rust colours, and then wetted and sprinkled with salt. Once dry black paint was sprayed over the salt. The salt was later washed/rubbed off to give a peeling blistering paint effect. A dirty wash and some weathering powders completed the finish, although it is seen here awaiting its doors.

Sunday 2 September 2018

Gaugemaster open day 2018

Yesterday I dropped in at Gaugemaster for their open day/exhibition, where they had a couple of large marquees full of layouts and trade demos. Getting in and out was tricky due to the railway crossing - who would have thought that little rural station would see quite so many trains on a Saturday afternoon?

IMG_5582

Anyway, there were some nice layouts, including "Somewhere in France" in 009 showing the WW1 railways. It packed an awful lot in a small space which I'm sure wasn't realistic, but it did tell the story of what the railways did and was very nicely modelled. The trains were a bit fast though.

IMG_5574

The originally named "Gas Works" in O has a nice industrial atmosphere and some interesting shunting.

IMG_5590

However my favourite layout was "Ferrocarril San Maria Gandia" which used HO, HOe, and Faller automated road vehicles in a Spanish setting. There's loads of nicely modelled detail without the layout feeling crowded, and with a definite Spanish feel. A video running next to the layout showed the prototype scenes that had inspired (and been copied on) the layout. No wonder it seemed to have a crowd around it.

IMG_5564

There's a selection of photos here (not that many this time) including a few of the other layouts, though one or two seemed to be little more than commercial demonstrations. Still I did manage to pick up a couple of things I needed, and a few that I didn't but were well priced in the "seconds" sales room. All in all, worth a trip.

Saturday 1 September 2018

Launceston Steam Railway

I'm just back from a trip to Cornwall, where I managed to get to the Launceston Steam Railway for the first time since my childhood. This is a preservation era line built to 2' gauge on a standard gauge trackbed and using (mainly) "Quarry Hunslet" locos rescued from the Welsh slate quarries.

IMG_5459

Despite its "modernity" I love the way that this little railway has developed a character of its own, from the "tramway" style carriages to the buildings made with traditional materials, quirky track layout, and the clutter around the workshops.

IMG_5479

The ride is not very long, but long enough and very pleasant.

IMG_5481

Even the loco shed and the water crane seem to have a particular character - simple and purposeful structures with a little style.

IMG_5466

IMG_5448

A tantalising view of a more substantial loco shed, reached by a steep and sharply curved kick-back track from another steep and sharply-curved siding.

IMG_5449

Old farm buildings have been re-purposed as museum/storage/workshop spaces reached by the steep curved siding and various spurs. Yet these delightfully dilapidated MOD wagons are stored off the tracks...

IMG_5467

Well worth a visit, and with a train ticket you get a discount on a cream tea in the cafe...!