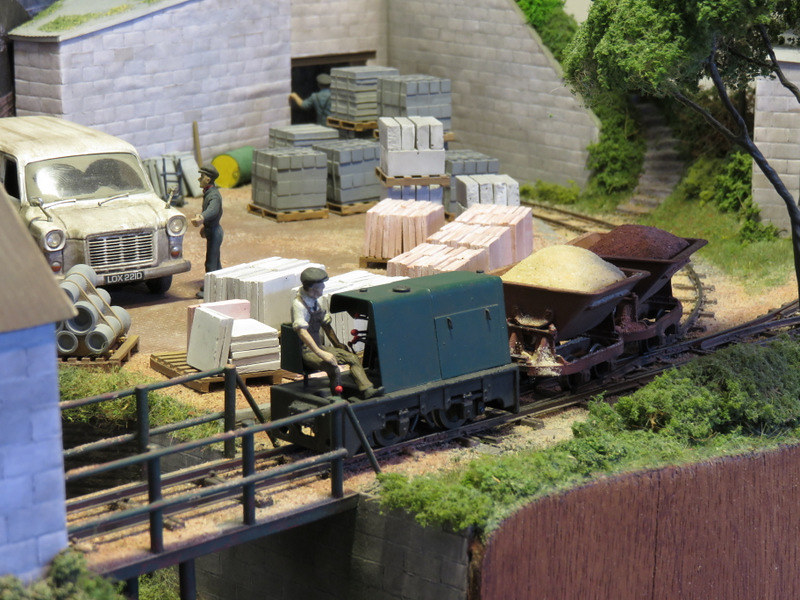
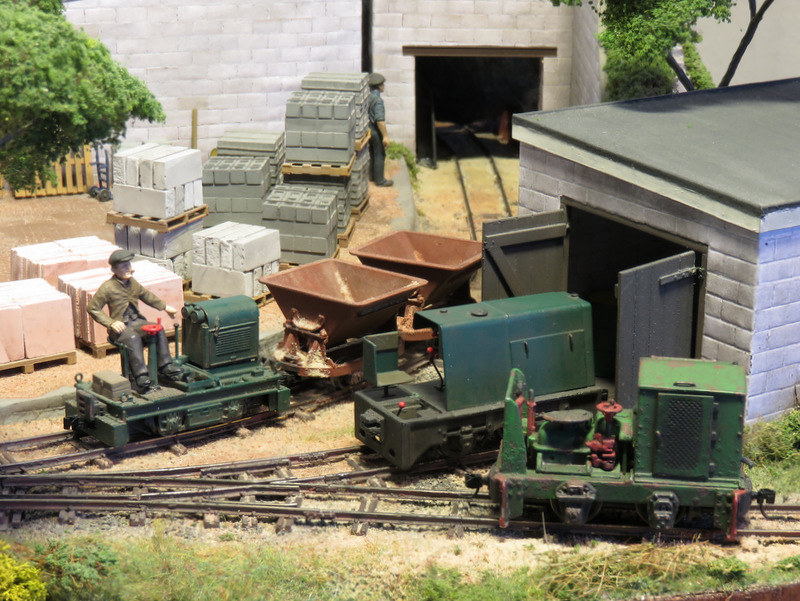
I've applied a fresh rubbing of graphite to the rails and test run, which revealed a mystery short circuit when the points were thrown. After some investigation it was found to be a point blade that had shifted along to touch the frog rail - this is a problem as the blade is electrically connected to the stock rail and the frog is switched. Forcing a blade into the gap shifted it back, I'm still thinking of a more permanent solution.

That aside running was smooth and problem free. I will need the super-glue to a couple of details that have fallen off though. However while it was out I took the opportunity to take some photos on my new camera, using a tripod and playing with the manual settings. I'm rather pleased with how they have come out.
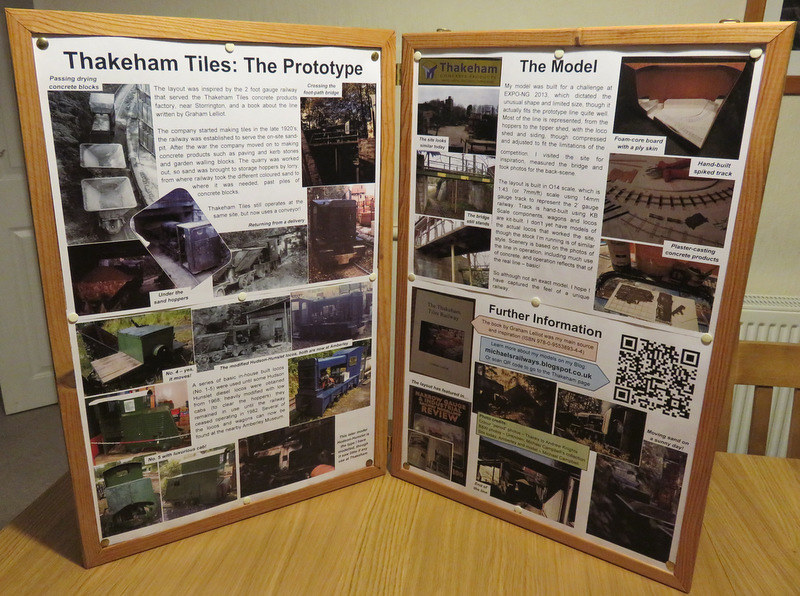
I've been asked to provide some information about the prototype and the model, and exhibition organiser Andrew Knights shared some photos he'd taken of the railway shortly before it closed, so I put together a display using them along with photos I'd taken of the locos now at Amberley, the site today, and the model under construction. The board is simply two cork-boards attached with a pair of small hinges I'd put together some time ago for something my wife was involved in - I knew it would come in useful again!
If you get along to the show do say Hi...
No comments:
Post a Comment