Wednesday, 30 October 2024

Fettling Hexworthy between shows

On Saturday I'll be taking Hexworthy to the Newhaven club exhibition (in Seaford). Following the two days at Uckfield there were a few issues I wanted to address to improve running. One was the uncoupling magnet under the bay platform line - this seemed to "grab" at metal wheels of coaches causing jerky running, and the small quarry Hunslets could actually stall. Operationally, the magnet isn't needed as I don't use the bay as a siding, stock remains coupled to the loco, so the obvious solution was to remove the magnet.


The cupboard-catch magnet had been stuck in place through a hole in the foamcore board using hot glue, such that it sits just below the sleepers. Cutting the glue away allowed the magnet to be prised away, but of course this brought some of the ballast with it. 


Fortunately, the little oblongs of ballast were so well set in glue that I could slice them off the magnet intact with a scalpel. Having stuck a piece of card under the sleepers, the ballast blocks could be glued back in place!

There had been occasional derailments exiting the fiddle yard, I think due to misalignment of the traverser. The traverser/turntable deck has a "lip" which passes under the fixed edge to prevent the deck rising up, but I think the fixed deck might have been rising slightly. 


I've added a lower support, the wooden "finger" seen horizontally protruding from the fixed deck under the traversing/turning deck lip. Hopefully this will constrain any vertical movement. I also filed the vee notch in the aluminium arm a little deeper and more symmetrical, and increased the spring tension. Originally I'd been aiming for smooth movement without having to disengage the latch manually, but that wasn't really possible, so now the latch can be disengaged via a single lever I could have a more positive alignment via the deeper V and stronger springing. 

Up top, the alignment of rails was checked, a couple of tracks were adjusted slightly with the soldering iron. A couple of rails were also trimmed back a fraction of a mm, although they cleared the entry tracks fine one of them caught on them at Uckfield, I can only presume due to heat expansion or distortion of the frame. I've also added a switch to isolate the traverser tracks, regardless of position. To access the bay locos draw their coaches back into the fiddle yard, this can happen when all tracks are in use which could be done by moving the traverser to a "between tracks" position so no track was live, but the addition of the switch makes this easier. 

A quick test suggests coaches can be pulled and propelled on and off the traverser, but they could most of the time before, so we'll see if things are more reliable. The latching feels more positive. If you are at the show on Saturday you can see for  yourself - do say hello!

Tuesday, 29 October 2024

Bachmann Baguley-Drewry 70hp - commissioning

The Bachmann Baguley-Drewry 70hp is a lovely model, and I wanted to use it on works trains for Hexworthy, but my wagons are all fitted with Microtrains couplings and the Bachmann models come with the standard 009 type coupling. I know the Bachmann EZ mate couplings can be swapped in, but while they'll couple to Microtrains, they don't work reliably in uncoupling. 

The large buffer blocks have a big square opening to clear the standard coupling, that is pretty close to the size of the Microtrains draft box which can be accomodated after a few strokes of a file. The model is supplied with alternate buffer blocks without the coupling hole, for which long coupling pins are provided, these look ideal to secure through the centre of the Microtrains draft box. 


However, the back of the coupling fouled against the coupling mount on the chassis block. Four screws release the body and skirt to reveal the chassis block, so I took a file to the coupling mount. It's now nearly flush with the block above, but while the centre screw socket has been flattened it is still intact, so the standard couplings could be refitted. 


The buffer blocks were clipped back in place with a smear of superglue as they pulled off slightly too easily, and would now have to take the strain of the coupling. The Microtrains coupling then fits in place, with a little superglue gel either side and on top (not near the moving parts), and the coupling pin inserted through the top of the block through the centre hole of the coupling. 


While the body was apart I fitted a driver from the Preiser truck drivers set, painted with added high-vis of course. A lever (gearbox?) needed trimming back as it fouled the seat such that no driver could sit there - it was that or amputate his left leg. 


While I didn't want a heavily weathered look, any working loco has a little dirt. I used water soluble oils to make a dark wash for the body, and a mid-brown wash for the frames. This is applied liberally, then a damp brush used to take off the excess - I spend longer removing it than applying it! This allows panels to be largely clean albeit slightly dulled, while emphasising shadows such as panel gaps and grilles. The airbrush was used to give a very light dusting of soot on the top (diesels produce soot too!) and track dust along the lower edges, similar to the coaches. 


Other detail painting included touching in the cab grab handles in black, and dry brushing a hint of rust and gunmetal over the edges of the buffer beam casting, corner steps, and cab steps. These help bring out the detail and provide signs of use. 


I'm pleased with the result, subtle from a distance but more realistic. 

The couplings work perfectly, and the loco looks great with the works trains, adding a splash of colour. 


It makes a good partner to the 90hp (Narrow Planet kit), noticeably shorter of course and with differing details (such as the side grilles), but clearly of the same family and the nicely detailed kit compares well to the RTR model. 

Thursday, 24 October 2024

Uckfield 2024

Once again the Uckfield show presented an array of top quality layouts covering a range of themes, any would have been star attractions at some smaller shows. I think there were about 20 layouts so I won't try and cover them all here, but here are some of my favourites, mainly focusing on the narrow gauge and light railway themes. 

Bunkers Lane (O9) - Bill Flude. I've seen this grow on NGRM and saw it at Alexandra Palace, but it rewards another look. It's colourful and fun, with lots of details, trains are always moving (with sound too), and being double-sided there's a lot more to it than you first realise. 


Nettlebed Lime (SM32) - Giles Favell. Another layout I've watched develop on NGRM, this features radio control realistically weathered locos with "steam" (actually water vapour), drivers who move their heads, and of course tipping lime trucks. 

Hexworthy (009) - Michael Campbell. Yes, my own little layout, which I felt like an imposter amongst the high-quality finescale layouts. It did attract a lot of nice comments, and the working playground went down well.


Clereley End (O16.5) - Peter Jackson. A compact and nicely done 7mm NG line, and yes that's a Bachmann quarry Hunslet just like the smaller one I was running on Hexworthy!

Sandshifters (P4) - Steve Howe. This layout was built on a surf board - yes, seriously! A delightfully minimal depiction of a light railway it looked great, with quirky rolling stock. 

Tucking Mill & William Smith's Wharf (2mm finescale) - Jerry Clifford. This delightful model depicts a GWR and S&DJR branch in Somerset. The detail belies the tiny scale, it oozes atmosphere and runs beautifully too.


Ruyton Road (P4) - Paul Bannermann. An imaginary terminus of the Shropshire and Montgomeryshire railway run by Co. Stephens, this tiny layout had the atmosphere just right and looked surprisingly spacious. 

Conyer Creek Signals (O) - Greg Coomber. A pre-grouping minor branch set in Kent. Being O gauge it was a large model, but used that to provide spaciousness rather than filling it with station. The scenery is excellent, the trains look superb. 

Hoath Hill (3mm scale, 14.2mm gauge) - Geoff Helliwell. A gypsum mine set in sussex as an excuse for a variety of mainly kit built industrial locos. Just look at that Garratt!

St Ruth (2mm finescale) - Midland area group of the 2mm Society. An ambitious layout for this scale and recognisable as Penzance, with a few tweaks, and with the lighting looked even more impressive at "dusk". 

I'll stop there even though there were more excellent layouts, and lots of light railway and industrial themed layouts. Good trade support too. Looking forward to next year already!

Sunday, 20 October 2024

Exhibiting Hexworthy at Uckfield

Back in the summer I posted how I'd made new, longer, support beams for Hexworthy as it is longer than Awngate was. In the run up to the Uckfield show I painted the beams, and the upper part of the trestles, in the same grey paint as used for the facia of Hexworthy. I didn't bother to paint the lower part of the trestles as they are hidden by a drape. I've also marked on in Sharpie which way round the trestles go and where the beams locate. The bolt just pushes through to secure the beams in place - I could add a nut, but gravity does the job well enough!


I used to attach the drape with drawing pins but that was a bit of a faff. I know Velcro is often used, but that involves sewing. Much easier to just clip it in place... so I got a bulk pack of bulldog clips and screwed them in strategic places along the front beam and inside the trestle legs. They're located so they don't prevent the legs from folding together of course, shouldn't catch on things in transport. 


The coffee mug/tool shelf also got a lick of paint, as did the display board panel. I've added a 4-way extension lead to the inside of the inner leg one end to keep the wiring tidy, and help speed-up set up that little bit, the cable just wraps around the cross-members. 


Assembled and with the drape added it looks neat, the visible parts of the support structure in grey to match the layout. The bulldog clips are mostly hidden under the layout which overhangs slightly. It takes just a few minutes to assemble and dismantle. 


Finally, I made up a couple of information pages for the display panel, I've kept these brief with big text and pictures. The first gives the background and location for the railway, convincing enough that several people at Uckfield asked if the line was still there or wondered why they hadn't come across it! The second explains 009 and the stock used, provides a list of animals to spot (keeps kids amused), and has a QR code/link to the blog. There's also another sheet with maps showing the station location in more detail and the Tors visible on the backscene, just in case people are interested, that's kept in one of the bulldog clips. 


Here's Tim Sanderson casually at the controls, sitting on the high stool in front of the fiddle yard. 

More on the show itself to follow... but the layout seemed well received with lots of nice comments. The playground of course was a star attraction. There were some running niggles - couplings misbehaving, the occasional unexplained (and unrepeatable) derailment, and a mystery short-circuit which appeared occasionally, but fortunately went away quickly too. However, mostly things ran well and we were able to keep things moving - at times with four trains in the station!

Thursday, 17 October 2024

White water

After the last post about the river, my local expert Tom Dauben pointed out (with photographic evidence) that Dartmoor streams flowing through rocky areas do have areas of white water, such as over rocks or through narrows. So, I thought I should make the stream look a bit more dynamic with some more texture, and a touch of white water in appropriate places.

Out came the heavy gloss gel again and "ridges" were created over and upstream of rocks and where the stream narrows to suggest the water flowing over obstructions. 


As expected from the previous experience, these ridges didn't dry completely clear but had some milkyness in the thicker areas, but this time that's OK. I then added more white with white acrylic paint dry-brushed onto the tops of the ridges, and streaking downstream of them, where water would be turbulent and appear white. I obviously forgot to photograph that stage...


After about 5 days I added the Magic Water over the lot, despite the extra wait this still started to look milky in places, though not as bad as last time, but this time I knew I only need to wait.


And here's the result, I think the magic water might have smudged/blurred the dry-brushed white a little but that's OK, it does add a clear and high-gloss finish and slightly softens the texture from the gloss gel which finishes off the stream nicely. The little rapids as the stream flows through and over the rocks hopefully looks convincing and adds interest and drama. 


After the culvert the stream opens out and after some final rocky obstructions joins the slightly slower flowing, deeper river.


The rest of the river edge has also had the magic water treatment now and sparkles nicely. I also moved the heron from the wall where he was vulnerable, and didn't have a good solid foundation (the wall is just foam), and is now rooted into a hole drilled into one of the plaster rocks. 


Over the last couple of weeks I've also been testing stock, carrying out repairs and adjustments to couplings and mechanisms, and generally preparing for Heworthy's second exhibition this weekend at Uckfield. It's always a good show, and Hexworthy will be easy to spot as it will be located in the entrance lobby. If you visit do say hello!

Monday, 14 October 2024

Coaching for exhibitions

Hexworthy has a couple of exhibitions coming up, the first being at Uckfield next weekend. Having done little modelling over the summer, there were a number of jobs I wanted to finish, so the last few weeks have been busy with multiple projects on the go. Starting with a pair of 009 Society kits for Hudson "toast rack" coaches. 


The instructions said to add the etched circular rails to the sides before assembly, but I found that made assembly more tricky - especially fitting the benches - and positioning the railings was fiddly anyway. For the second coach, I assembled the body and fitted the bench seats first, adding the etched rails just before adding the seat back rails, fitting the rails was still fiddly but overall it was easier. 


I also found fitting the etched steps tricky. It didn't help I bent the first one in the wrong way as the instructions weren't clear, but while on one coach superglue held them in place straight away, on the other they just wouldn't stick in place. I eventually got them fixed on the third attempt, but you can see the mess...


For some reason, one of the coaches started bowing in at the top edge, so I inserted some plasticard supports, but the other seems just fine. With little to the sides they are delicate. 


Bogies are the standard WD moulding, but I added the handbrake wheel to the end rather than the upstand (which would foul the end of the coach). The back-to-back of the wheelsets was checked, and my new pinpoint reamer tool used in the axleboxes before inserting the axles to ensure free running. 


Another batch of passengers were painted, again a mixture of Preiser HO and the 3D printed Finescale Figures (with no legs) I got a while back. This job is tedious, but at least in the open coaches, noticeable. The Preiser HO figures were used in the toastracks since the lack of legs might look a bit odd, they're a bit small but better than empty coaches. 


This coach got painted with enamel (Humbrol 48), not happy with the way it was covering I decided to airbrush the other coach. That said, while not the best paint finish, it's come out looking OK in the end, with a coat of Dullcote. The roof is primer with airbrushed soot, the underframes and step got airbrushed dirt. 


This coach got airbrushed with the Tamia deep green as used on the Ashover coaches, but coverage was poor, and it dried shiny. This didn't seem right. I decided to brush on another coat, then realised that the pigment had settled and the pre-airbrush shake hadn't mixed it well as the jar was getting low. So, the finish in the end isn't really any better than the coach above. This got a little more dirt, as though older and due a repaint. 


The completed pair, although the coach on the right will match the Ashover coaches while that on the left is a better match for Ffestiniog coaches. 


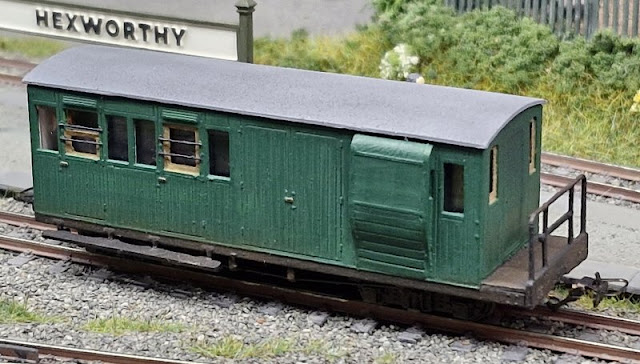
Or, as here, matched with the WHR coach and a small brakevan for a suitable train for a quarry Hunslet - perhaps a private charter or coach party?


Another job was this Dundas kit of Ffestiniog Railway coach no. 10, this I'd made years ago but the green was a bit bright, the windows had turned yellow, and a footboard had got lost. Repainted with Humbrol 48 it is a better match to other FR coaches, a replacement footboard was made up and fitted (can you tell?), and new glazing fitted - I confess I didn't cut to recess the glazing so it's not as flush as it could be. I also noticed the handrails never got fitted, but it may be neater without than with wonky ones. It already had passengers, but I've fitted Greenwich couplings in place of the Microtrains, they're body mounted but this is a short coach and curves on Hexworthy are relaxed so I expect that will be OK. 

Another job was the light weathering and fitting of passengers to the Bowsider bogie coach (and also a couple of bug-boxes) acquired recently. 

And so a few more coaches are ready for service on Hexworthy, giving more options for train consists and redundancy in case of issues (such as broken couplings). The weekend was spent testing trains, particularly for smooth running and reliable coupling/uncoupling, though that doesn't mean new problems arise during exhibition running!