A little while ago I treated the scenic areas of Hexworthy to a coat of green scatter. While this makes a big difference to the look of the layout, the use of static grass adds an extra level of realism when viewed close-up. The scatter provides a good base preventing the bare ground showing through the static grass, and the use of ground foam scatters provides an unevenness, onto which the static grass provides the texture.

So, here's a selection of the fibres I used. It seems I've collected a lot of bags of scatter, mostly at exhibitions when I see it and think I might need some, but I've ended up with some duplicate packets, lots of long dead grass, and I could do with more shades and lengths of green! Still, this proved to be a reasonable selection. I mix fibres in a pot to suit the location; here I used shorter lengths (1, 2, and 4mm) of mid-light greens for the pasture where sheep graze, a more lush look by the river (some darker greens plus some longer yellow grass), and longer/more mixed paler grass (2, 4, and 6mm mid-pale greens and some yellows and browns) for embankments.

I use Peco basing glue for static grass, I find this doesn't form a skin like PVA meaning it allows larger areas to be covered, and the fibres stick better, it even allows a second pass. It's also the right consistency to apply neat. I think the scatter base helps stop the glue running too. Cheap kids brushes are needed for this, they won't be good for much else afterwards.
I use a Peco applicator, this works much better than the cheap tea-strainer meets fly-swat type I bought cheap years ago and is much safer, but I guess that isn't surprising! Here I've clipped the ground to a convenient rail, but if there isn't one nearby, a pin pushed into the ground is used. The applicator is shaken and moved at different angles to ensure even coverage, I find rotating it helps too.
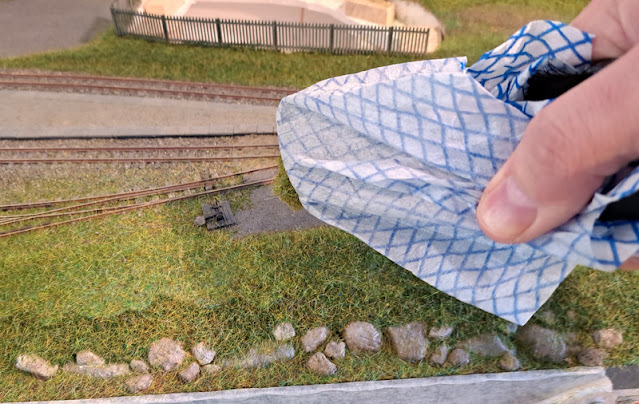
I then vacuum off the excess almost immediately. A piece of jay cloth catches the fibres so they can be returned to the pot. Vacuuming while the glue is wet doesn't seem to dislodge fibres that are stuck, if anything it can help them stand up. The applicator can then be refilled, or filled with a different mix, and another application made while the glue is still wet - sometimes adding longer grass for example.
Grass doesn't have to cover large areas. A small brush not only helps get into corners and close up to walls, but also to apply small areas of glue around objects, along the edges of pathways and in drainage gullies.
Here's a close-up of the are seen being grassed above, once the glue has dried. This embankment has shorter grass in mid-green with longer yellow grass and a few browns too. The small brush allowed glue to be pushed between the rocks so the grass grows from between them.
In a wider view some subtle changes in texture can be seen, the shorter and brighter green grass of the pasture at the rear, the longer yellower grass of the embankments (the join will be marked with a fence in due course), and slightly darker green close to the waters edge. The mixtures of fibres and variations of the mix avoid the lawn look, although it will still need breaking up with various types of bushes and weeds. It does show I needn't have worried too much about the colours of the base scatter though, the result of the static fibres being pleasingly dense and even.
And here are the grassy strips along the edges of the track ballast. These seem to have worked well. I've tried not to overdo these, especially in busy yard areas, I'm not aiming to show neglect.


No comments:
Post a Comment
Due to surprisingly high levels of Spam all comments will now need moderation. If you are advertising, don't bother, otherwise I must apologise if there is a delay in comments being visible, please don't let that put you off!