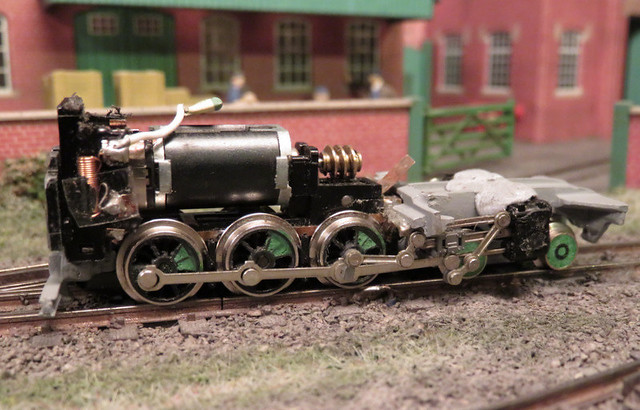
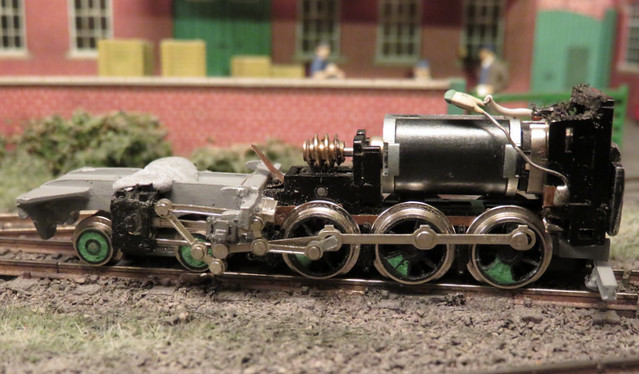
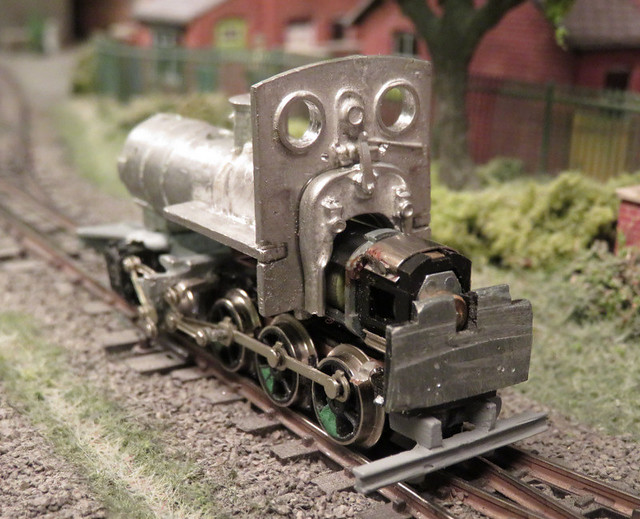
So far I have successfully dismantled the chassis and cut the block to shape, moved the connecting rod from the middle to front wheelset, attached the bogie and front frame, and started re-assembly. The cylinders move forward, and this leaves the con-rod and valve gear at a bit of a stretch, while the tab on top of the slide rods glues under an outrigger.

Except here's the problem. The mechanism binds, and I'm certain it's because where the crank pins are furthest from the cylinders the valve gear is pulled tight, and just won't go any further. I suppose I could shift the cylinders back a mm or so, but I don't think that's right. Also the plated metal valve gear means the tab on top of the slide bars doesn't want to stick to the whitemetal outrigger, even superglue gives way. Plus the bottom of the valve gear is frighteningly close to the track.

So on the other side I've modified the outrigger, trimming the back of it so that the shiny tab sits on top of the rear "shelf". It will still need gluing but it is held more securely. This will be hidden by the side tanks too, so big blobs of epoxy might be in order. The result is the slide rods are lifted at least 1mm relaxing tension on the valve gear at full travel, and giving more ground clearance too. I've also rotated the cylinder slightly closer to the horizontal to line up with the slide bars - I think they look closer to the prototype pictures, plus that moves the face of the cylinder back a fraction.
So far so good, I'll do the same to the right side and see if it rolls freely. But I've already spotted another question...

The cab front and back-head has a slot for the motor, except the motor is too wide to fit. Unless, as shown, the motor is rotated 90 degrees to the vertical - where with a little filing it should fit. However the instructions don't mention this, and as the rear plastic support would need removing, and new connections making to the pick-ups as well as a means of stopping the motor spinning, I'm sure it would be if that were intended. Given the motor will be inside the cab either way I see little advantage, so I'll probably be grinding away a lot of whitemetal!
I will finish by mentioning the wheels, as N-gauge wheels don't look good on a 009 model. As well as filling the front wheels to make prototypical disc wheels, I've added balance weights to the drivers from filler. But there were still way to many spokes, and cutting some away would be very difficult without damage. I decided to cut back alternate spokes - they are still there, but recessed so they are less visible, The remaining spokes will be highlighted when painting hopefully giving the impression of a 6-spoke wheel (the prototype had 7, but close enough) rather than 12...
Michael those wheel mods especially look very effective! Great work! Does it still run ok with all those modifications?
ReplyDeleteWell, not yet... hence I need to sort the binding valve gear!
ReplyDelete